Hey,
In the last three articles, we explored fairly complex process of building a flower setup. This time, I’ve decided to dive into something more fun and straightforward: understanding the basics of Vellum simulation on a plane + MOPs. We’ll deconstruct one of Paul’s lessons, where he teaches how to create an animation of knitting fabric.
I’d like to break this article down into three parts, as Houdini tutorials can often get quite long. Here’s the plan:
1. Basic Vellum simulation setup: Understanding PopForce and PopAxisForce.
2. Creating a thread and distributing threads on points.
3. Understanding MOPs (MoGraph Operators in Houdini).
And this is the outcome that we will achieve when combining all the layers:

Feel free to subscribe to Paul’s Patreon and see how he discusses the topics mentioned above.
PART 1
In this first part, we’re going to focus exclusively on the Vellum simulation.
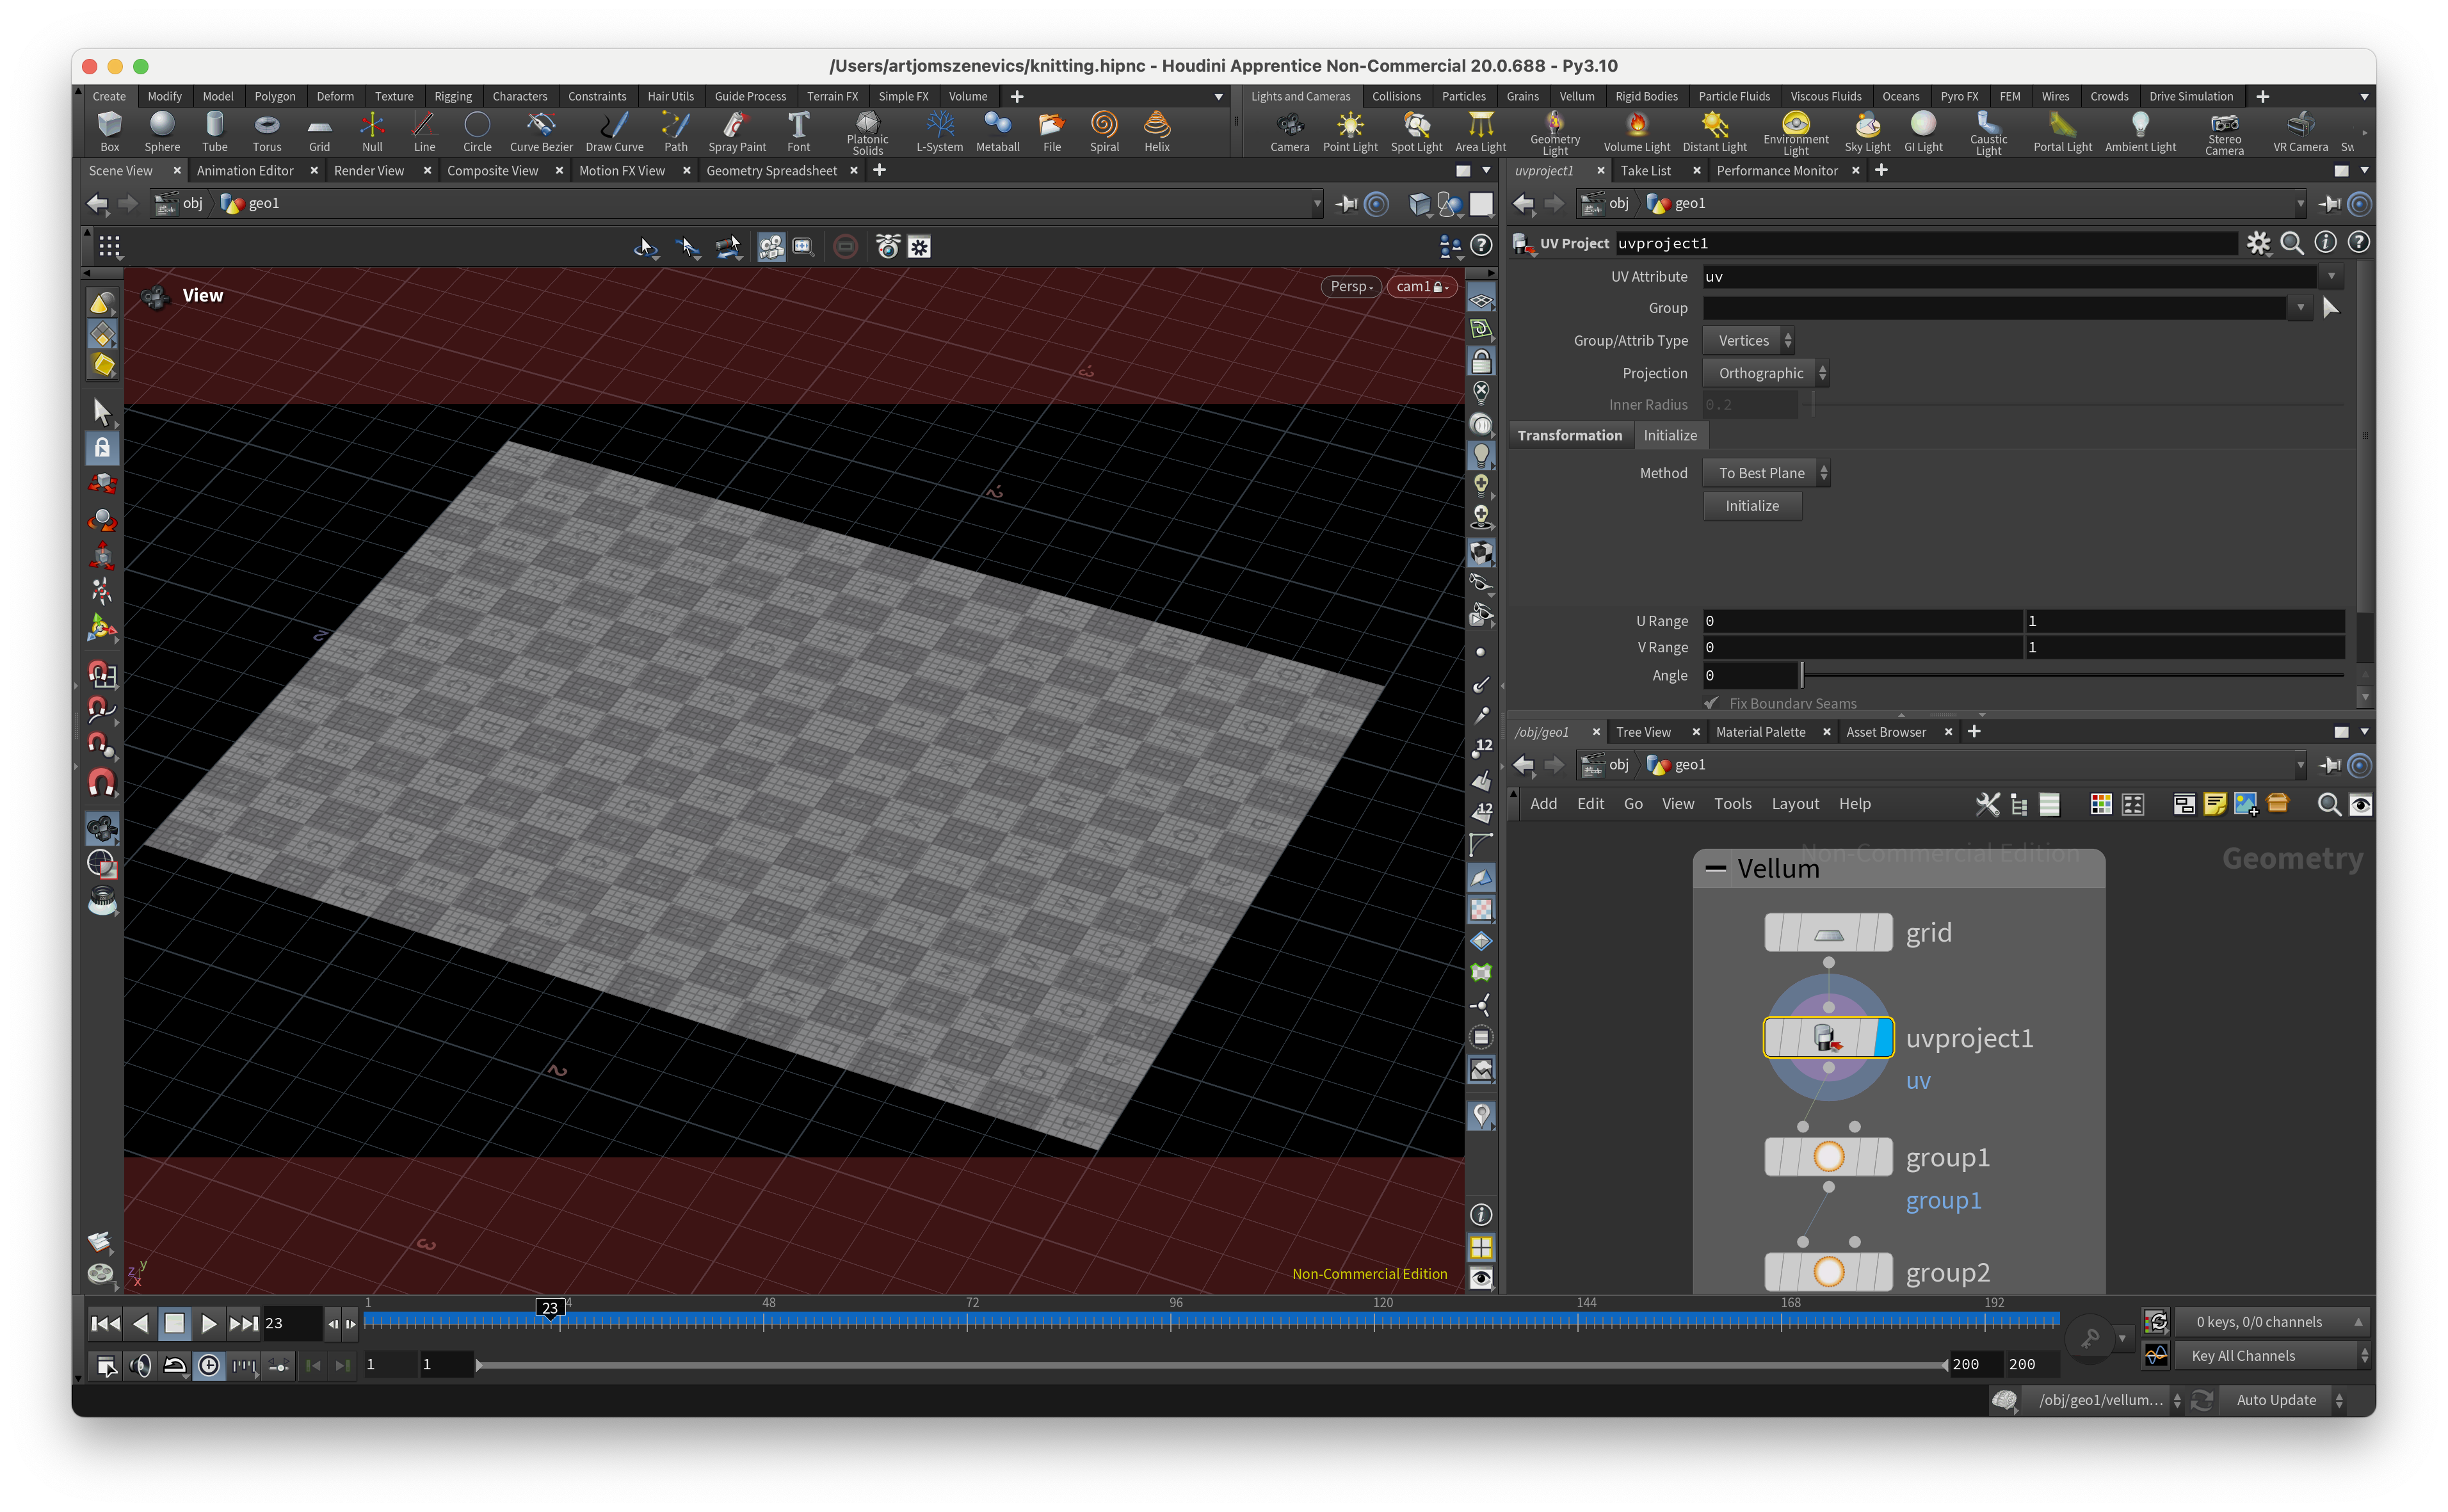
Step 1:
Create a Grid node and a UV Project node. Optionally, you can control the number of columns and rows simultaneously by multiplying them with a separate float slider. In the “Edit Parameter Interface,” I’ve declared a float parameter, which is set from 0 to 10.
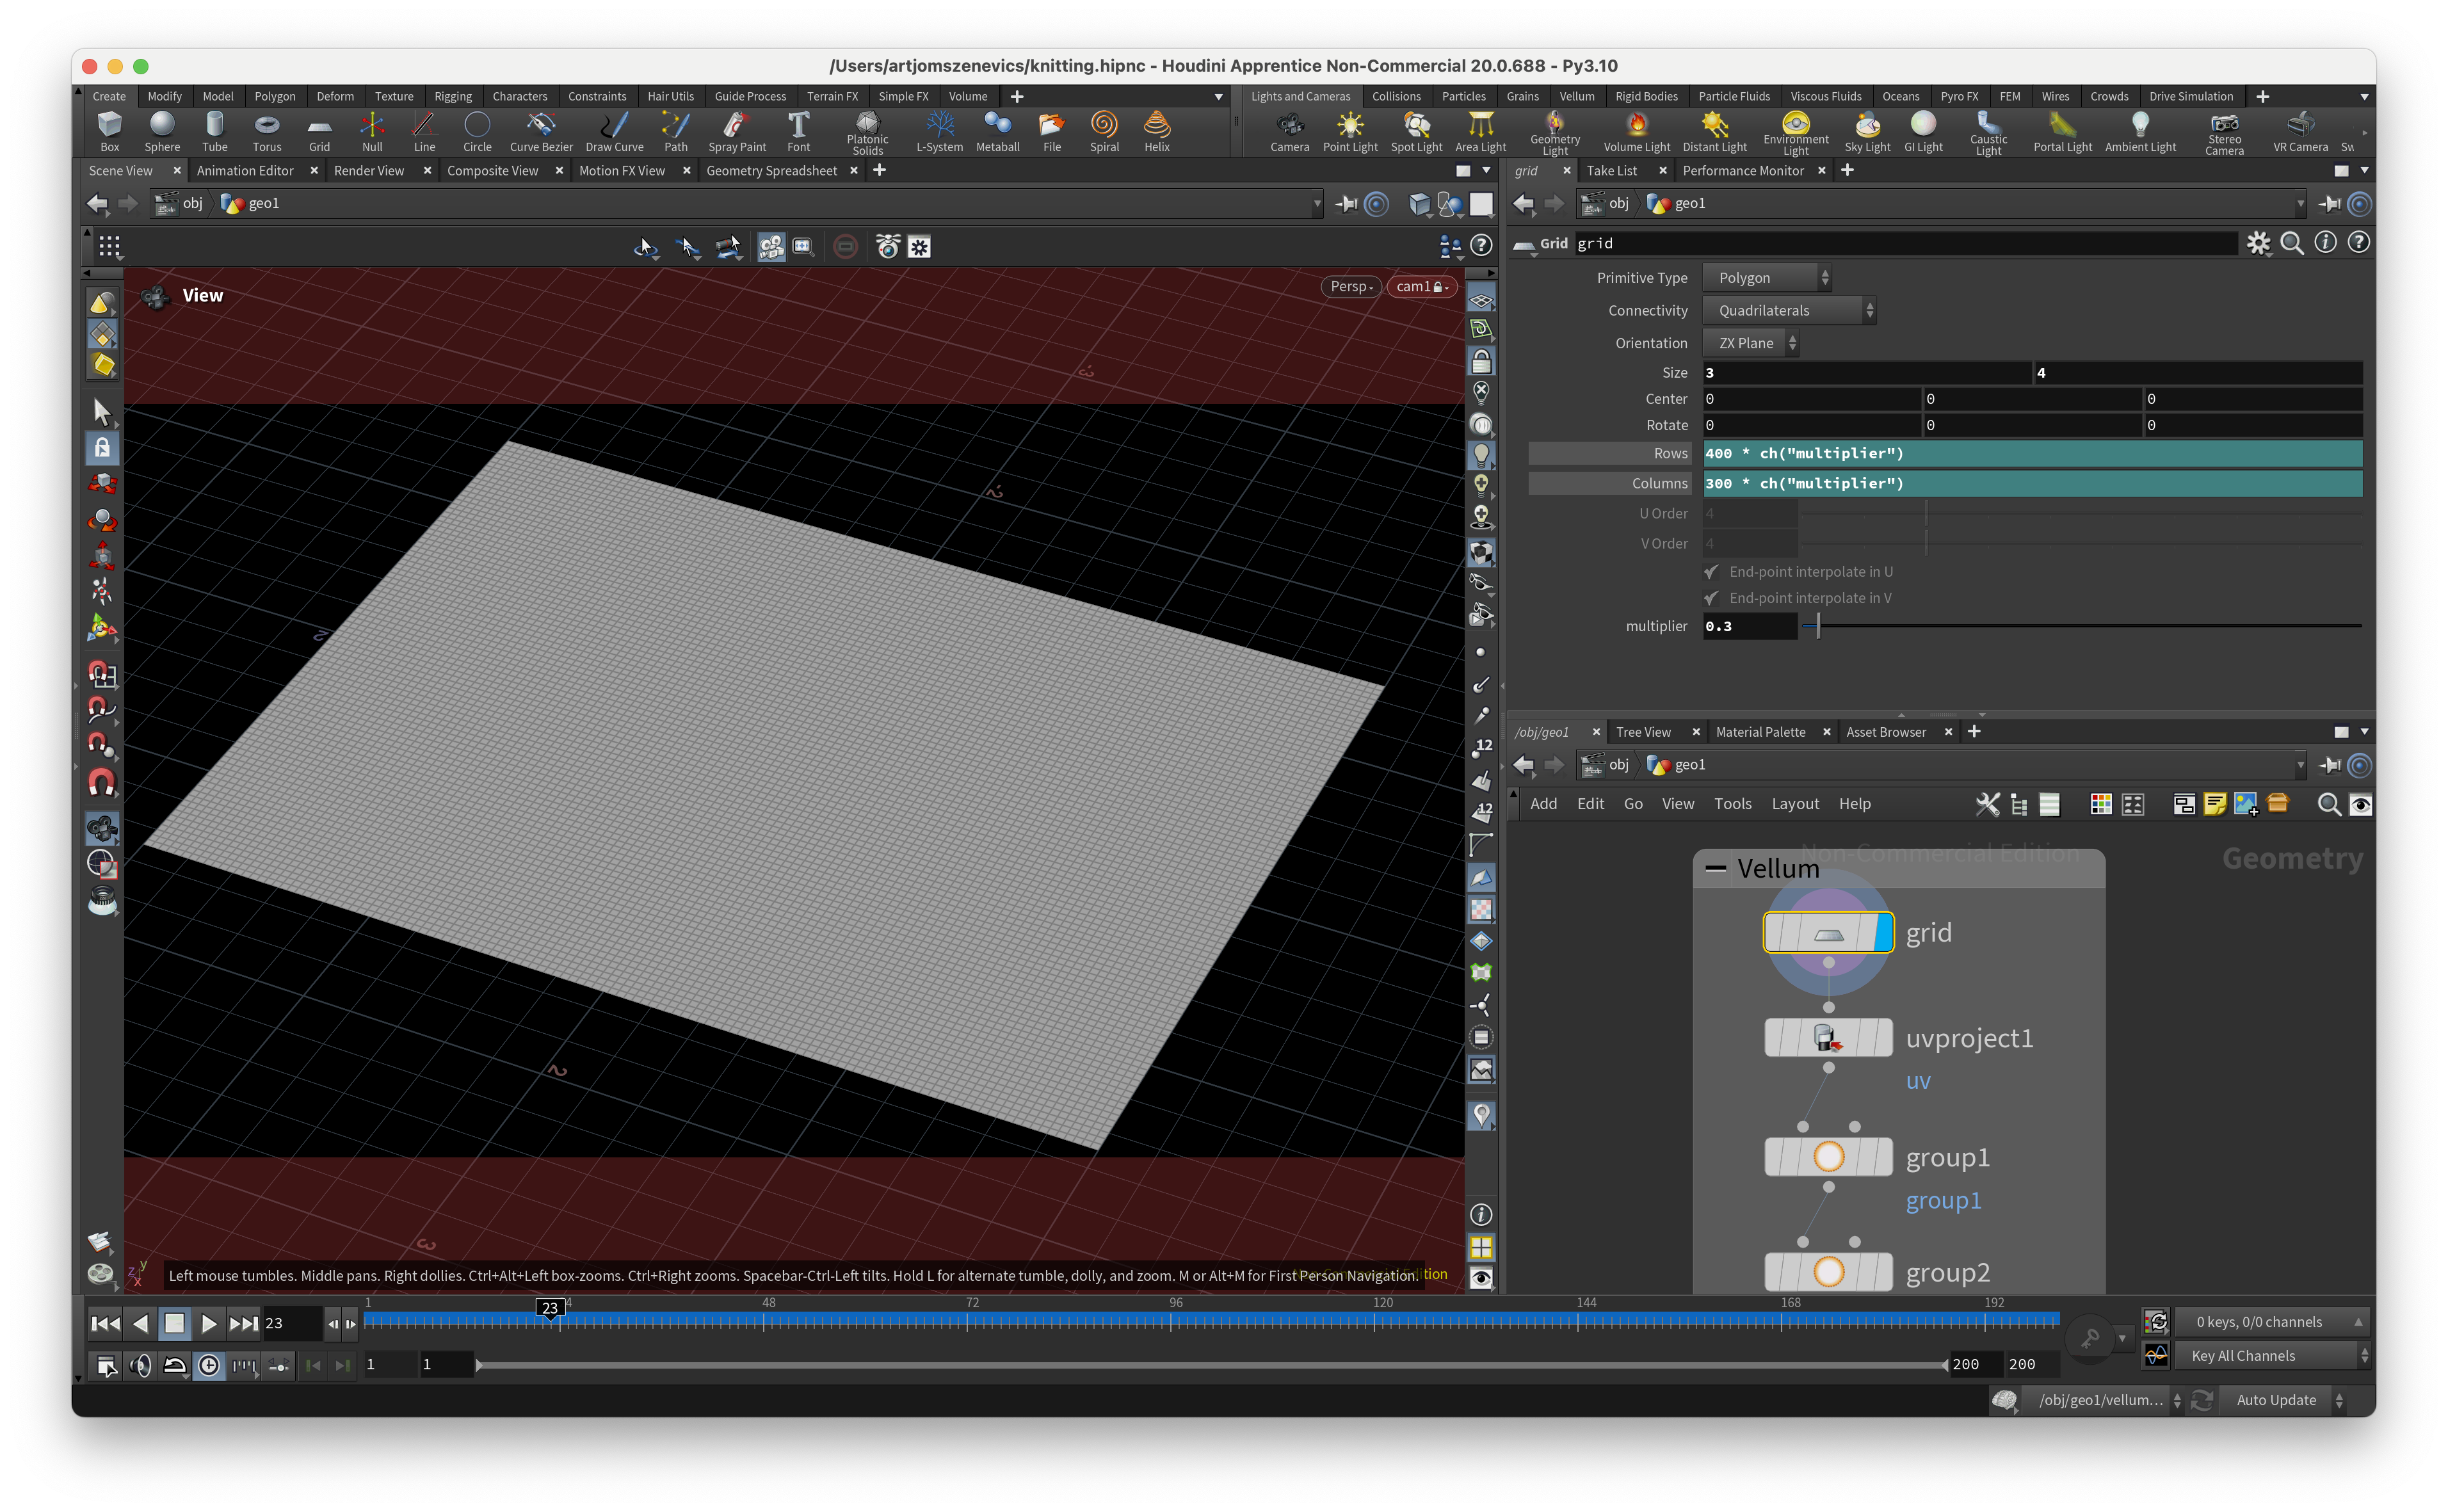
Step 2:
Create a UV Project node. In the “Initialize” panel, click “Initialize” to see the UVs.
Step 3:
The next three nodes form the basics of the Vellum cloth simulation:
1. Create a Vellum Constraints node. In the “Constraint Type” dropdown, choose “Cloth.” Here, you can tweak the cloth parameters if you want to make the cloth more stretchy or bendy.
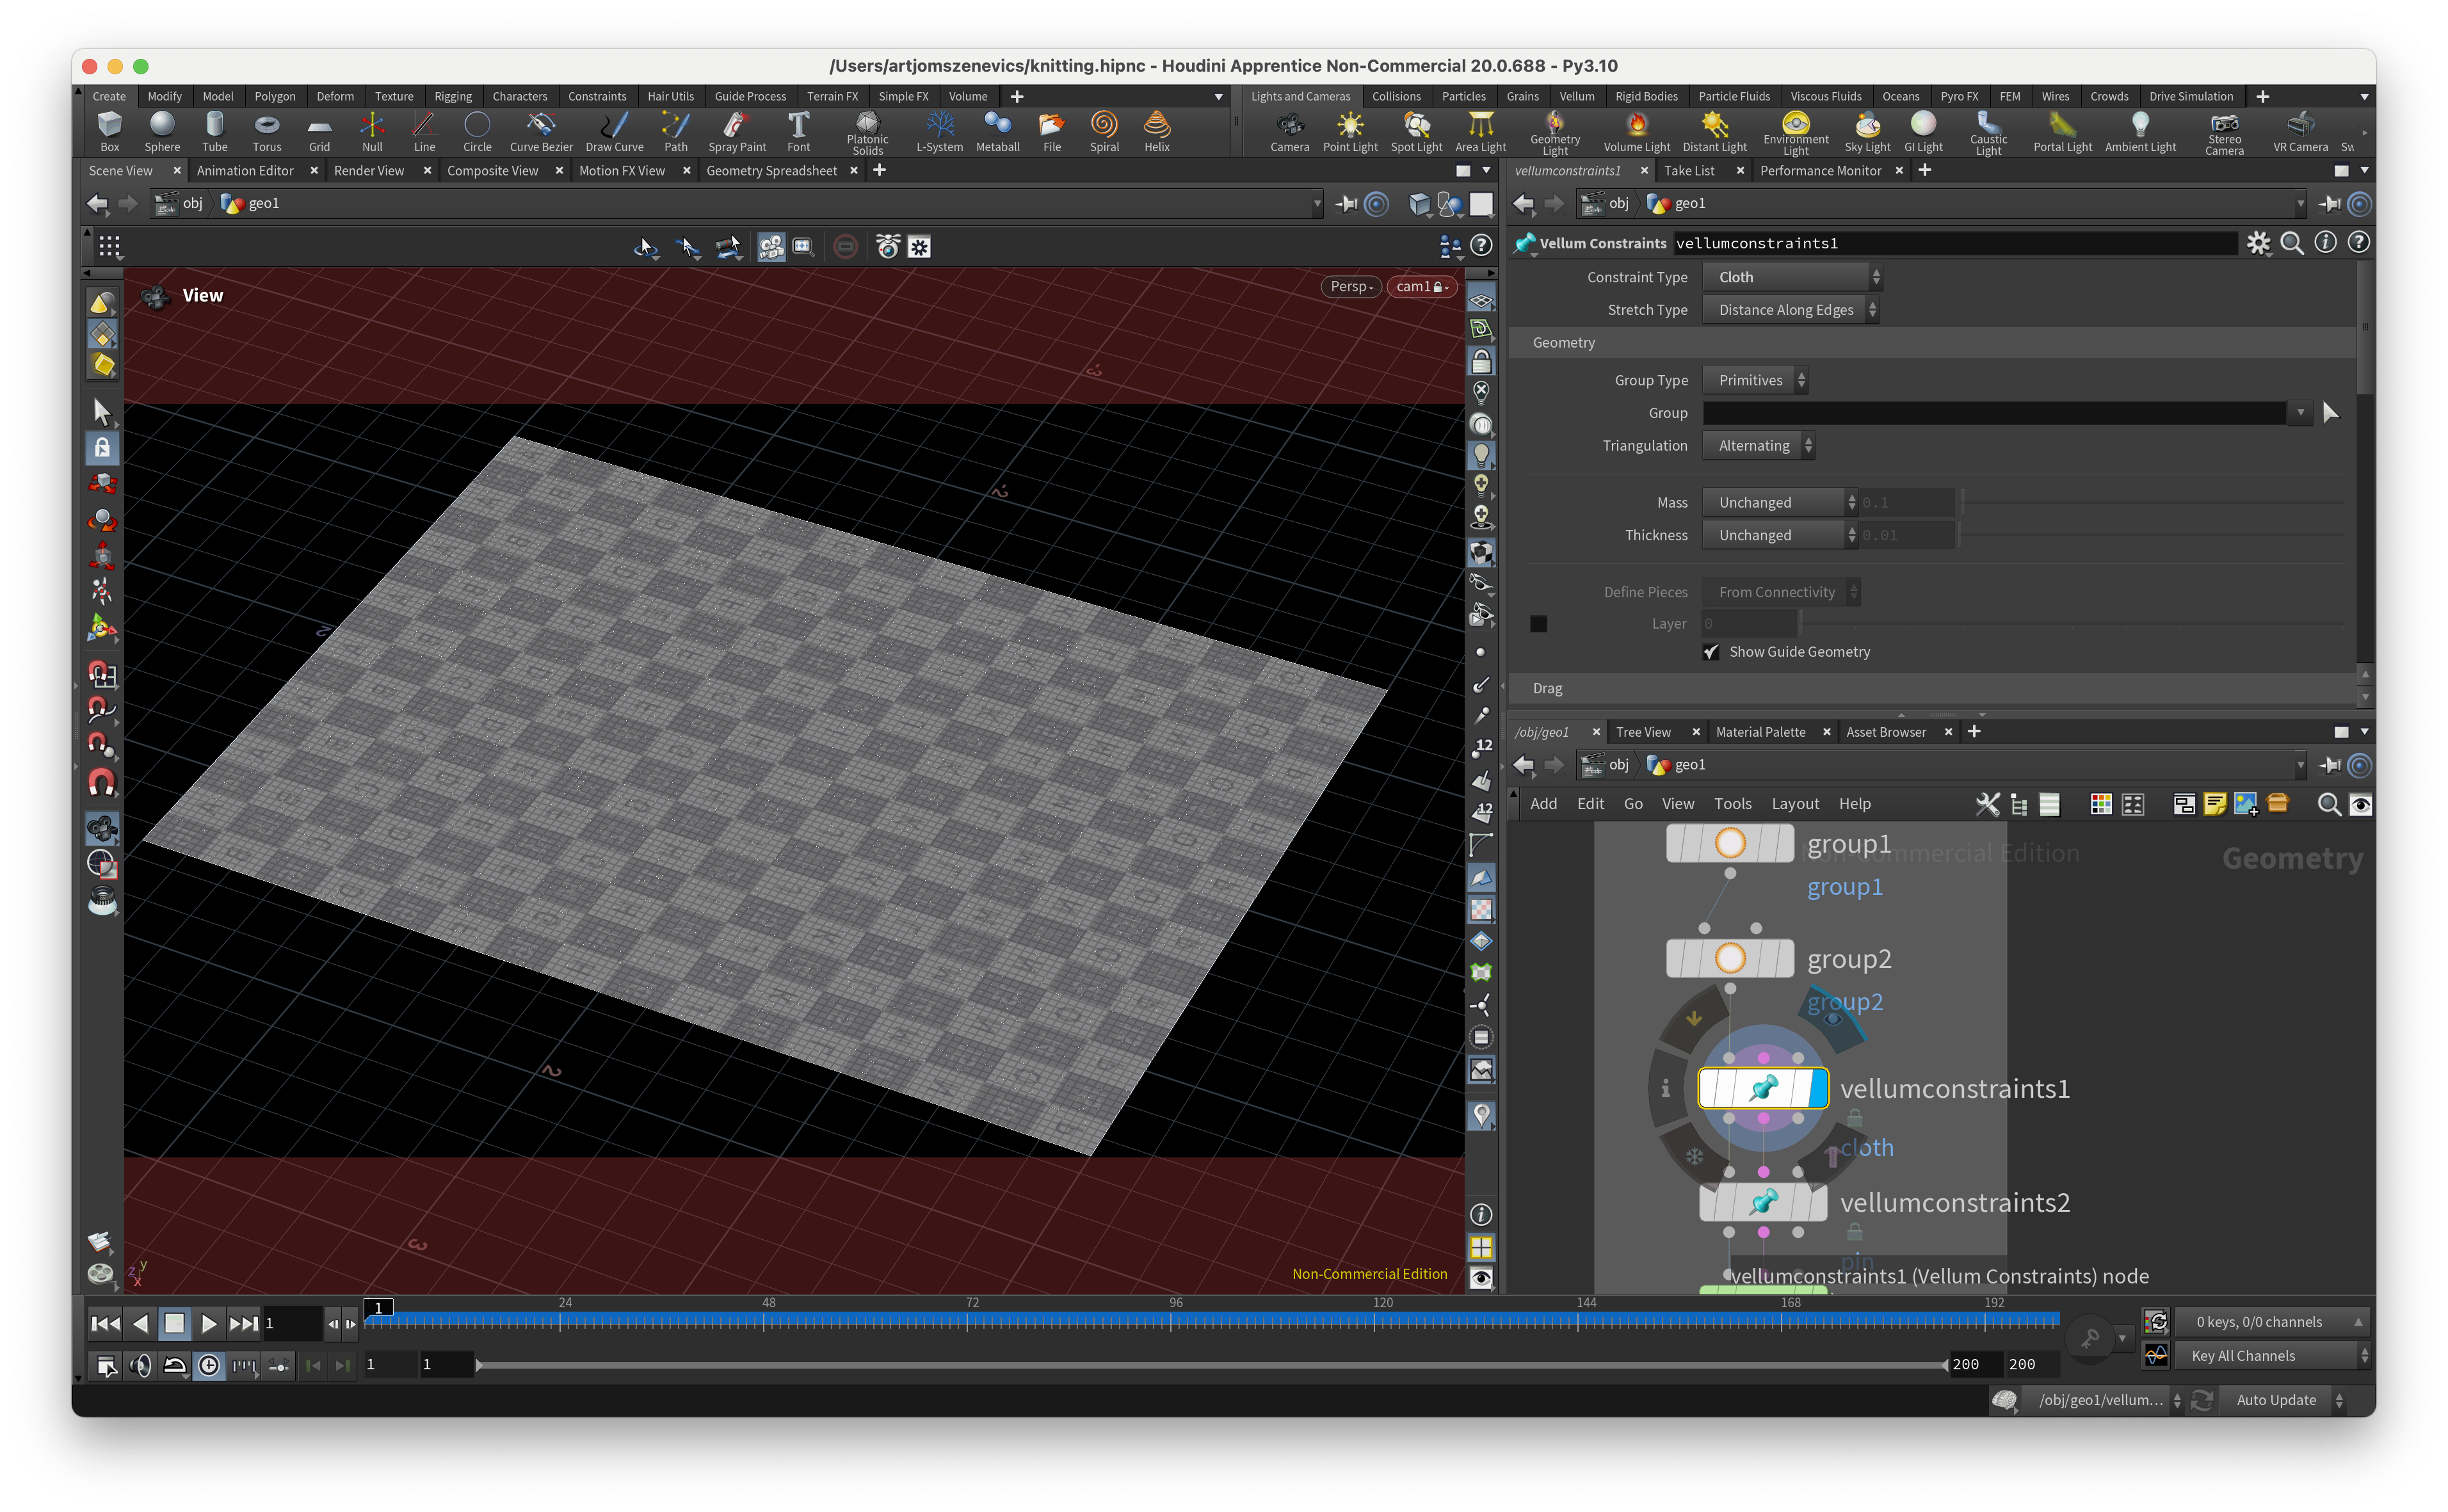
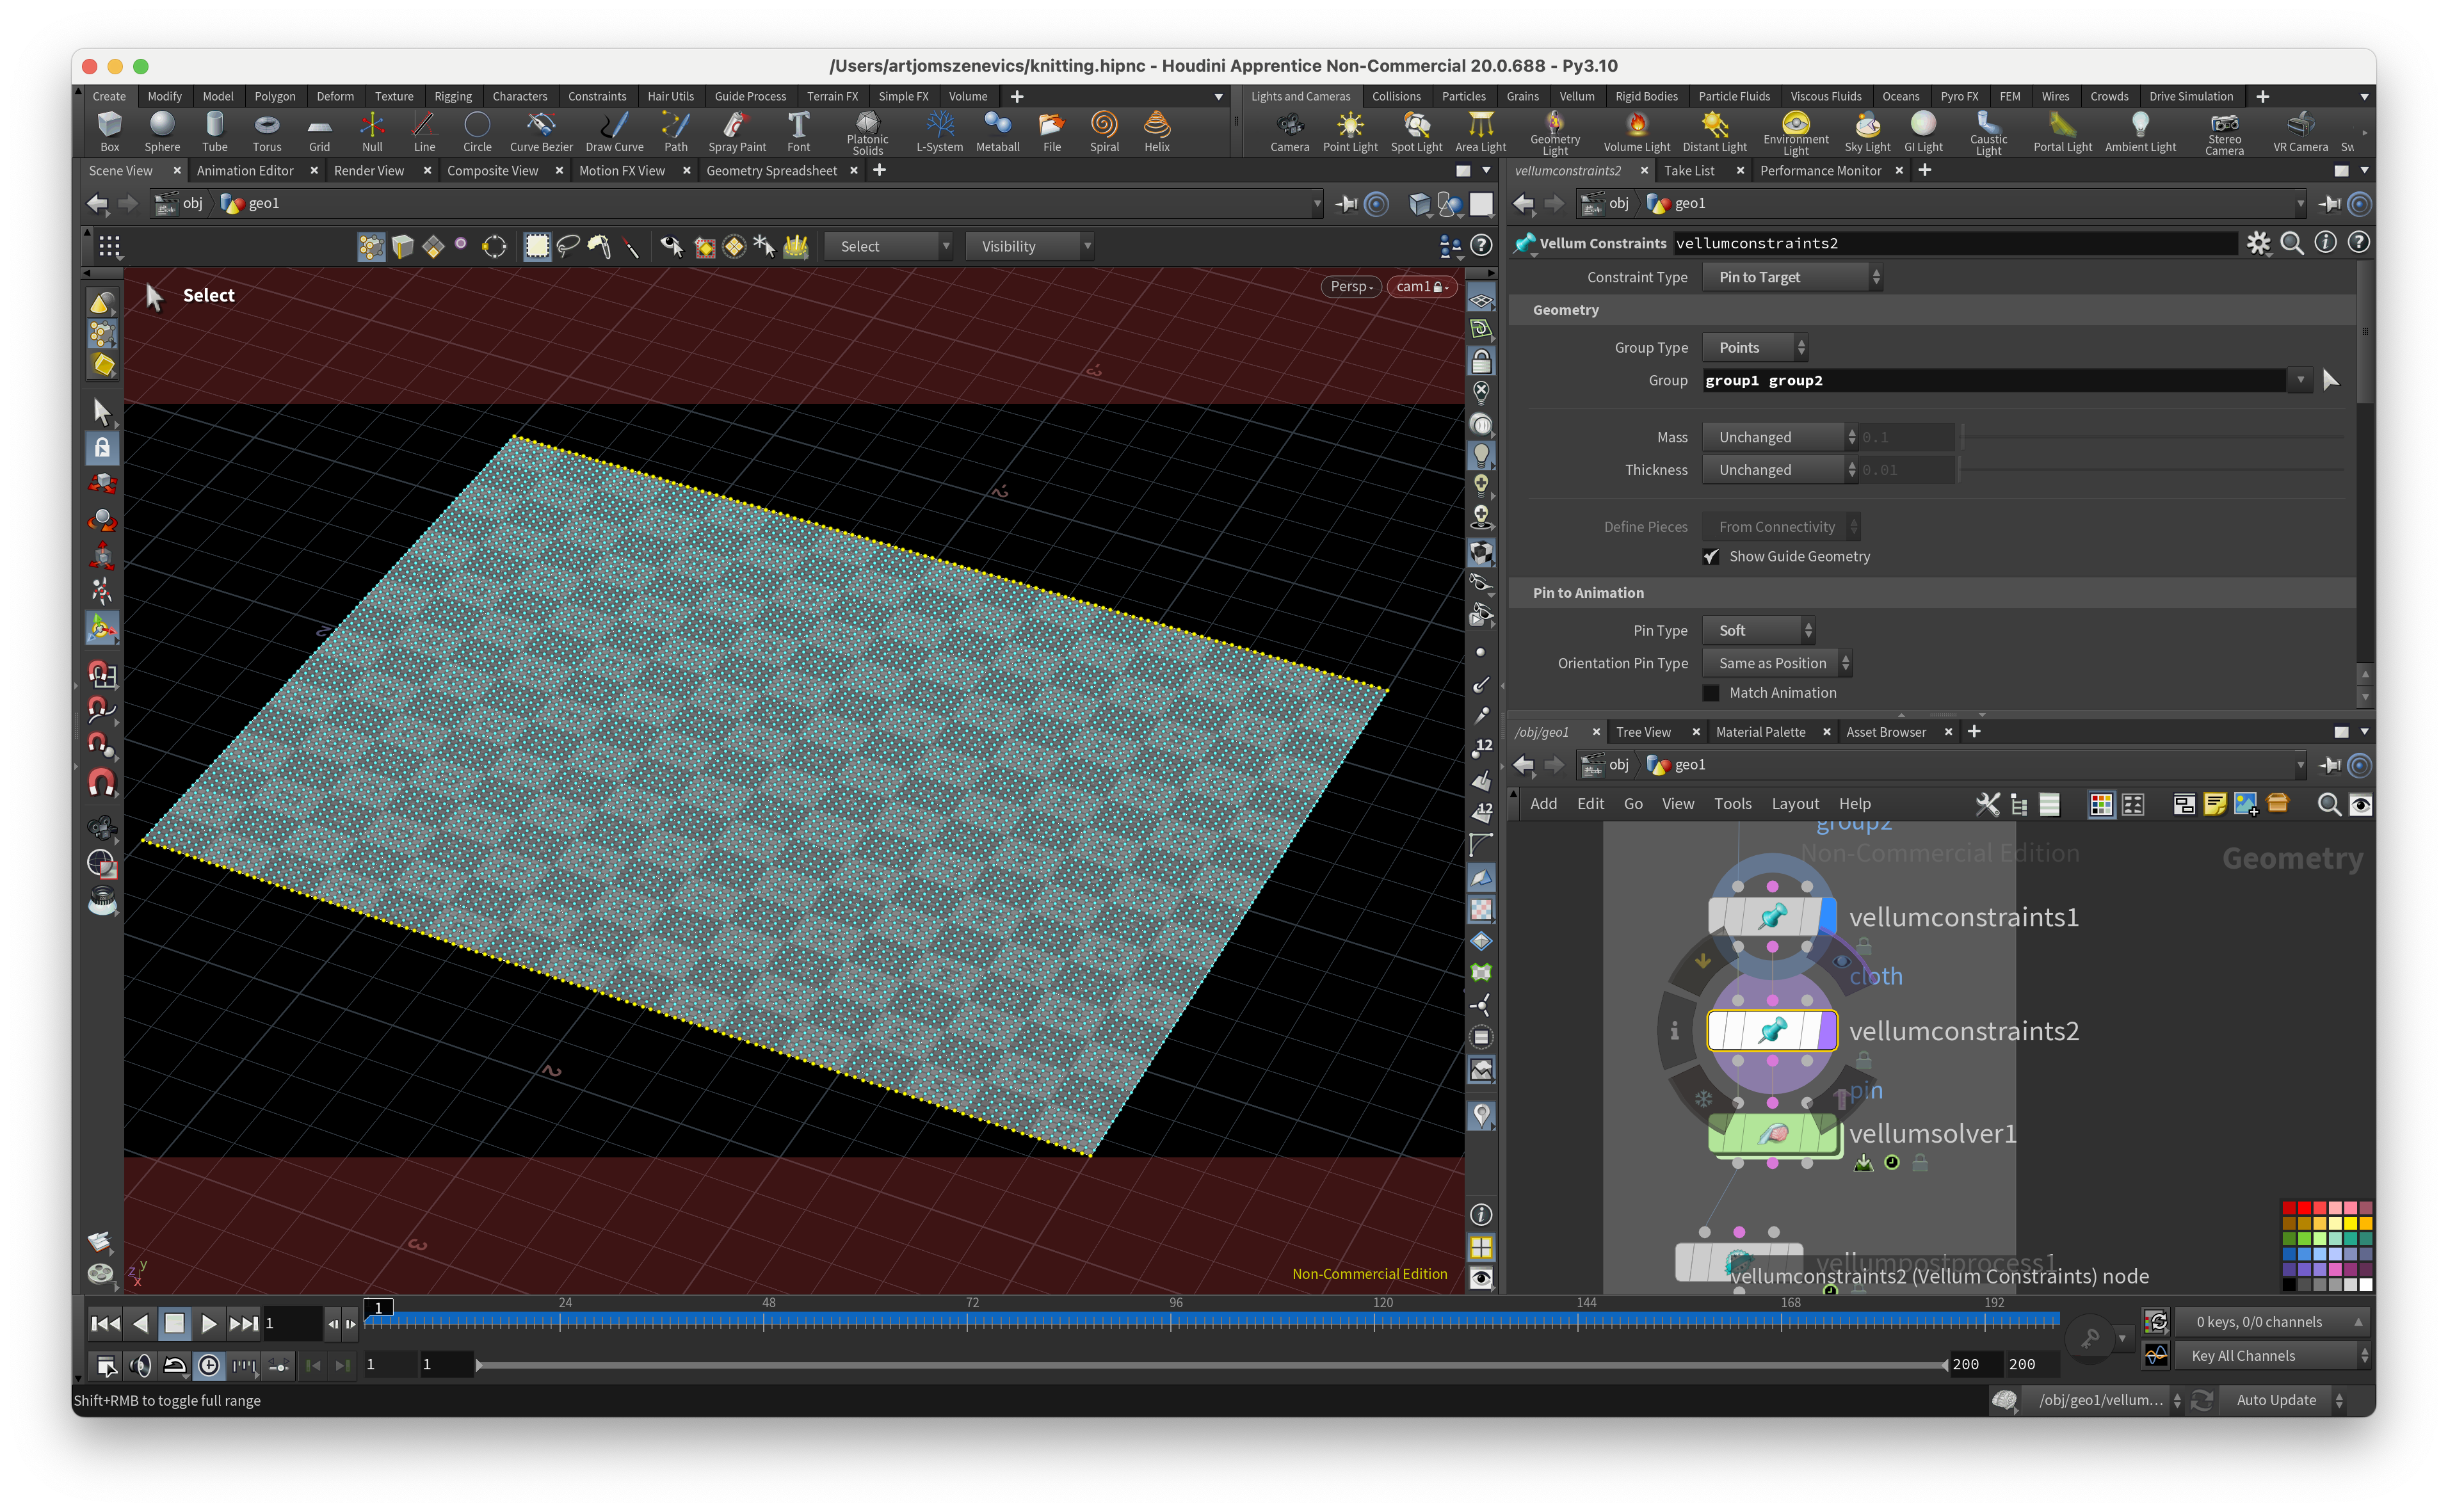
2. Add another Vellum Constraints node, and in “Constraint Type,” choose “Pin to Target.” This allows you to select a group of points to which the cloth will be attached. Additionally, you’ll be able to control how much the points will stretch from their initial position in space during the simulation.
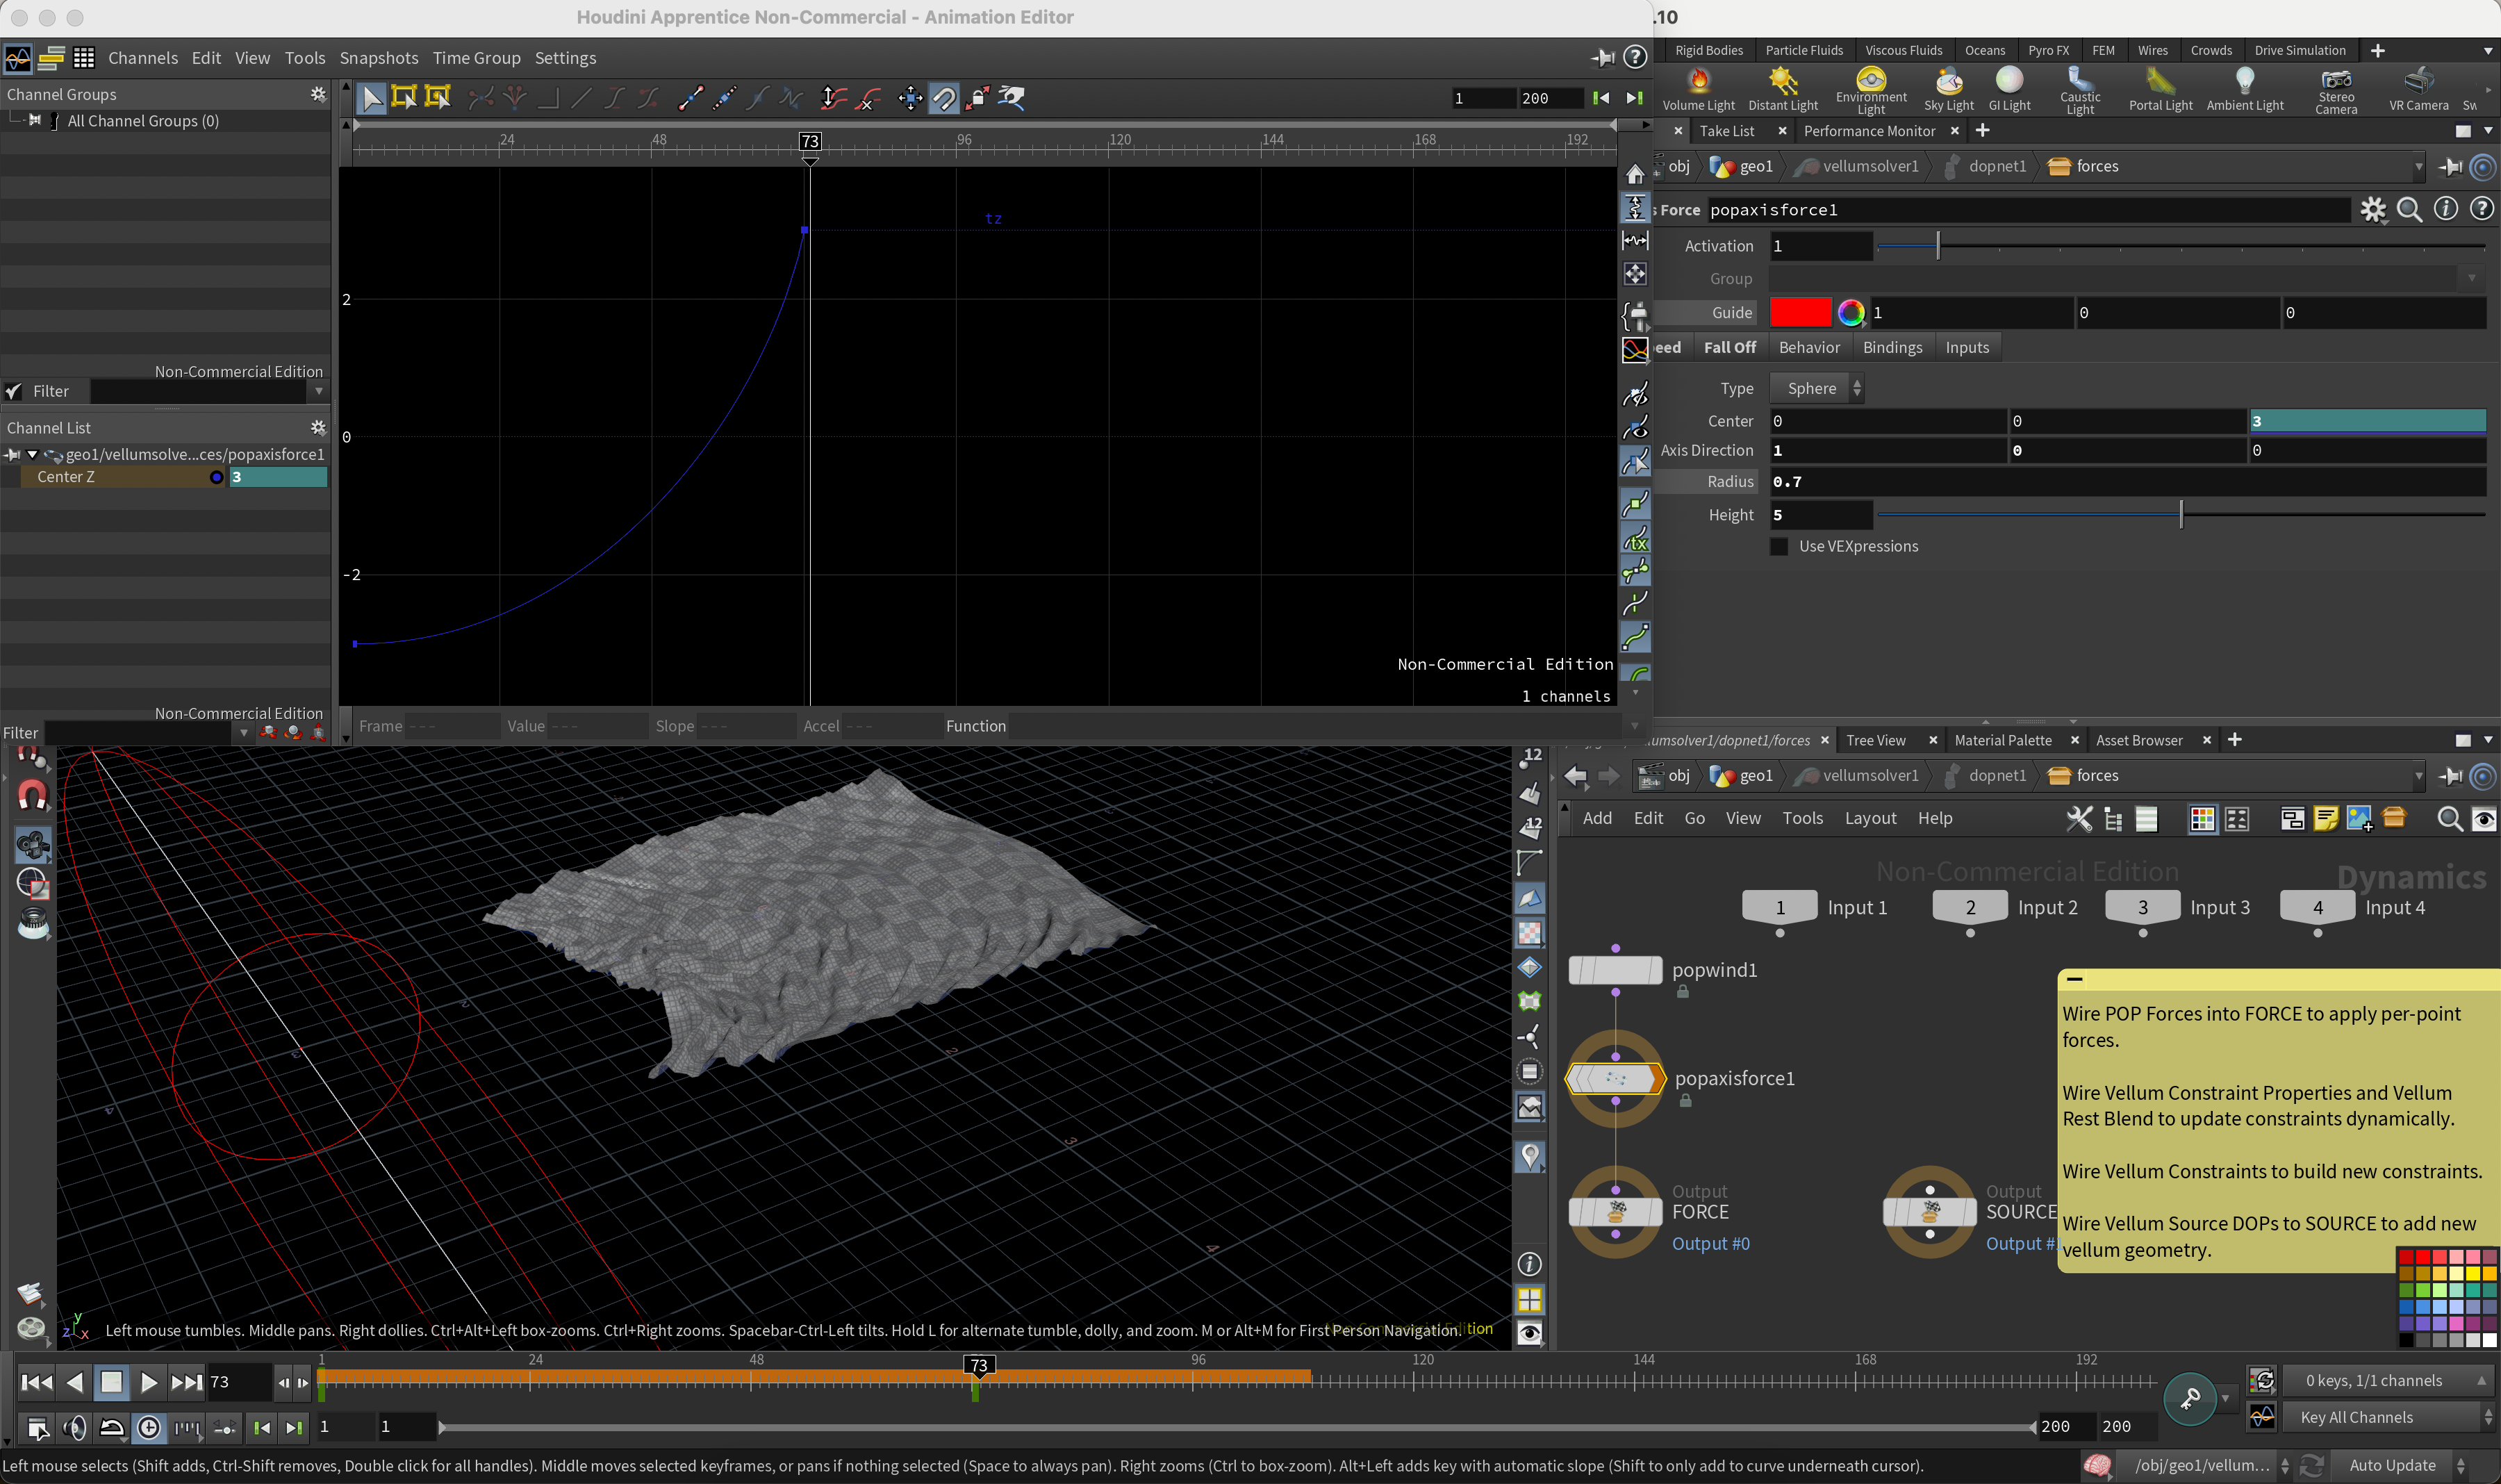
3. Finally, create a Vellum Solver to run the simulation. To make it simulate like real cloth, we’ll add a few basic forces: PopWind and PopAxisForce. (POP stands for Particle Operators.)
• PopWind: This is a basic wind force, similar to noise but more organic.
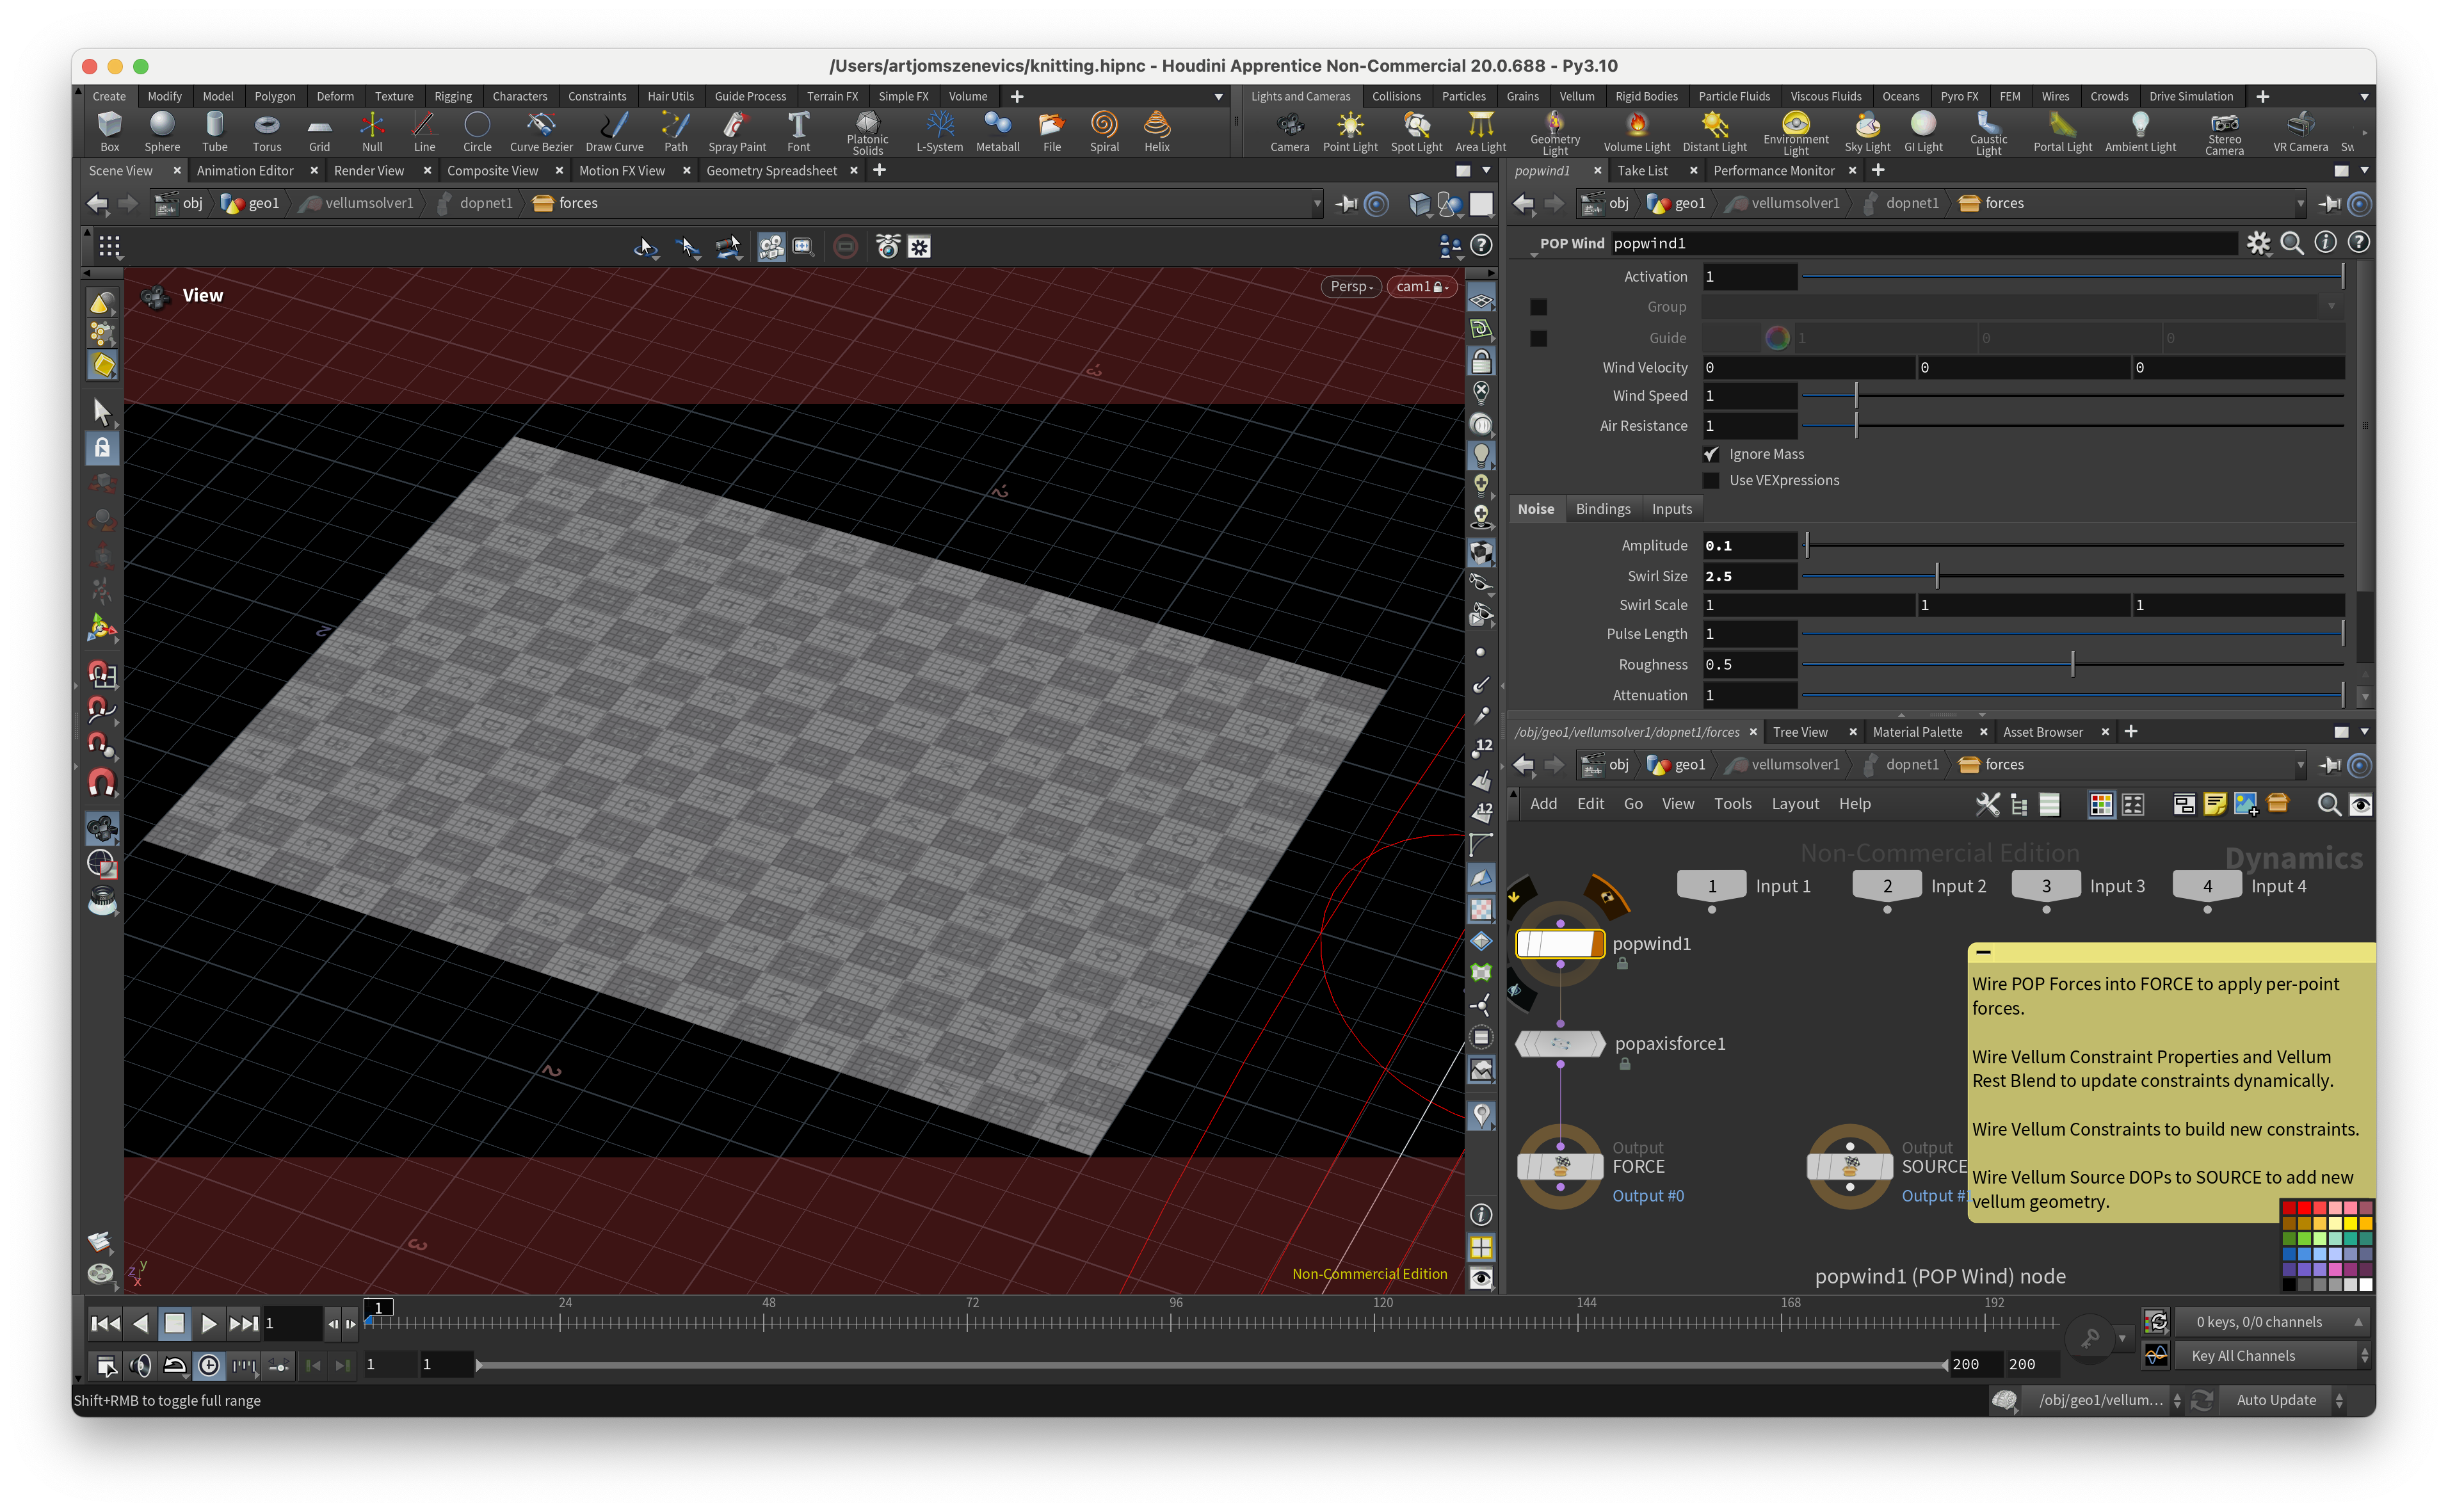
• PopAxisForce: This node applies force around its axis. (You can also use custom curve forces with PopCurveForce.)
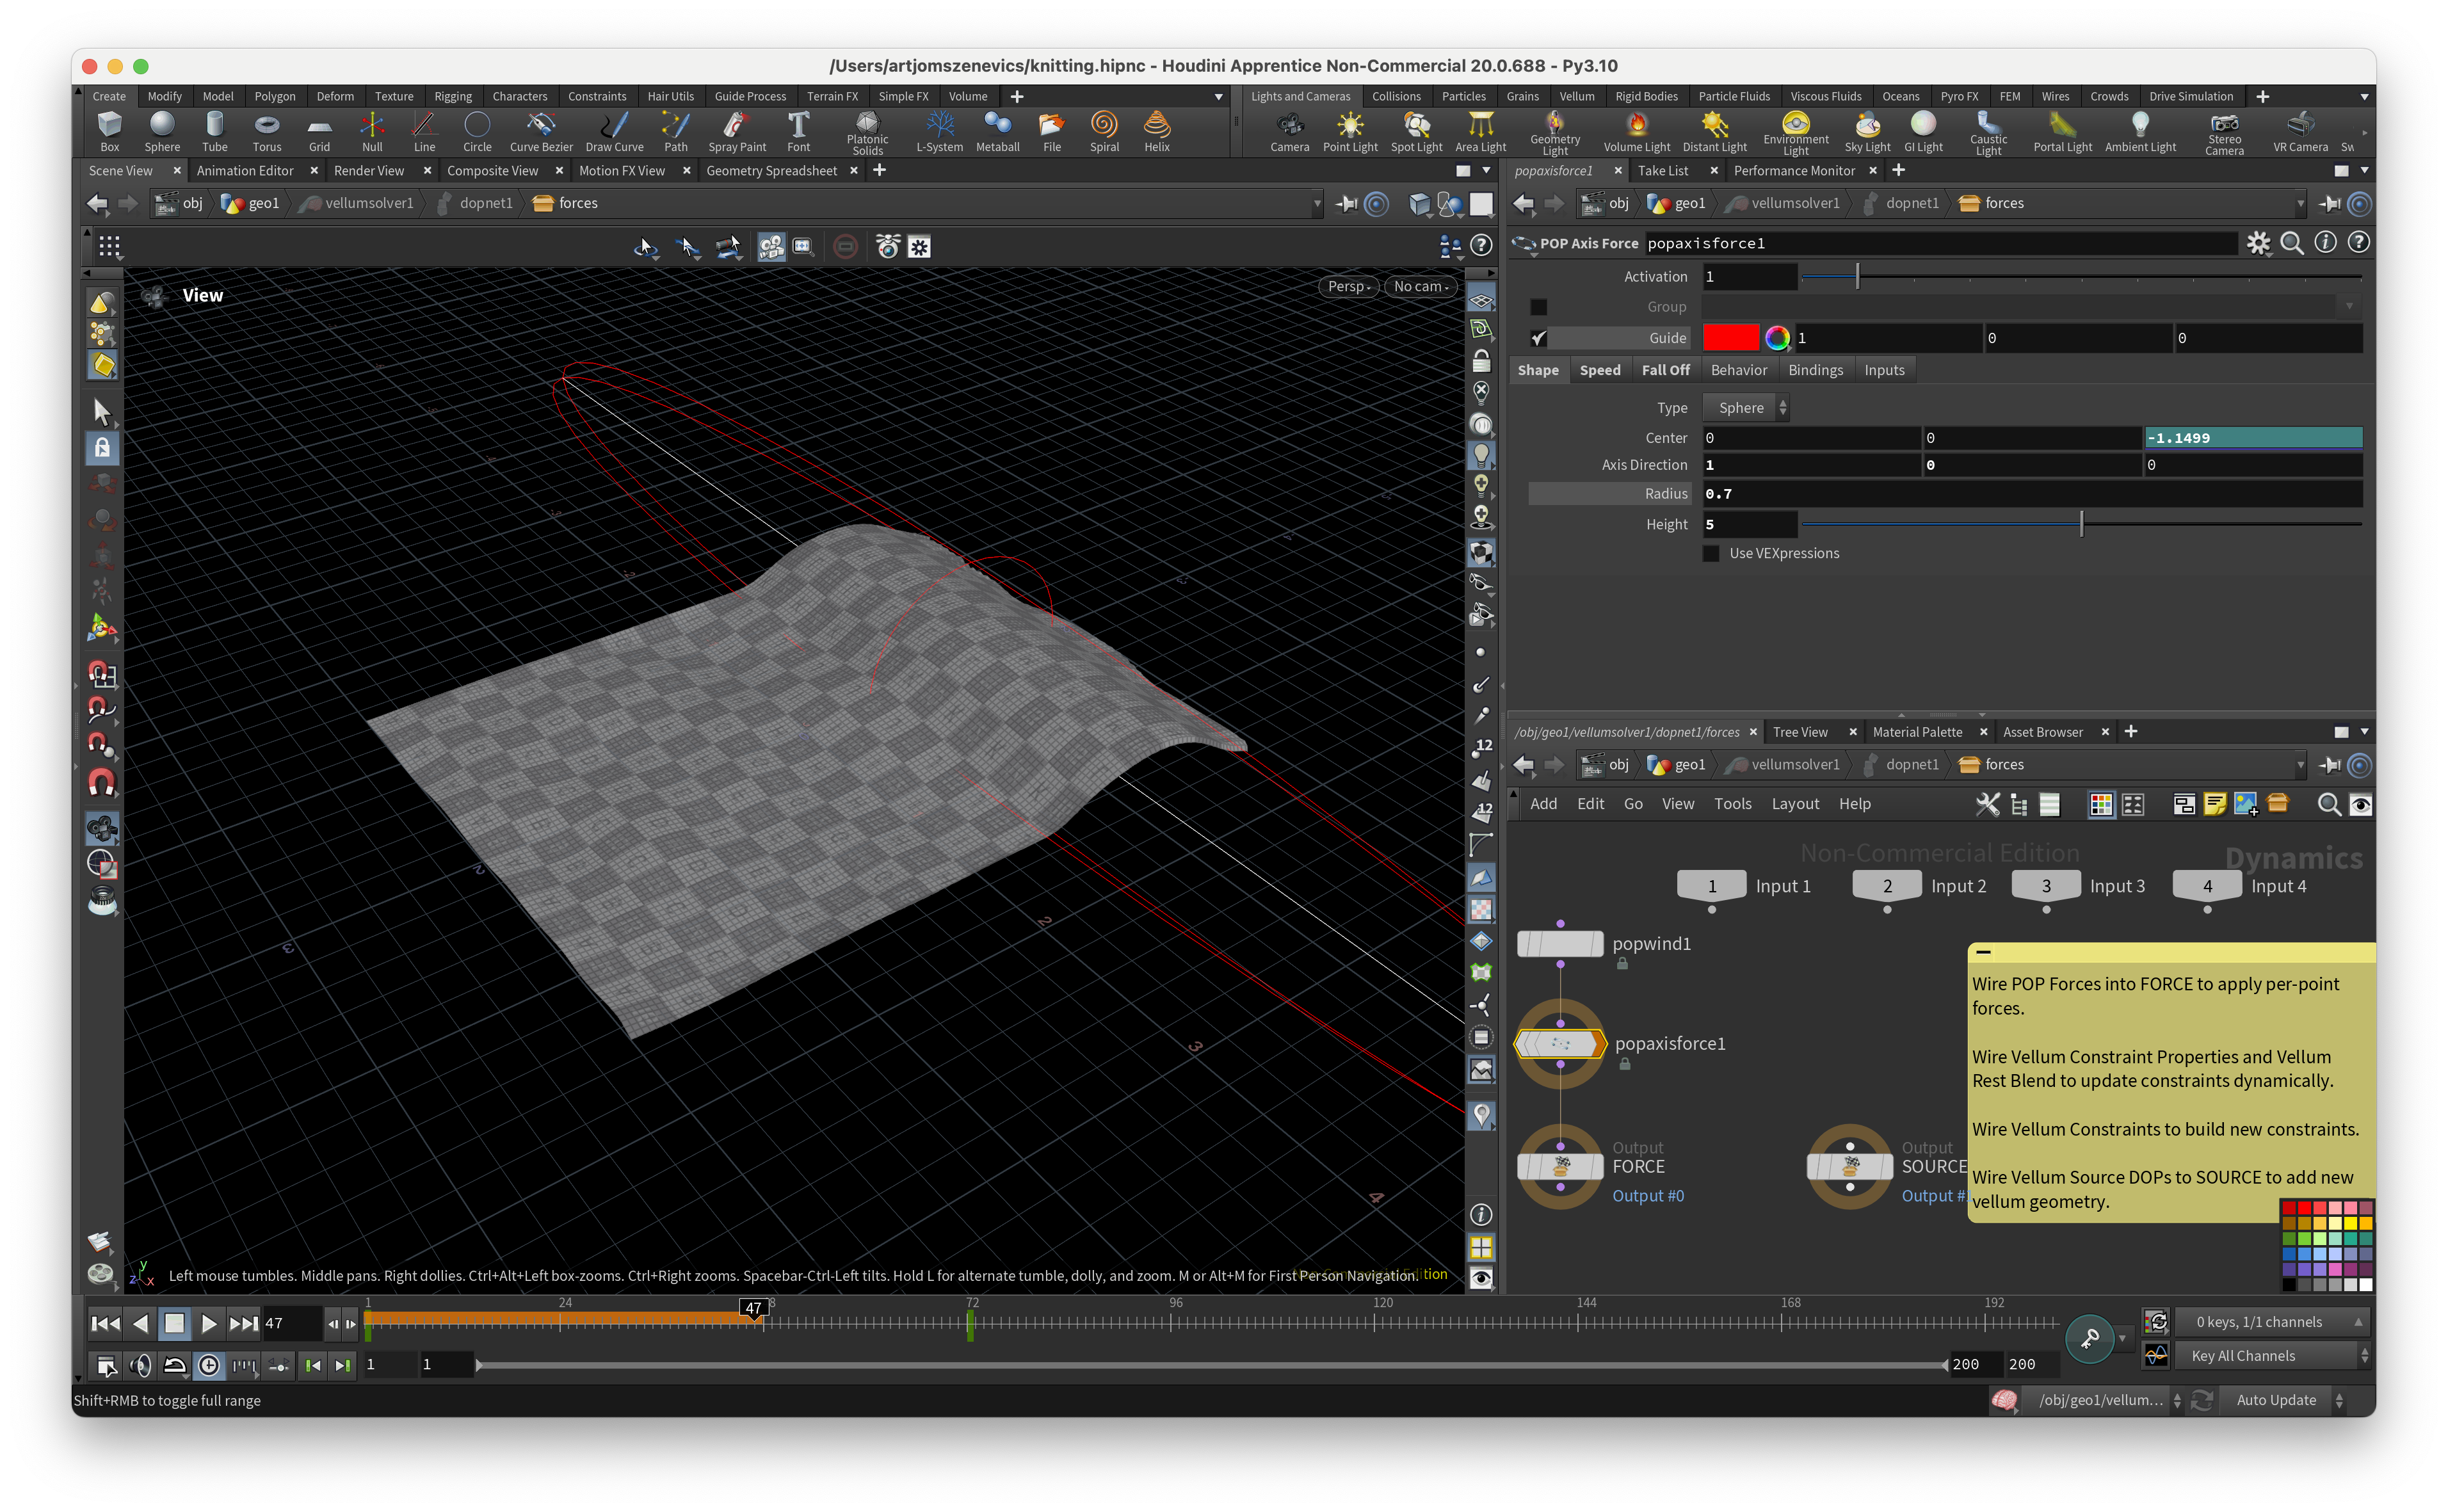
To make our cloth swing in the breeze at the end, I adjusted the speed curve of the PopAxisForce animation. This way, we get a strong swing at the end of the cloth.

Step 4:
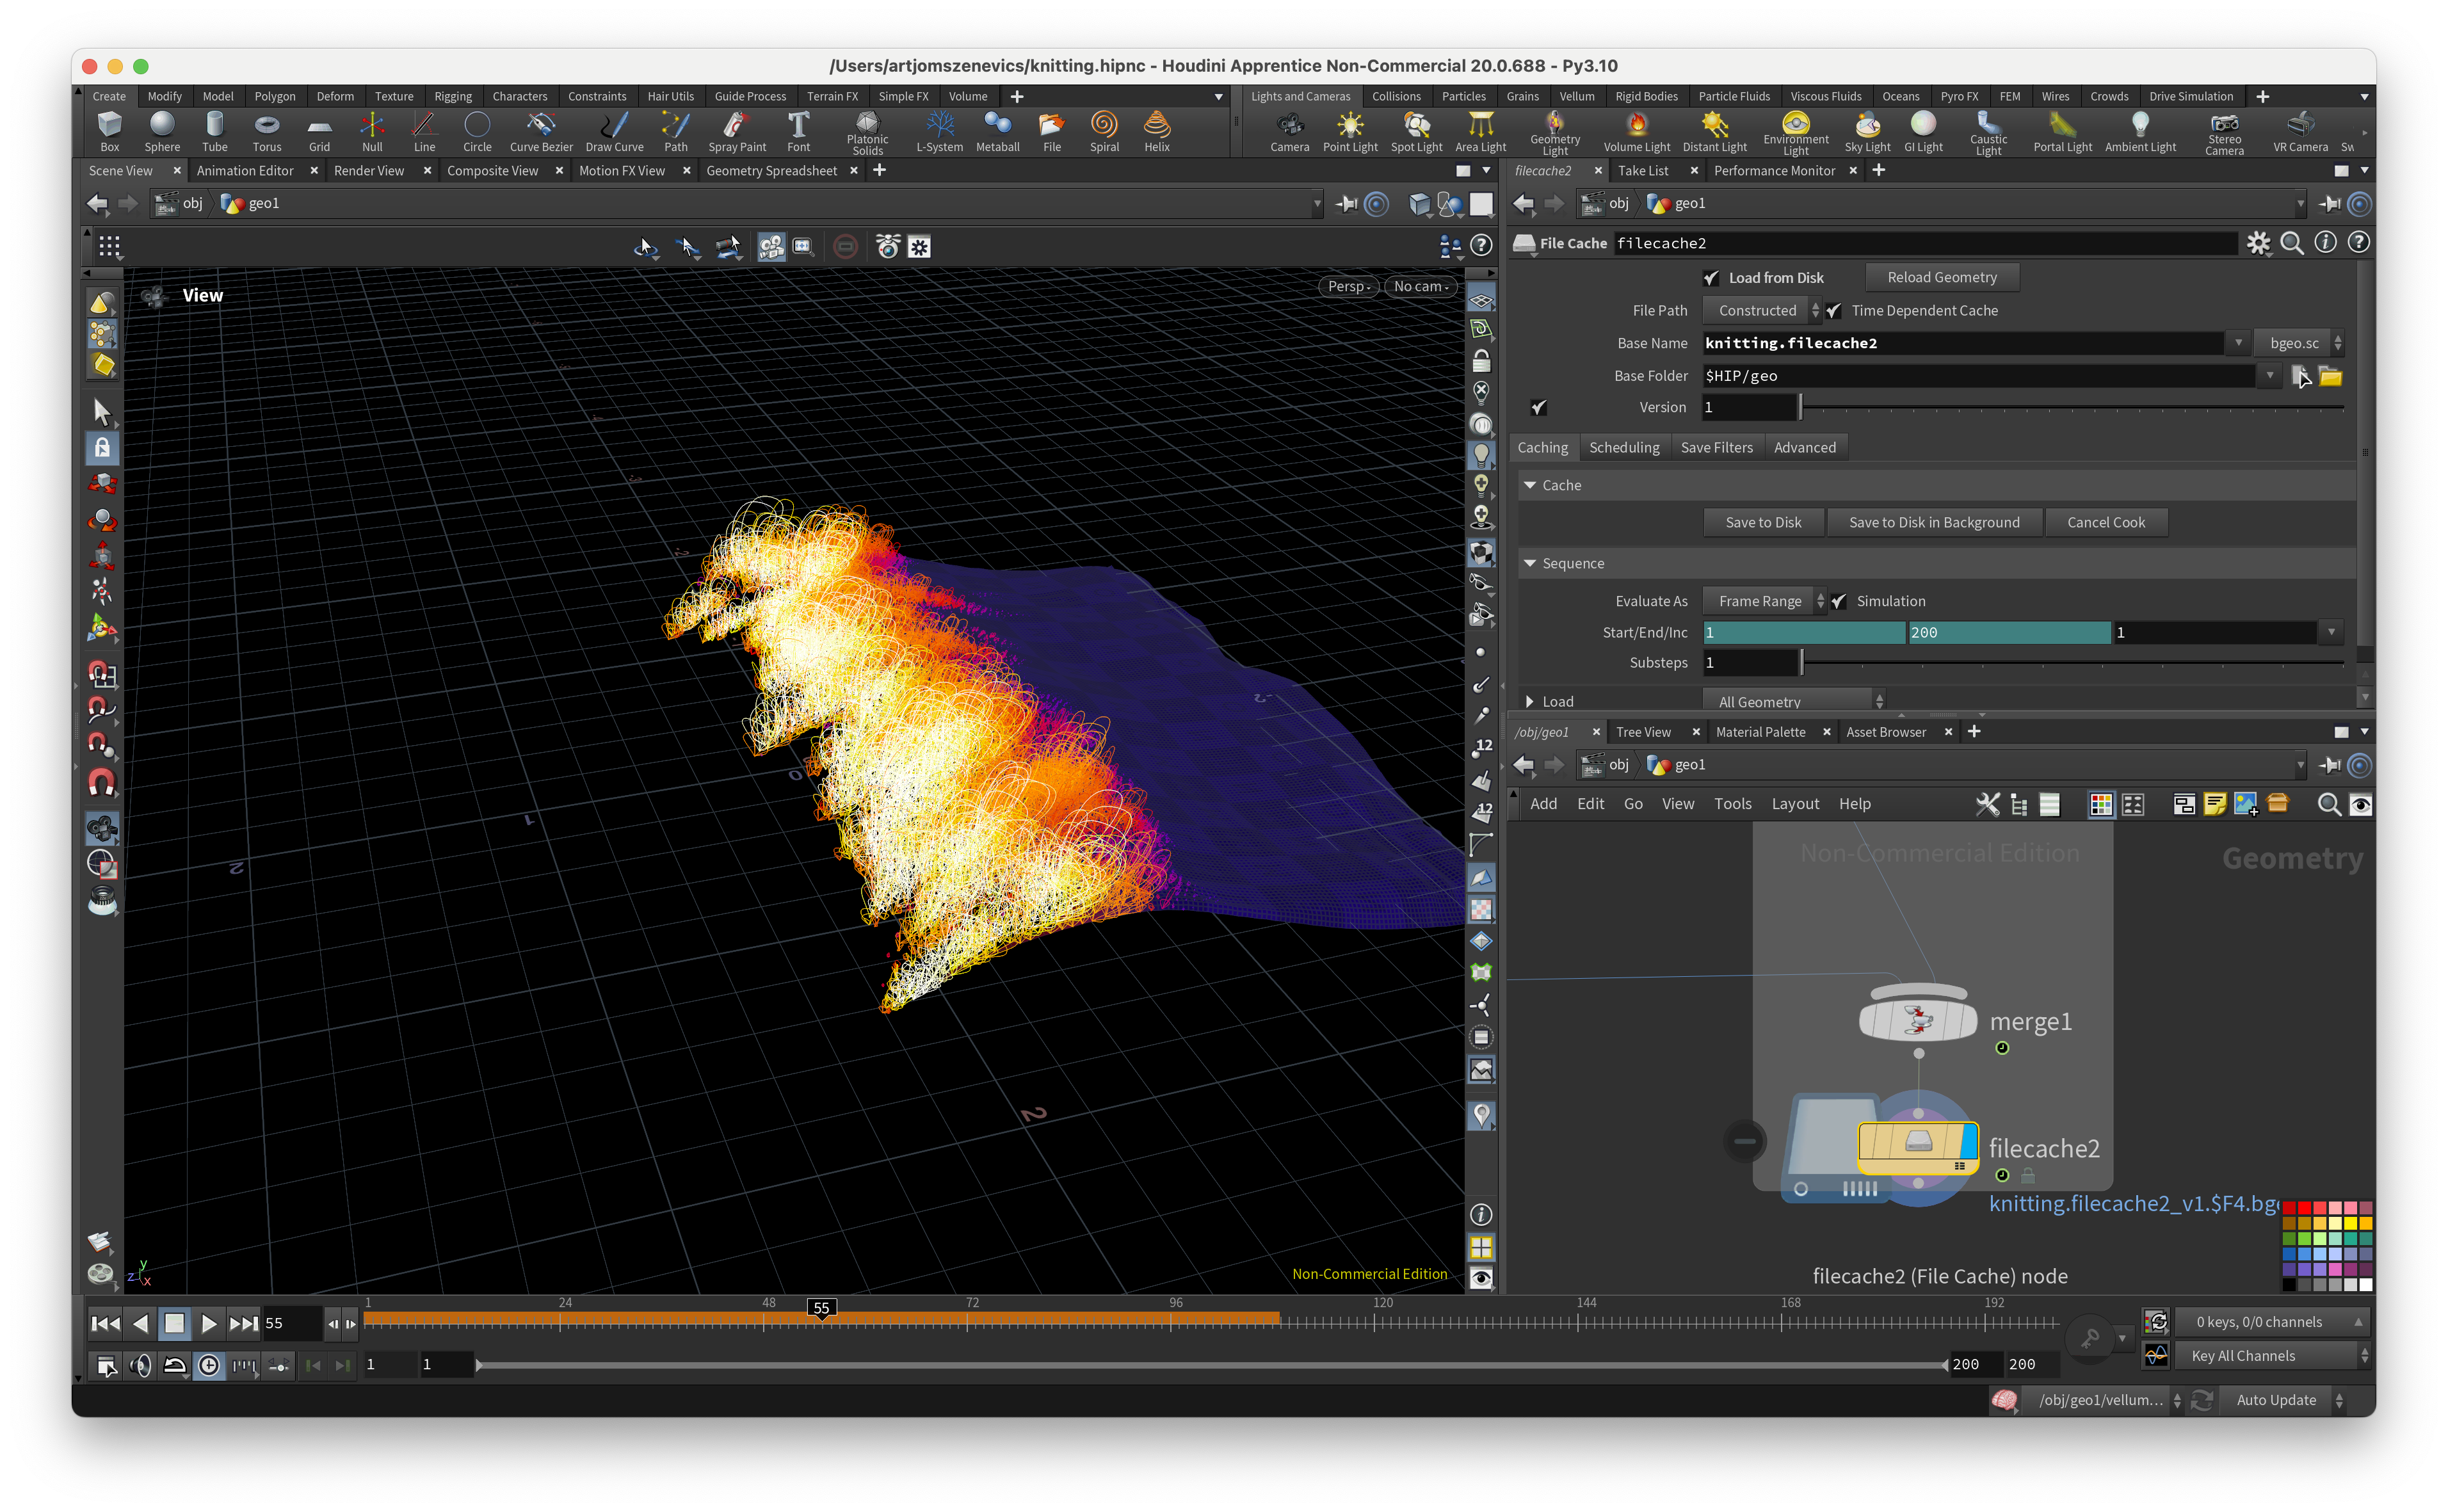
Add a Vellum Post Process node to increase subdivisions, adjust normals, and cache out the simulation with a File Cache node. Also here are a few different simulations that had during the exploration phase. I've decided to continue build on top with the last one which I think is something in between.

PART 2
In this part, we’re going to learn how to scatter points on a surface as well as creating threads.
Step 1:
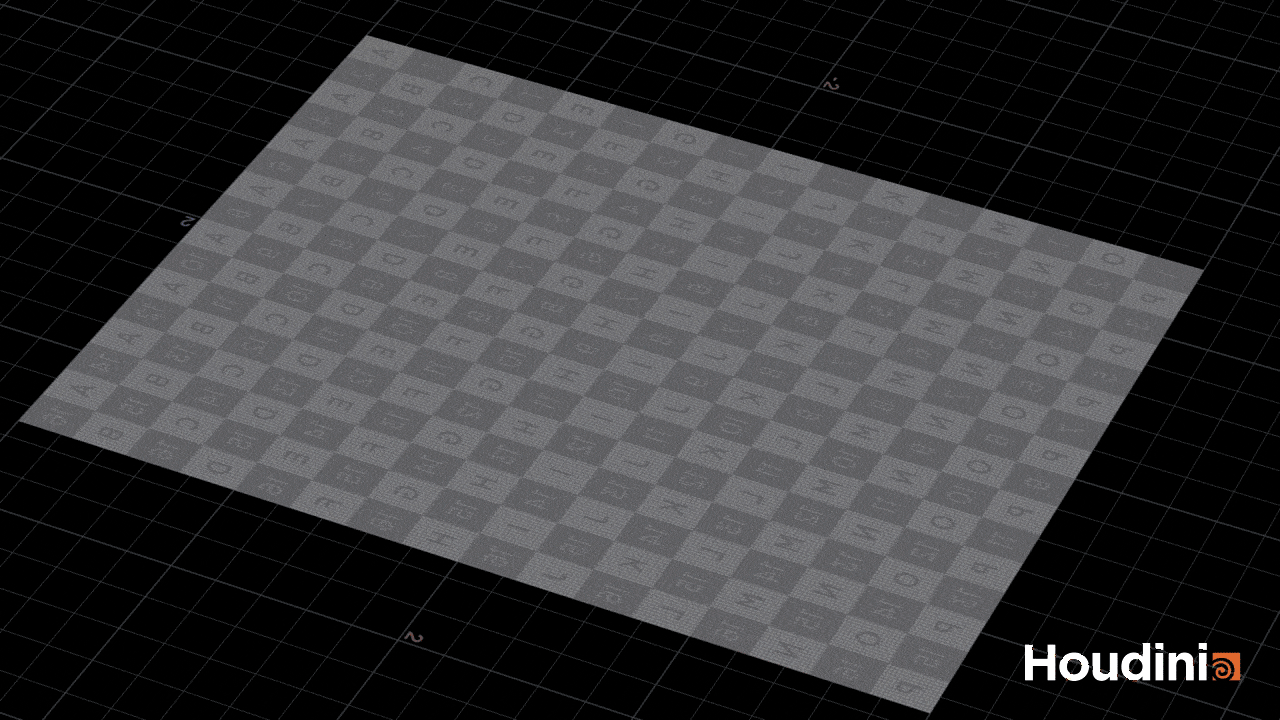
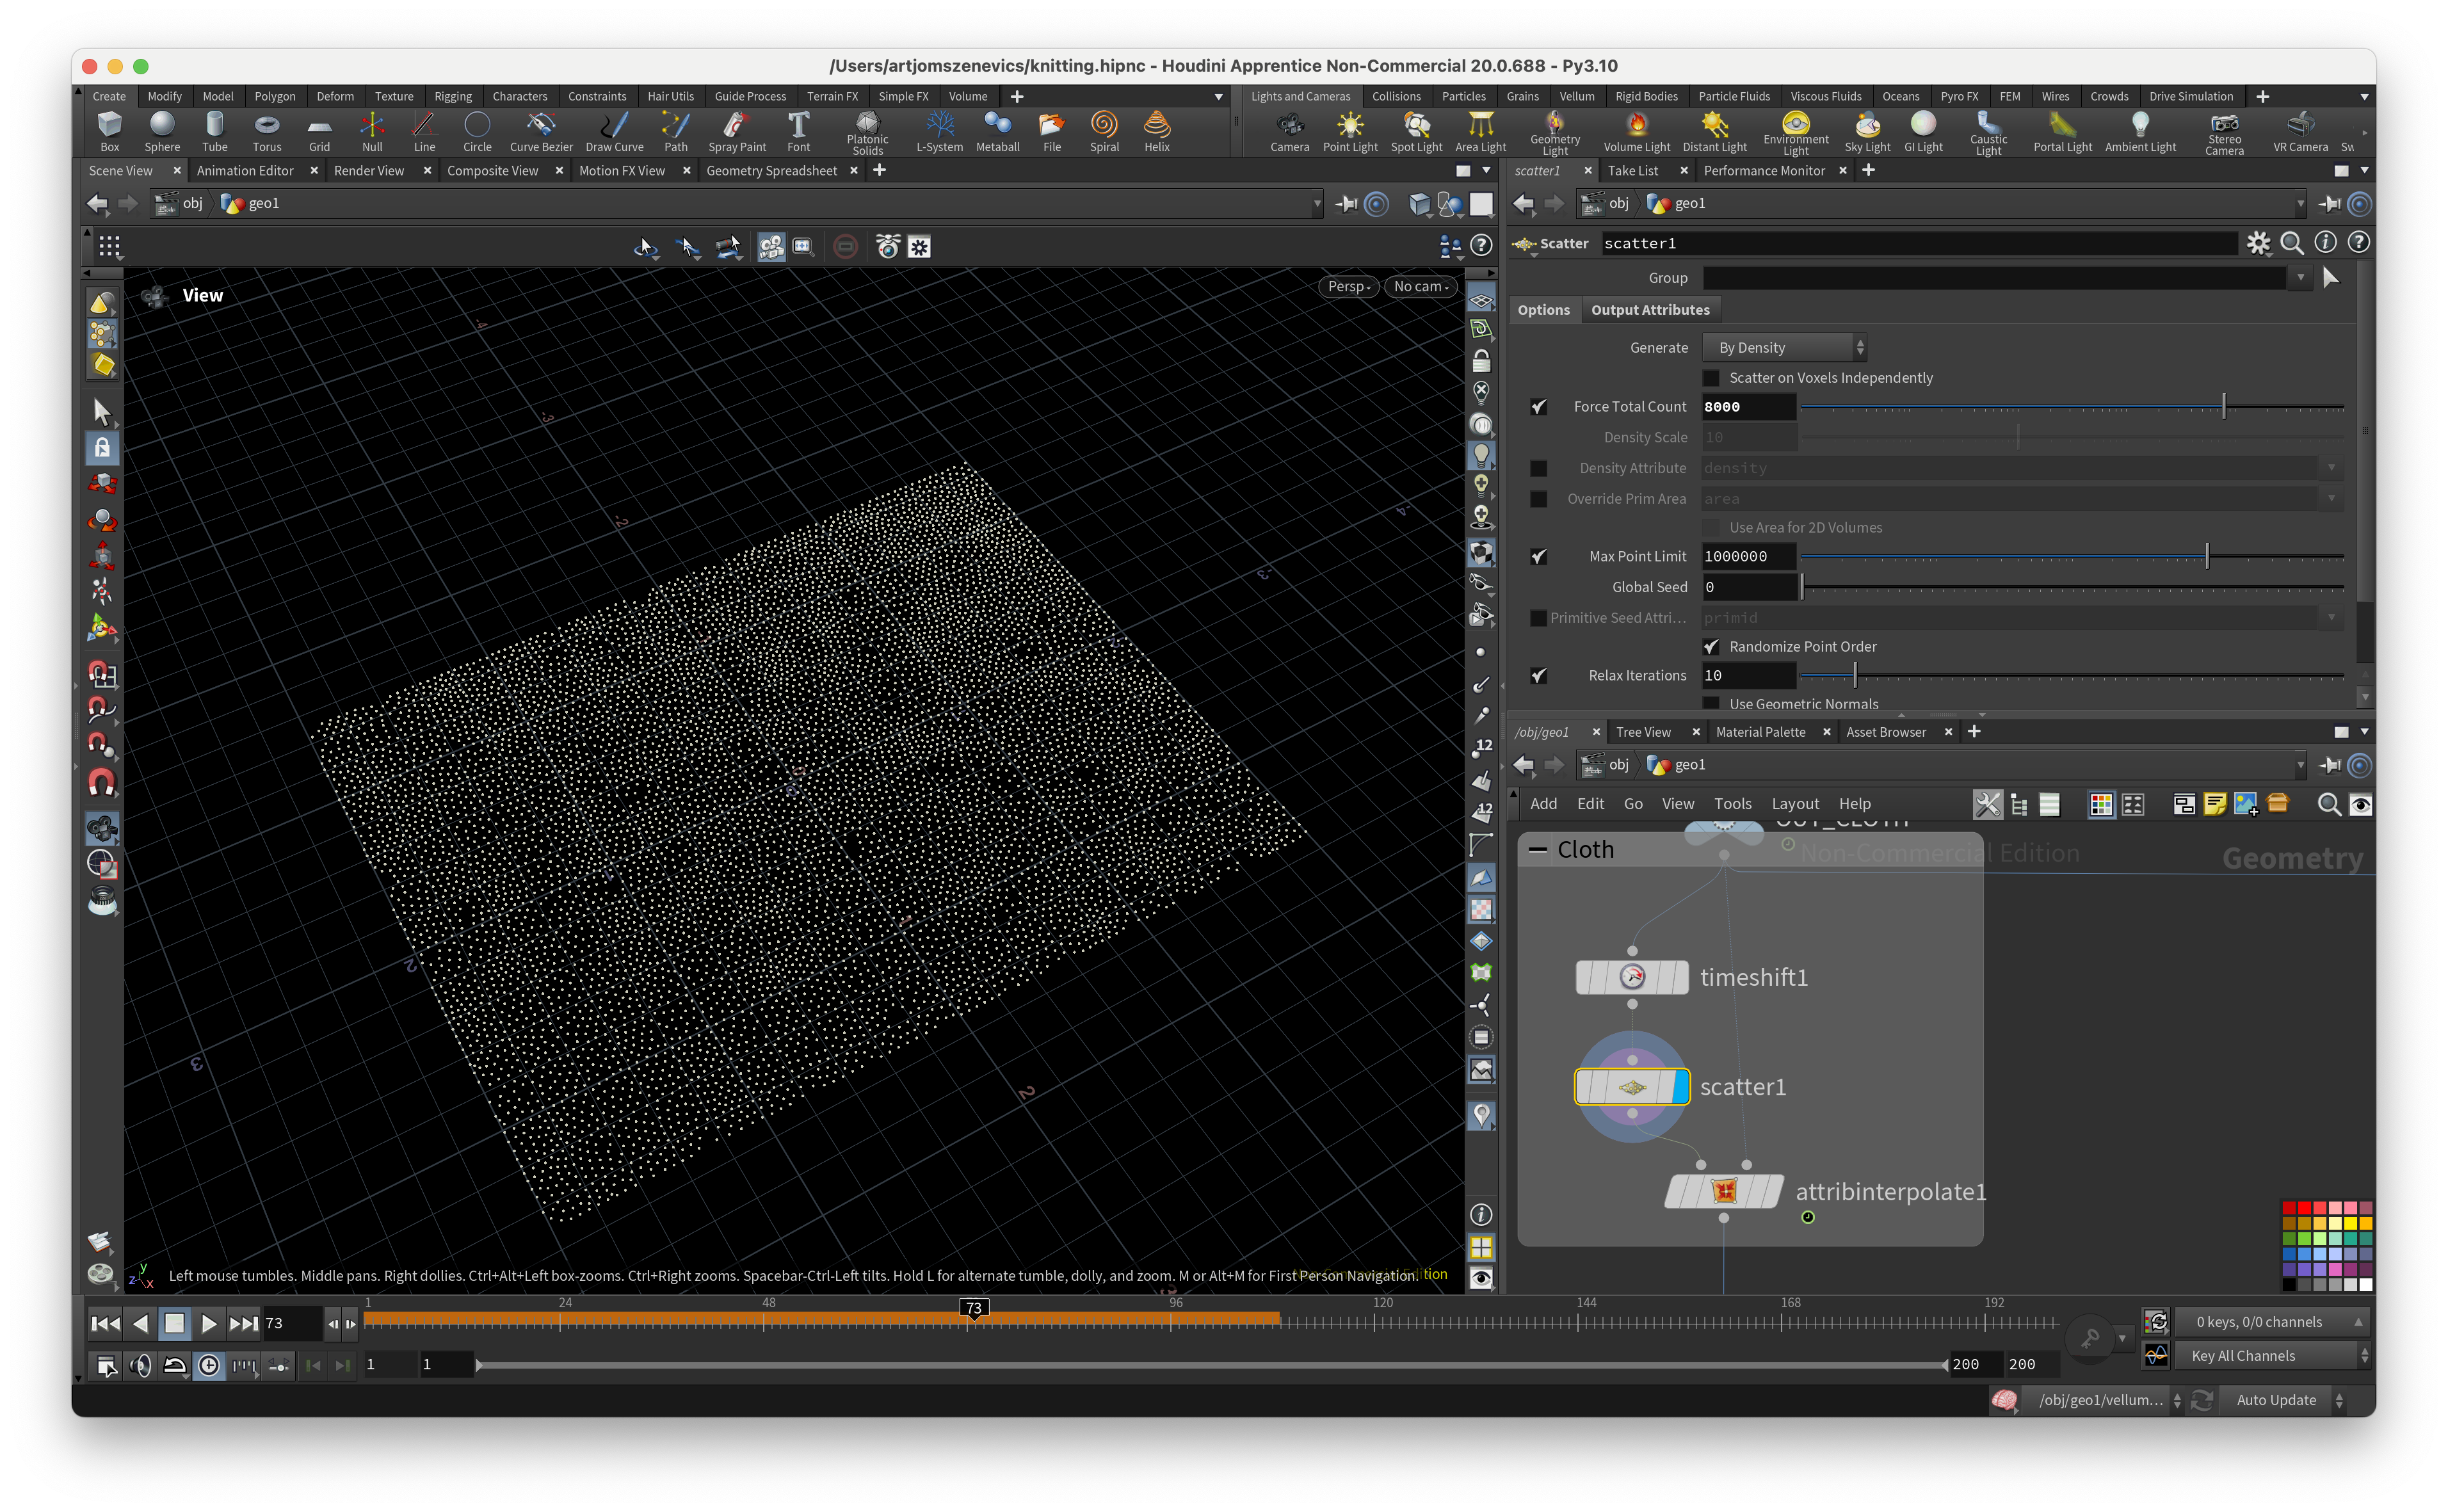
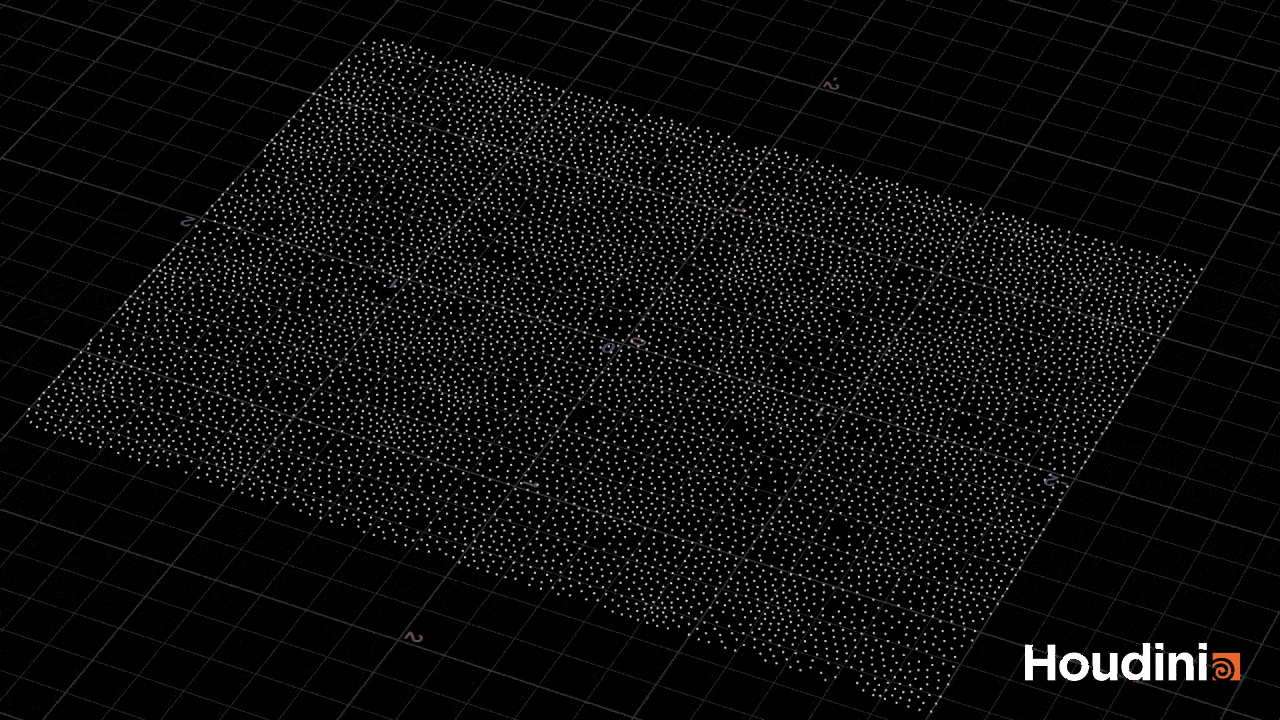
This is how it looks like if we simply plug the Scatter onto the grid:

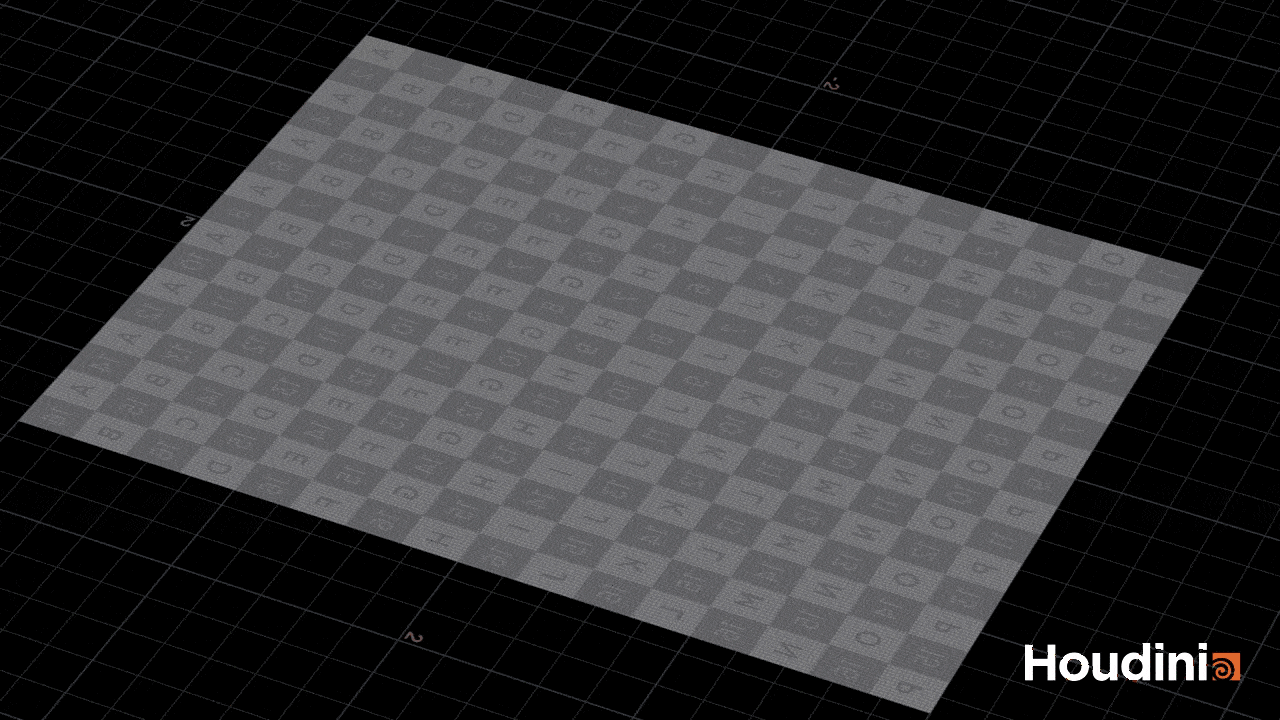
You can see that our points or not glued onto geometry. To fix this Paul tells a really near trick.
We will start with our previously made Vellum simulation and add it to Time Shift. Clear the channel so that it’s fixed to a specific timeframe.
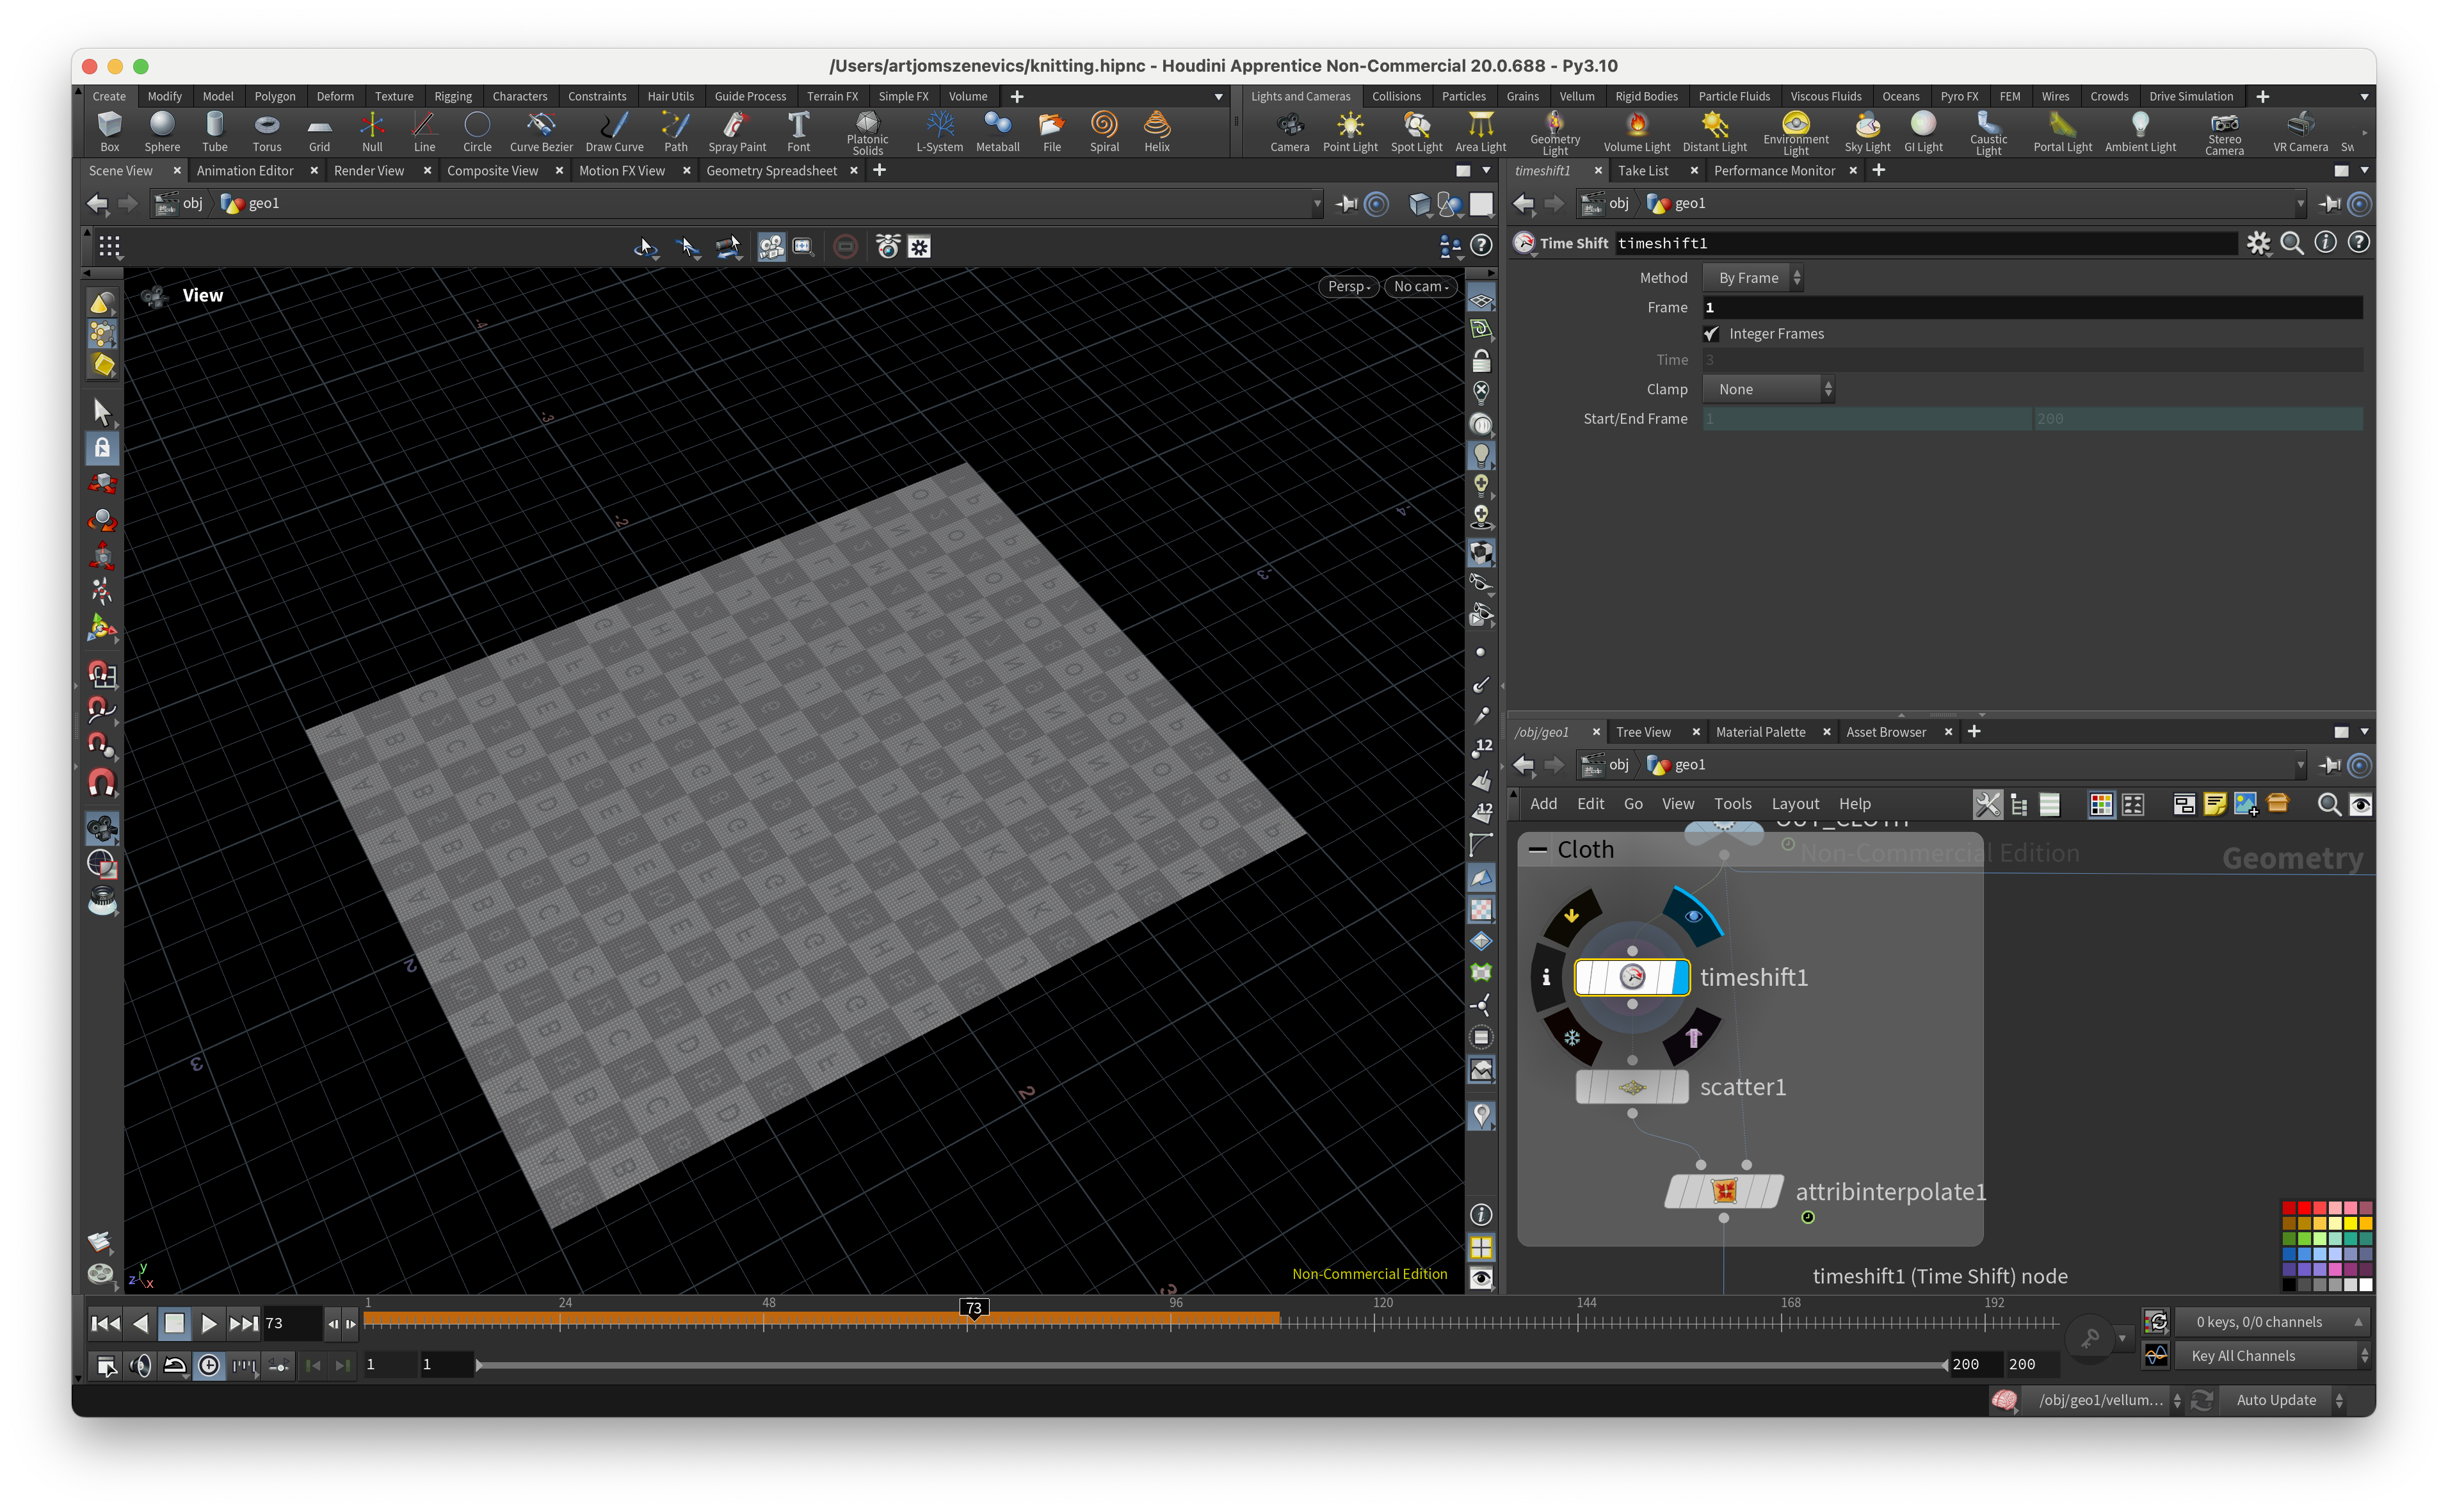
Step 2:
Add a Scatter node. If you play the animation now, you will see that our grid remains static because we have set it to a fixed frame in Time Shift
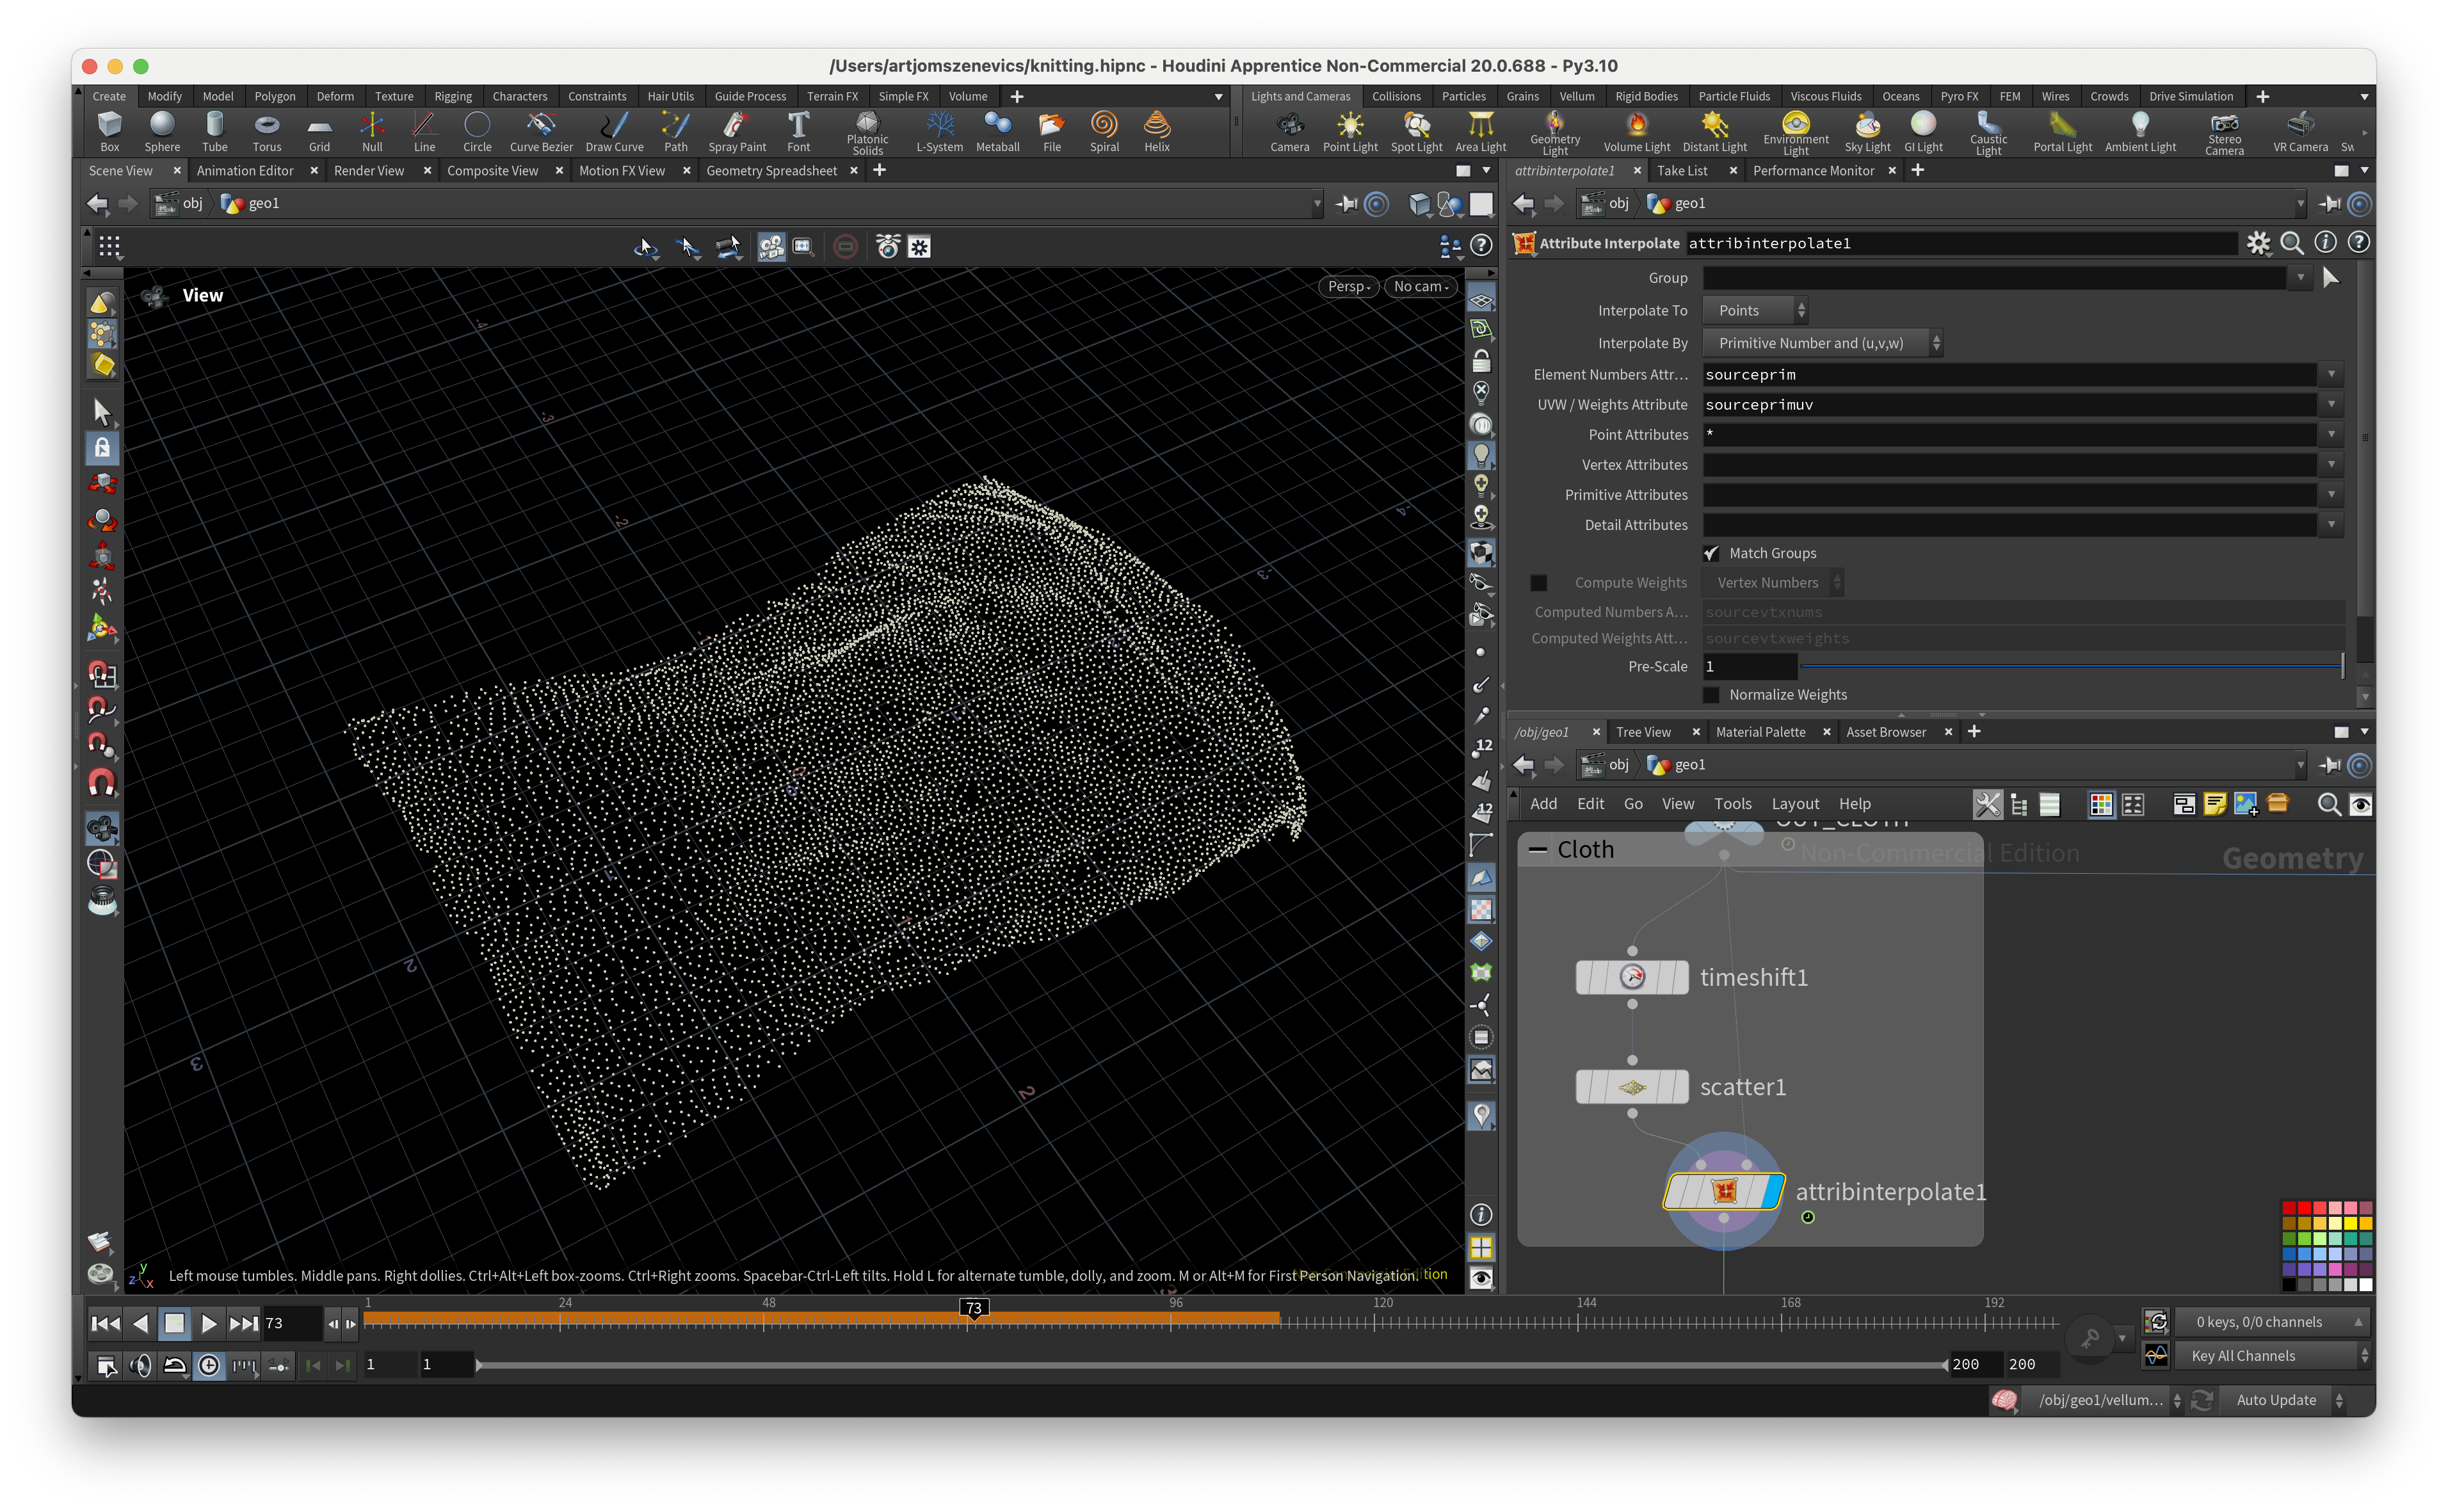
Step 4:
Next, we want to combine the stopped scatter on the plane with our noise-animated plane. To do this, we’re going to use a node called Attribute Interpolate. But before that, we need to set the output attributes for the scatter; otherwise, it won’t work. In the Output Attributes, turn on the following two options:
• Prim Num Attribute
• Prim UVW Attribute
Step 5:
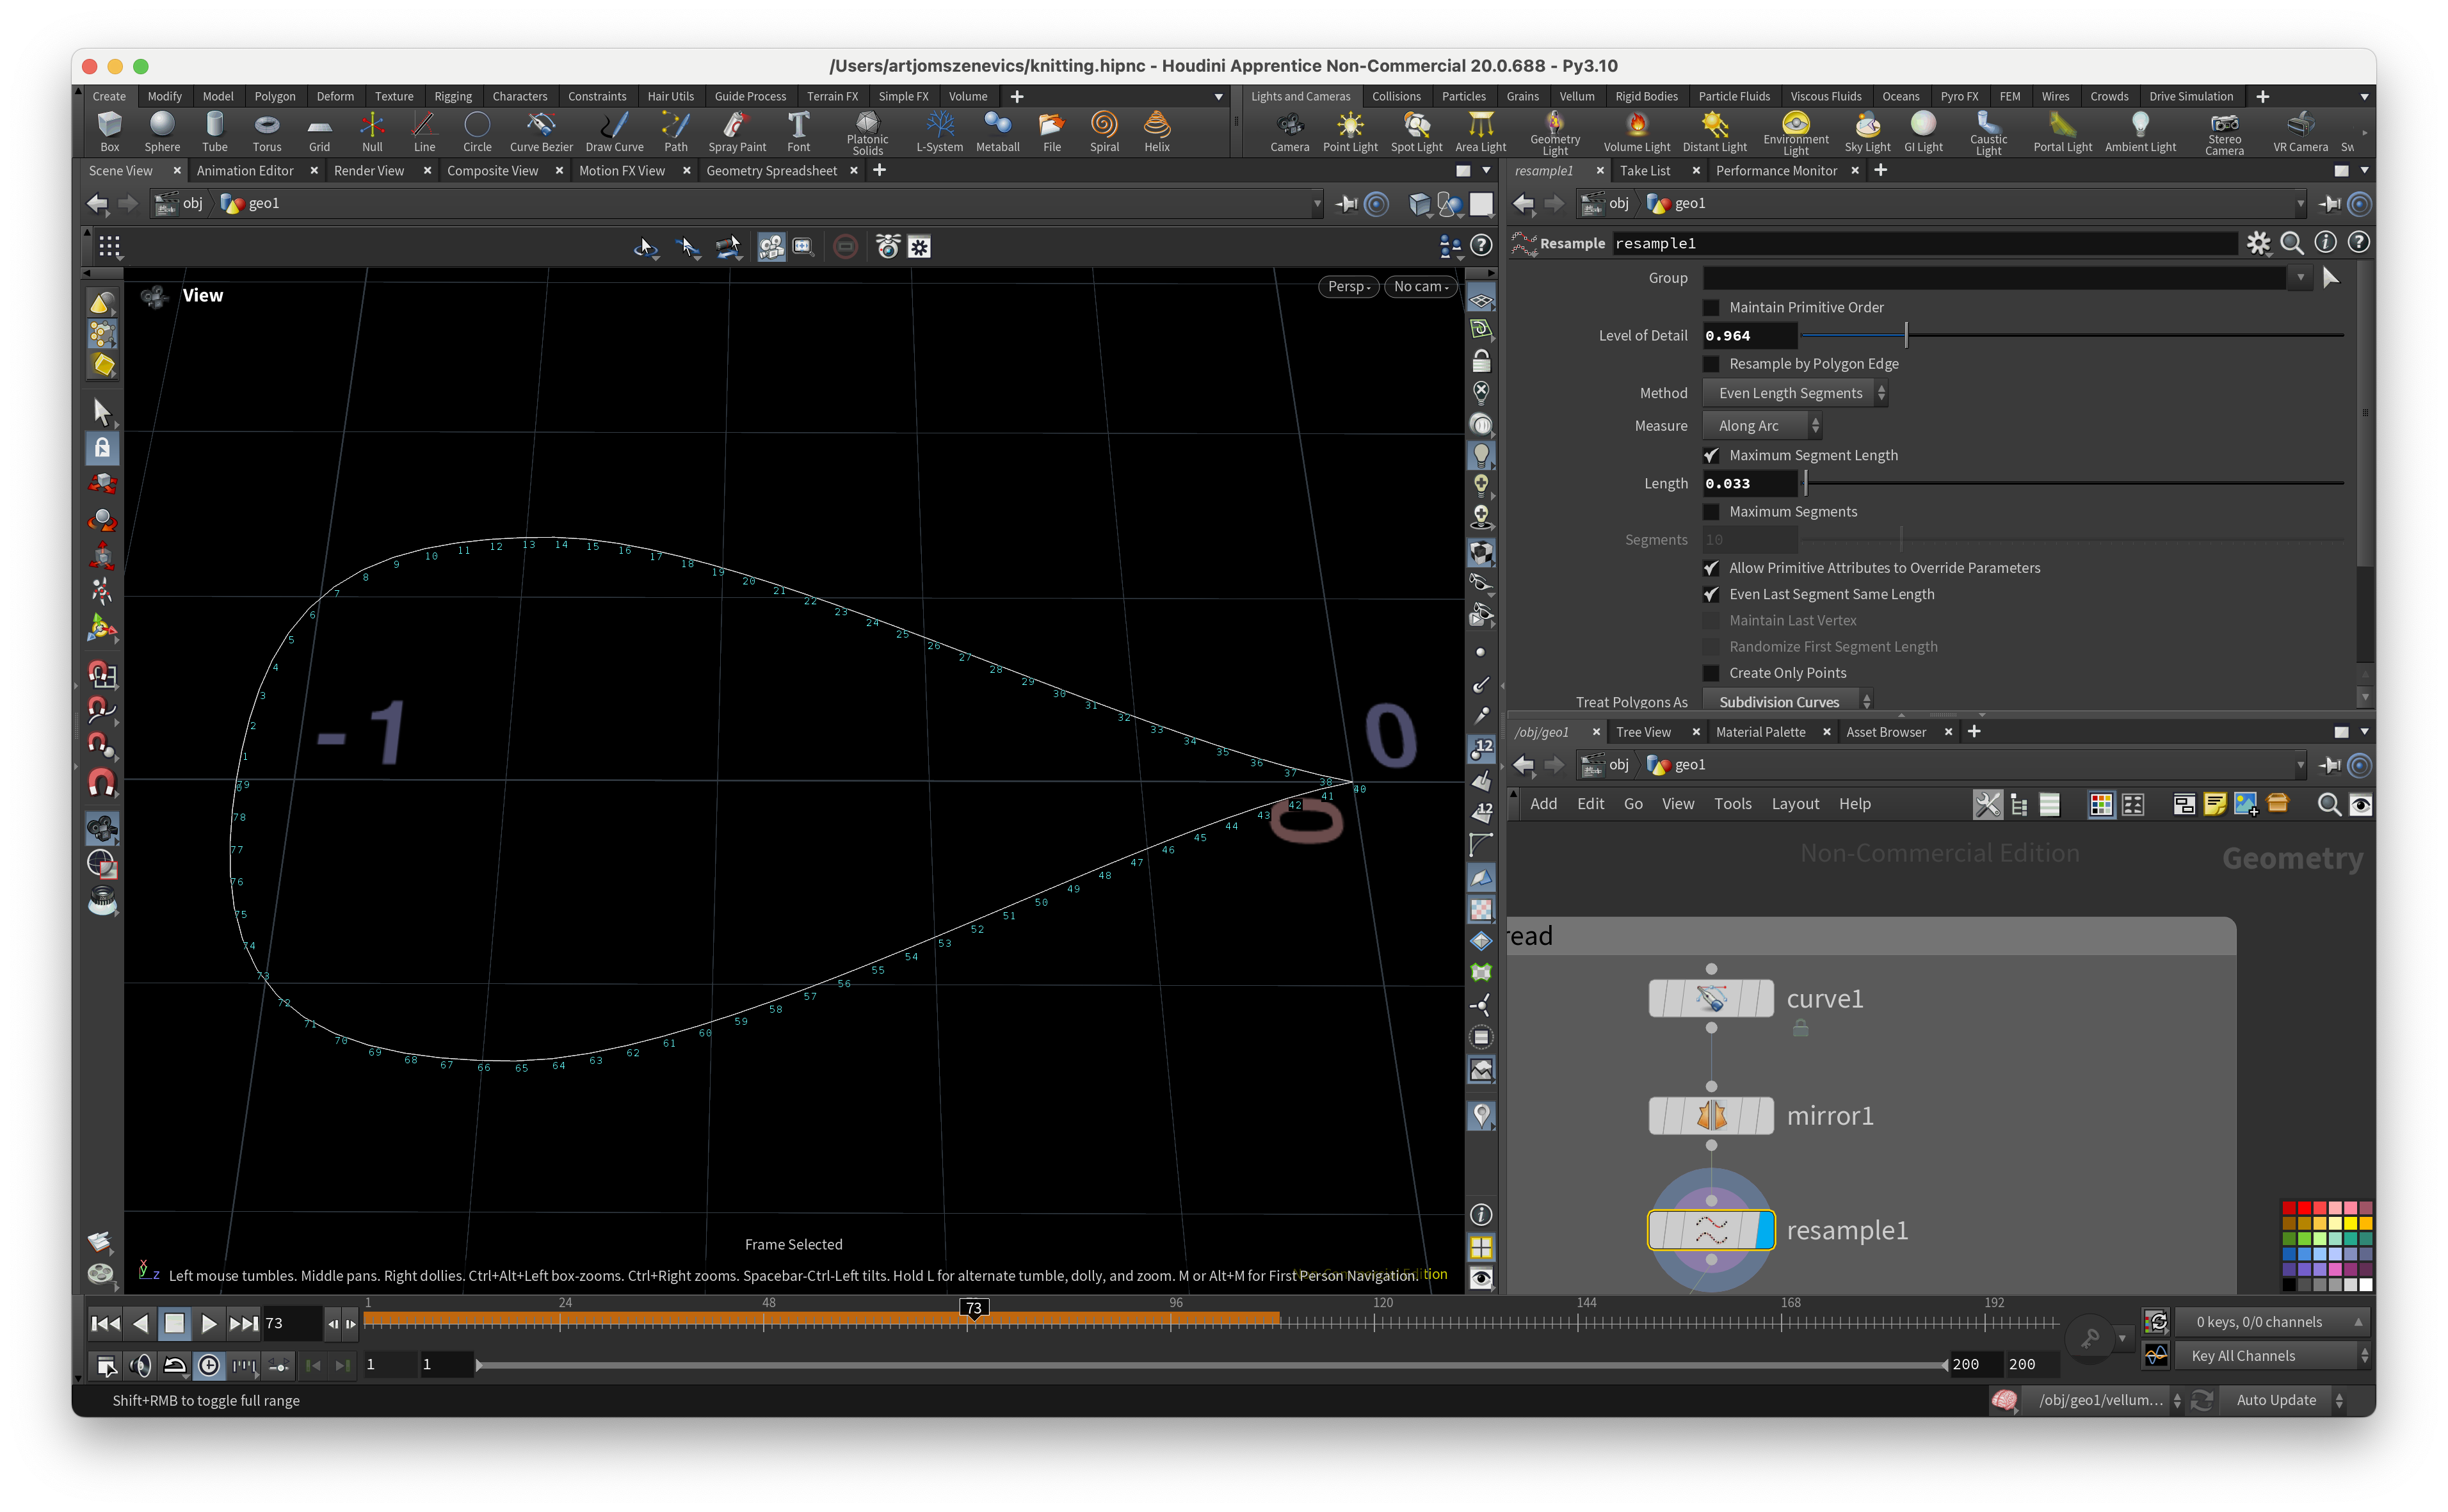
And here’s how Paul creates the thread. Start by creating a Curve.

Step 6:
Add a Mirror node.

Step 7:
Add a Resample node.
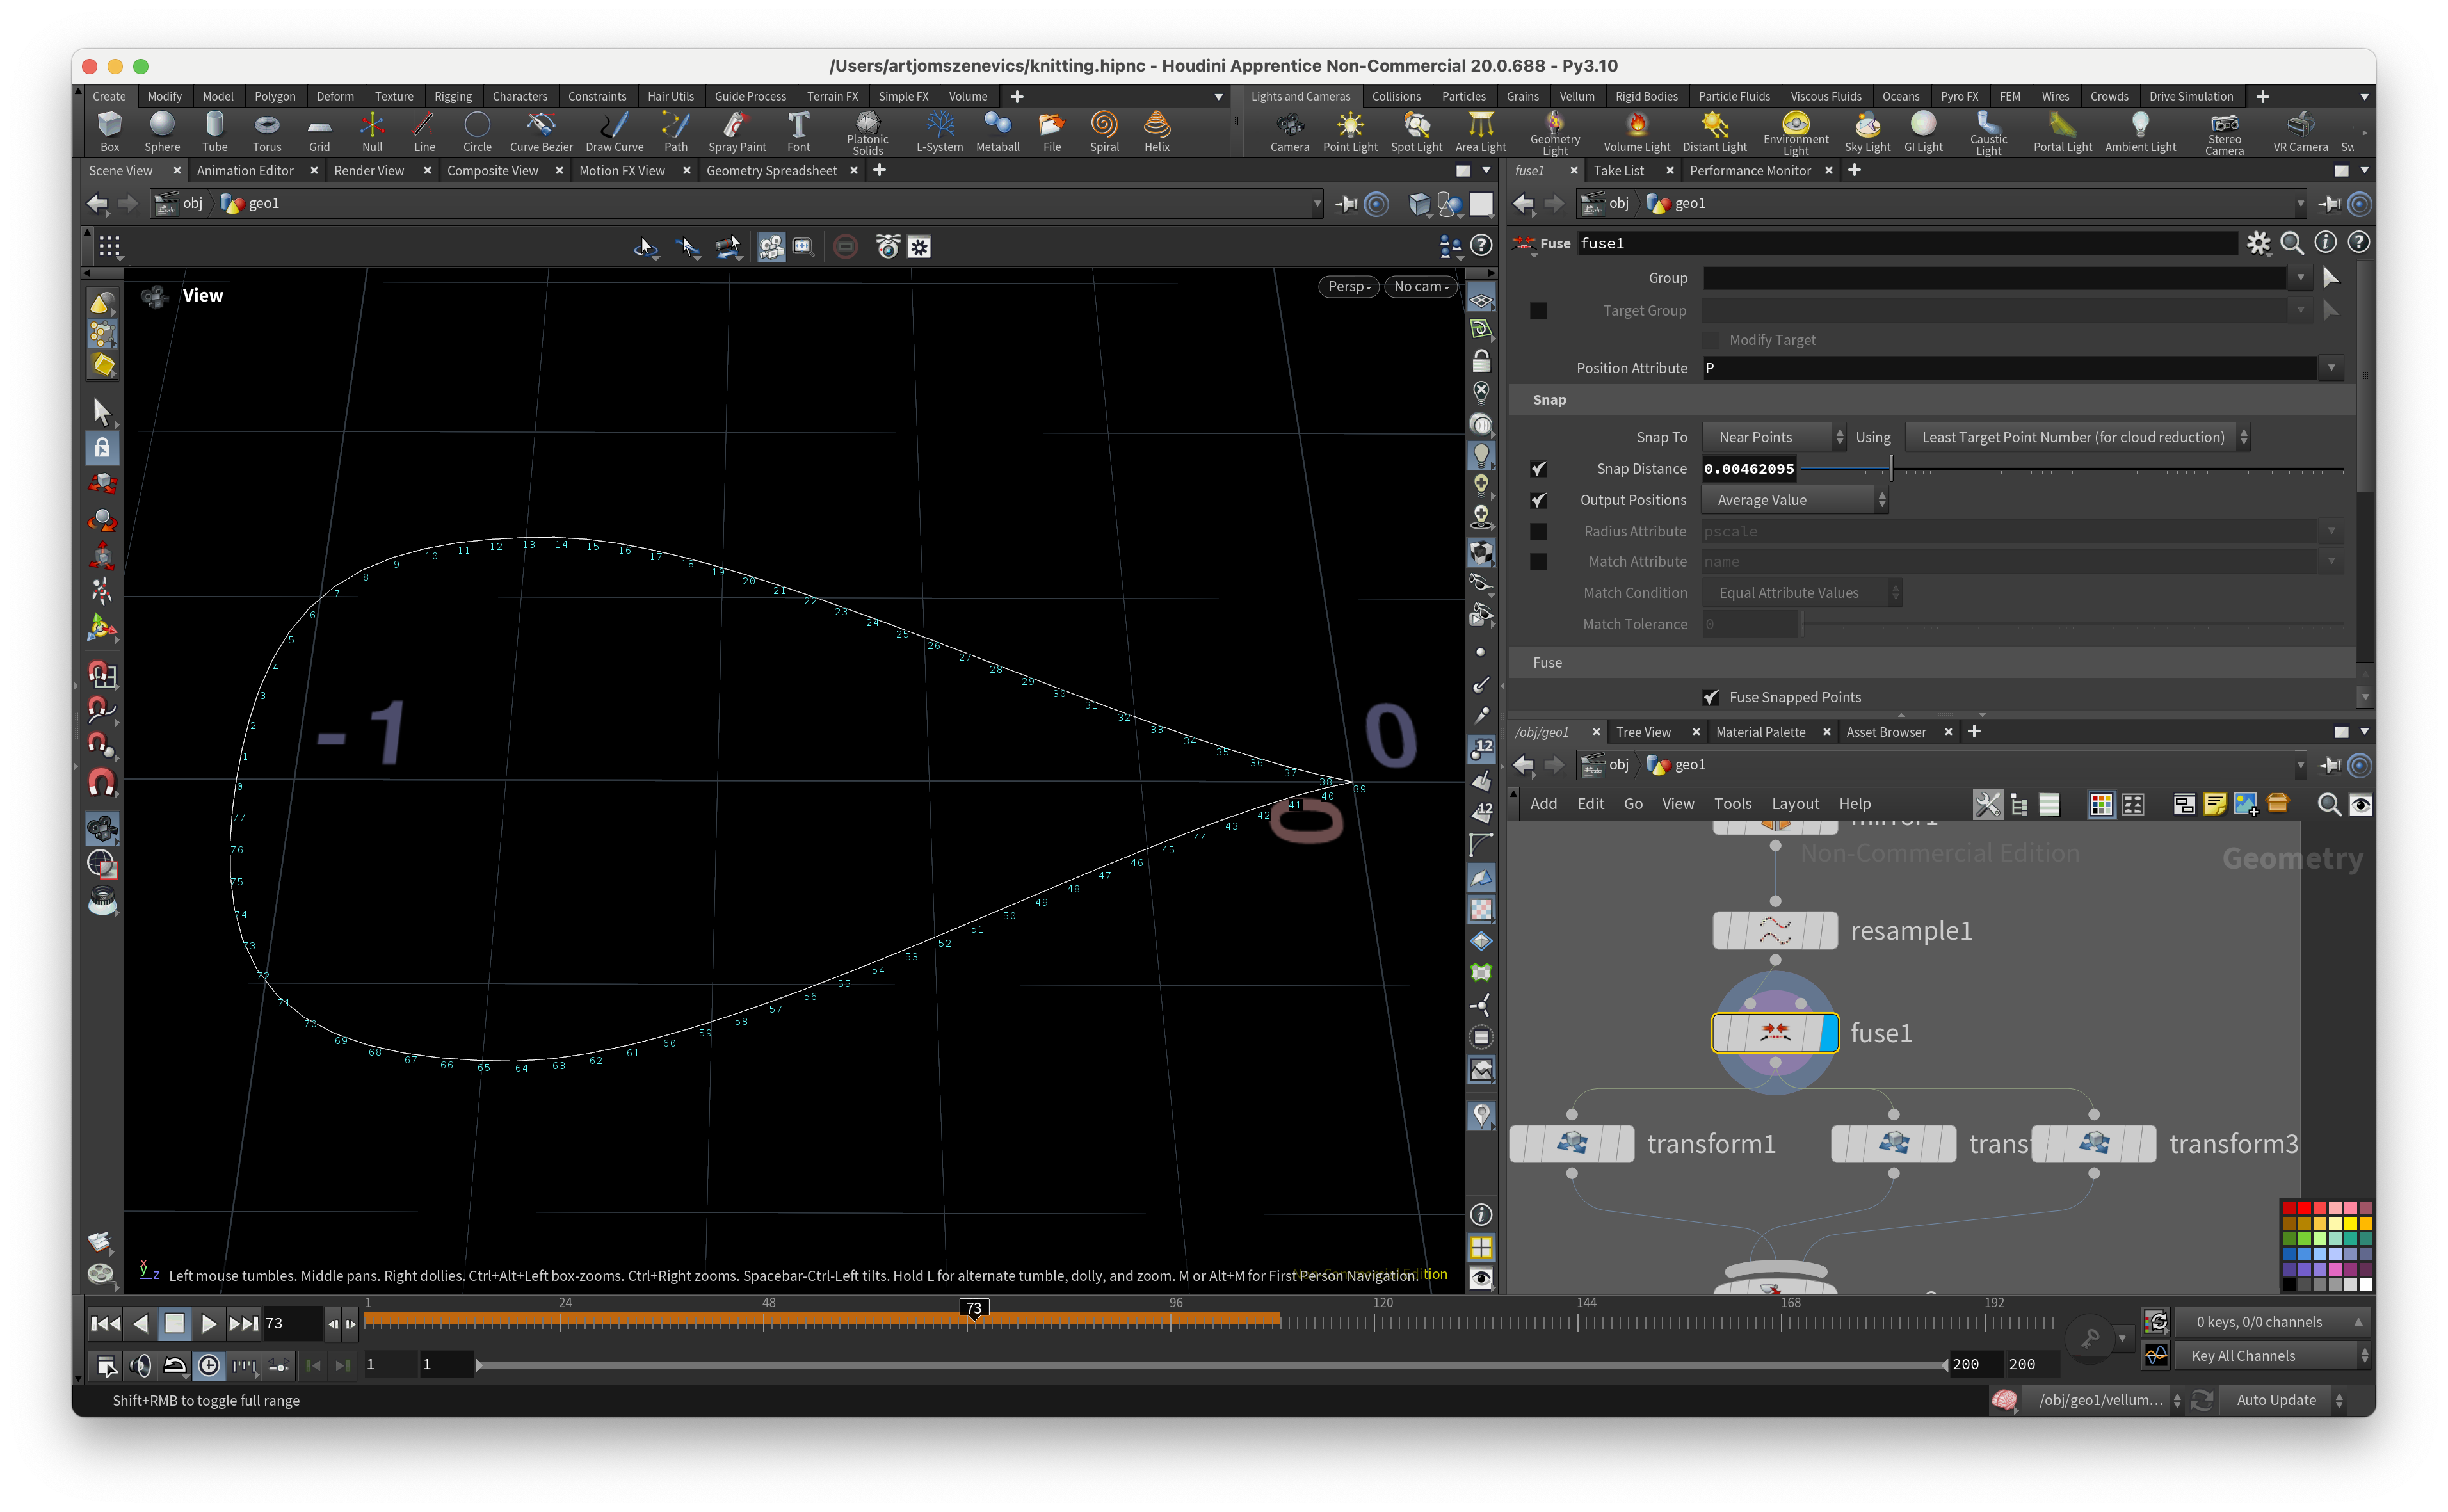
Step 8:
Fuse the curves. Make sure to adjust the Snap Distance so that you have only one point in the middle of the curve.
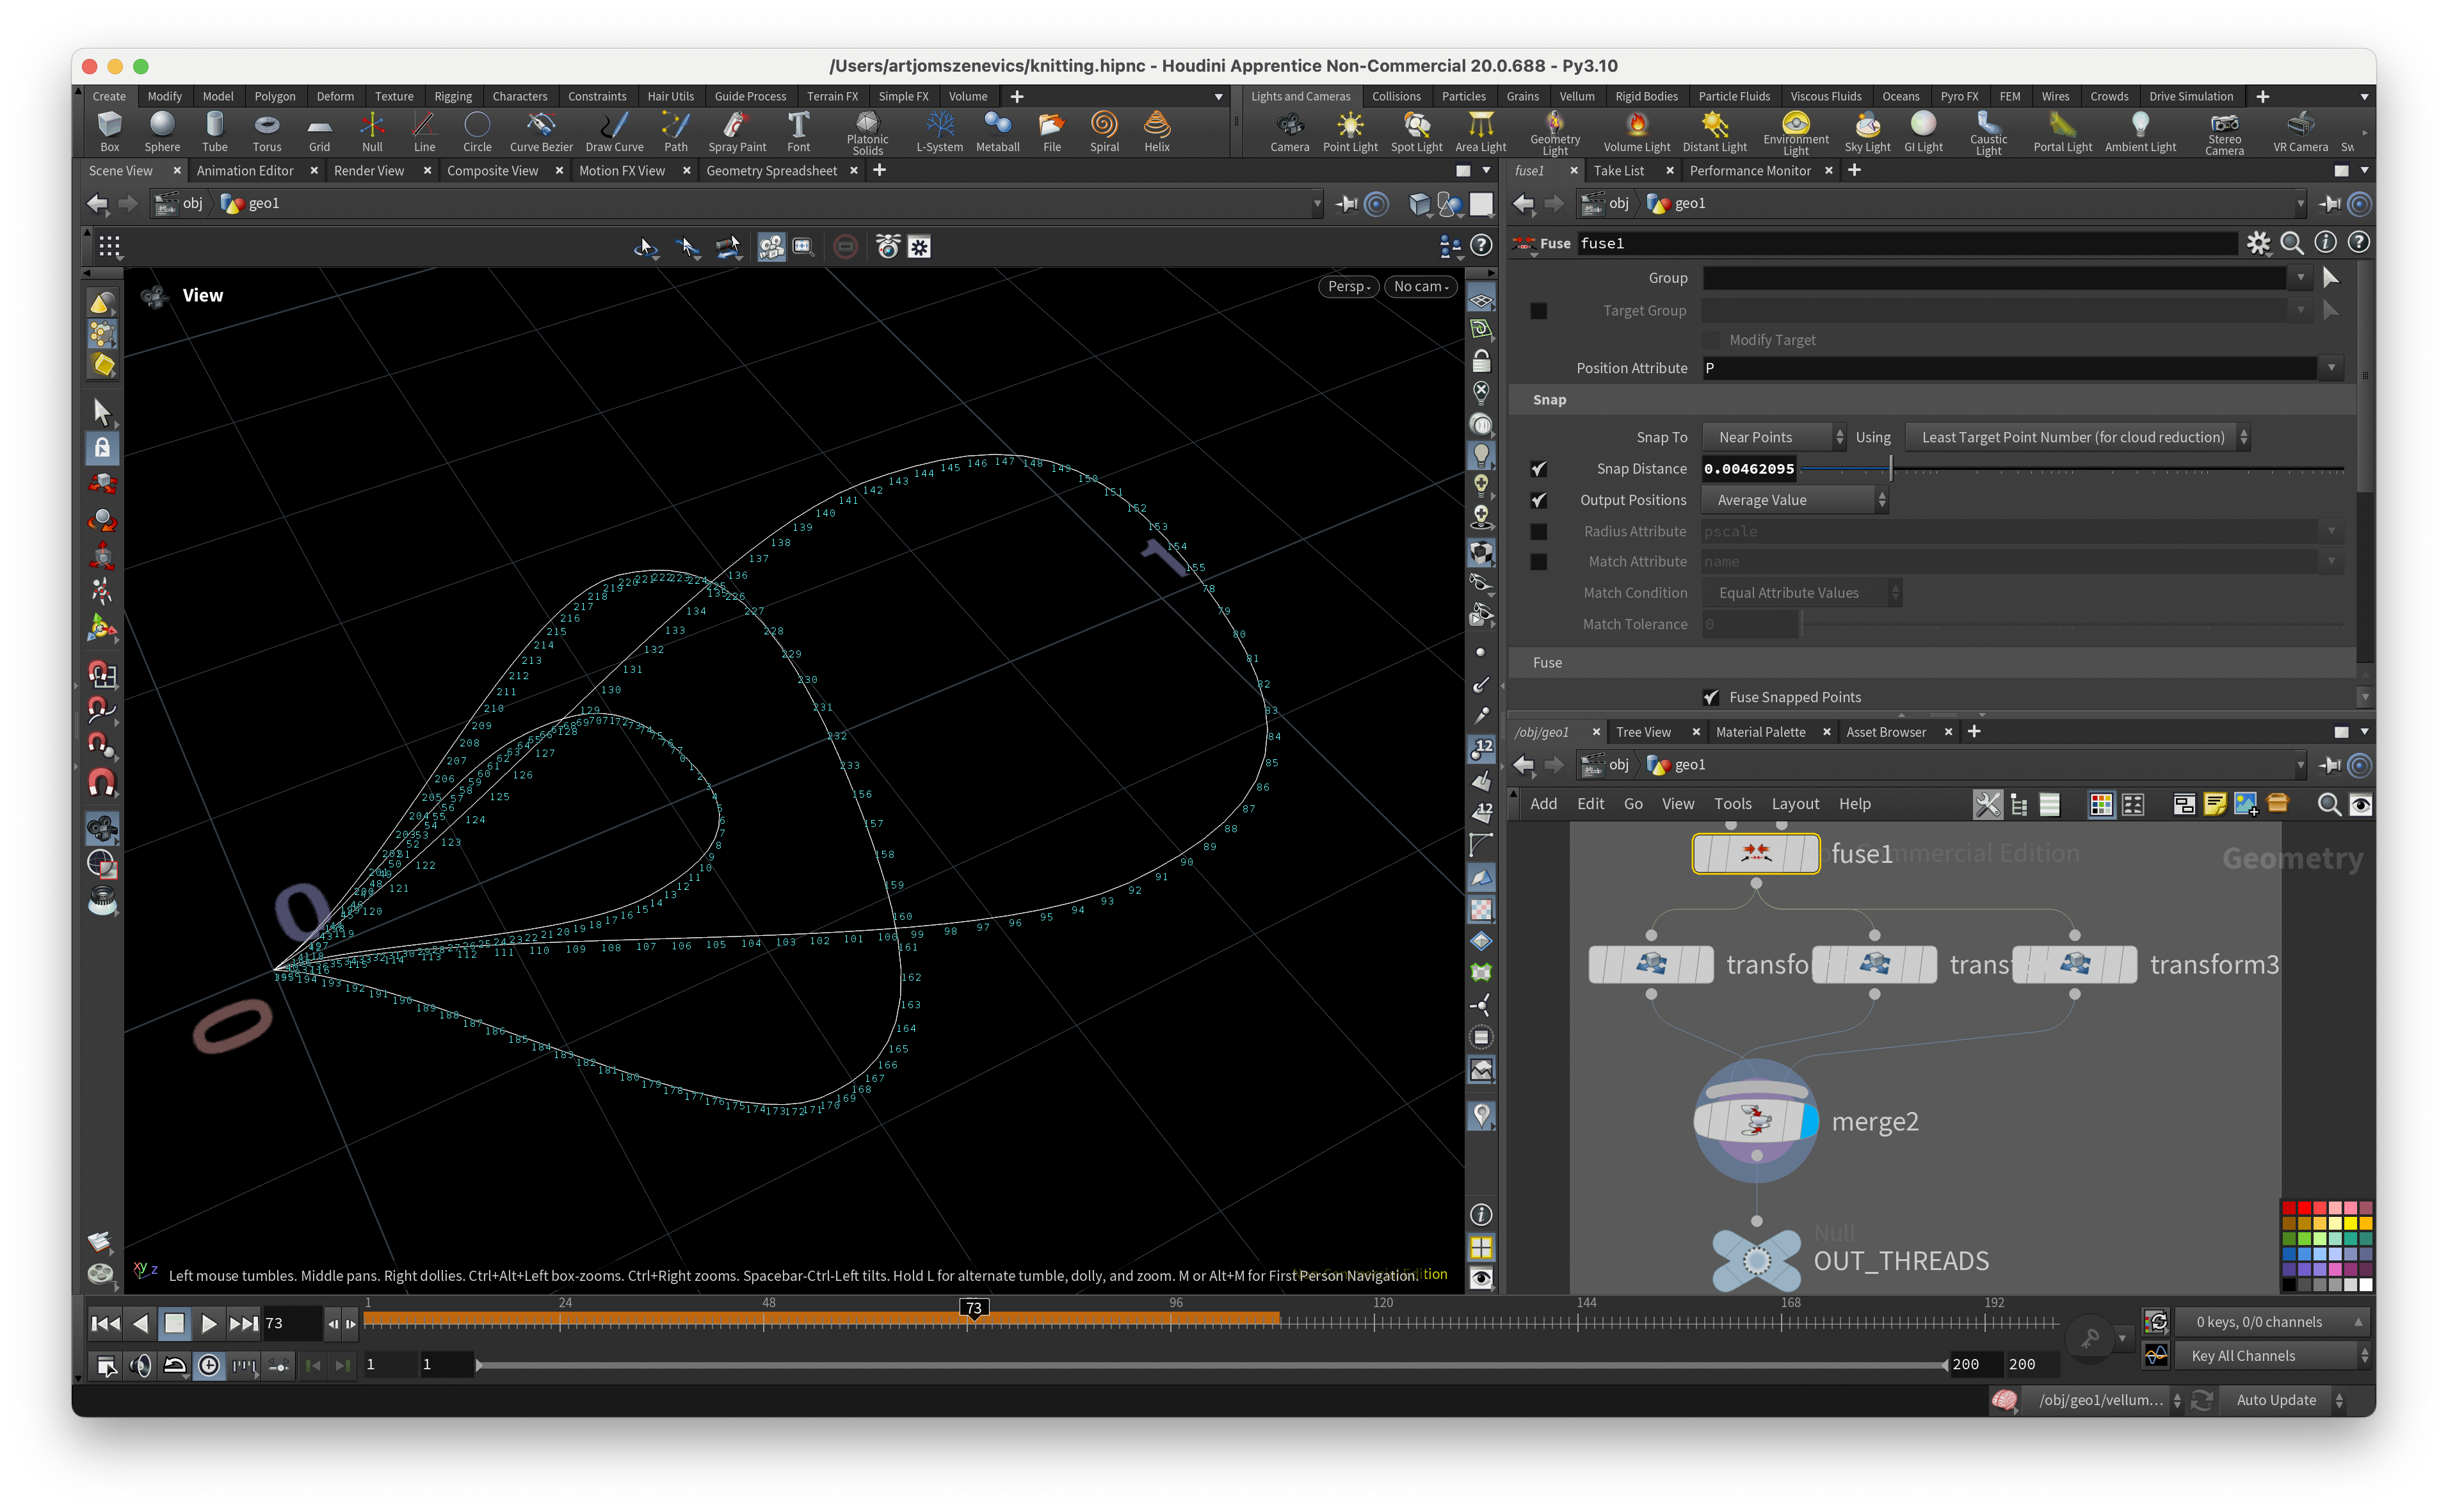
Step 9:
Paul adds a few Transform nodes and adjusts some parameters to give the threads a more organic look. Add a Merge node to see all of our transformed threads together.
PART 3
In the third part, we’re going to start using MOPs, which is essentially a large library of motion design tools for Houdini. Think of it as motion graphics controllers.
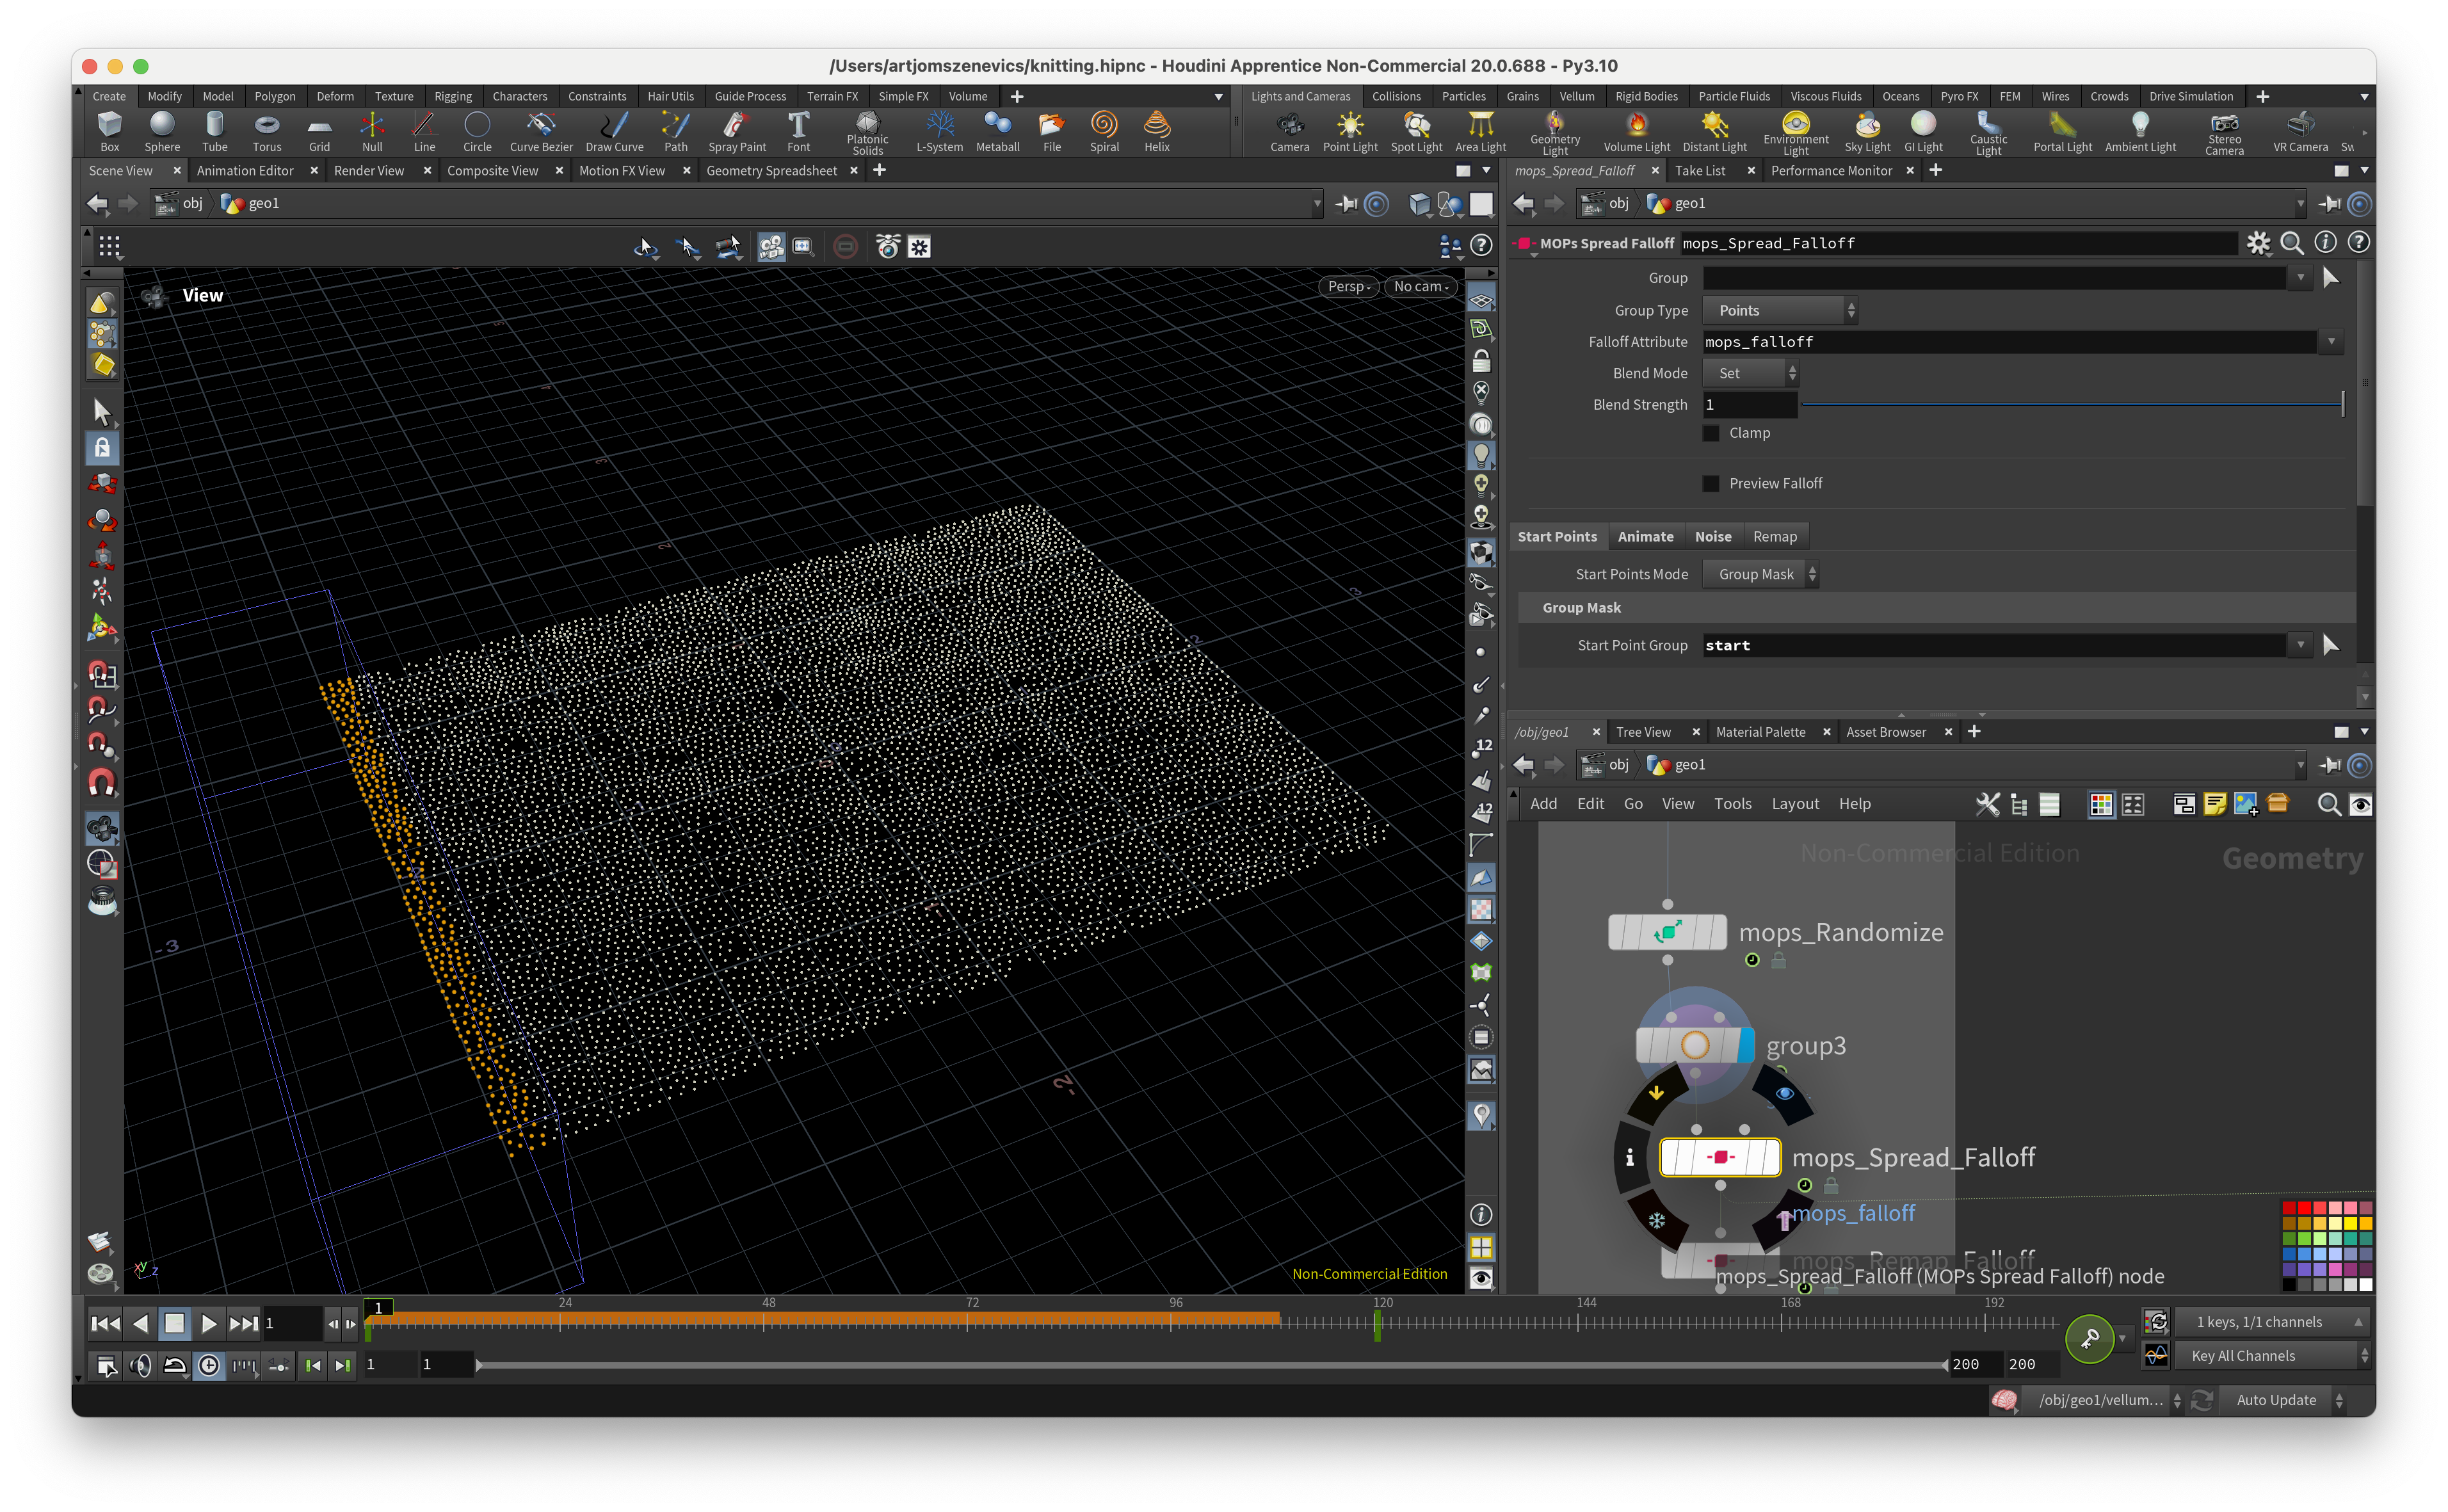
Step 1:
Create either a MOP Shape Falloff or a MOP Spread Falloff.
• With the MOP Shape Falloff, you can choose different shapes, such as Cube, Sphere, or Torus, as your falloff object.
• With the MOP Spread Falloff, you can set a specific point or point group as your falloff starting position, and the animation will behave like an infection spreading.
We will use Vellum simulation with the MOP Spread Falloff.
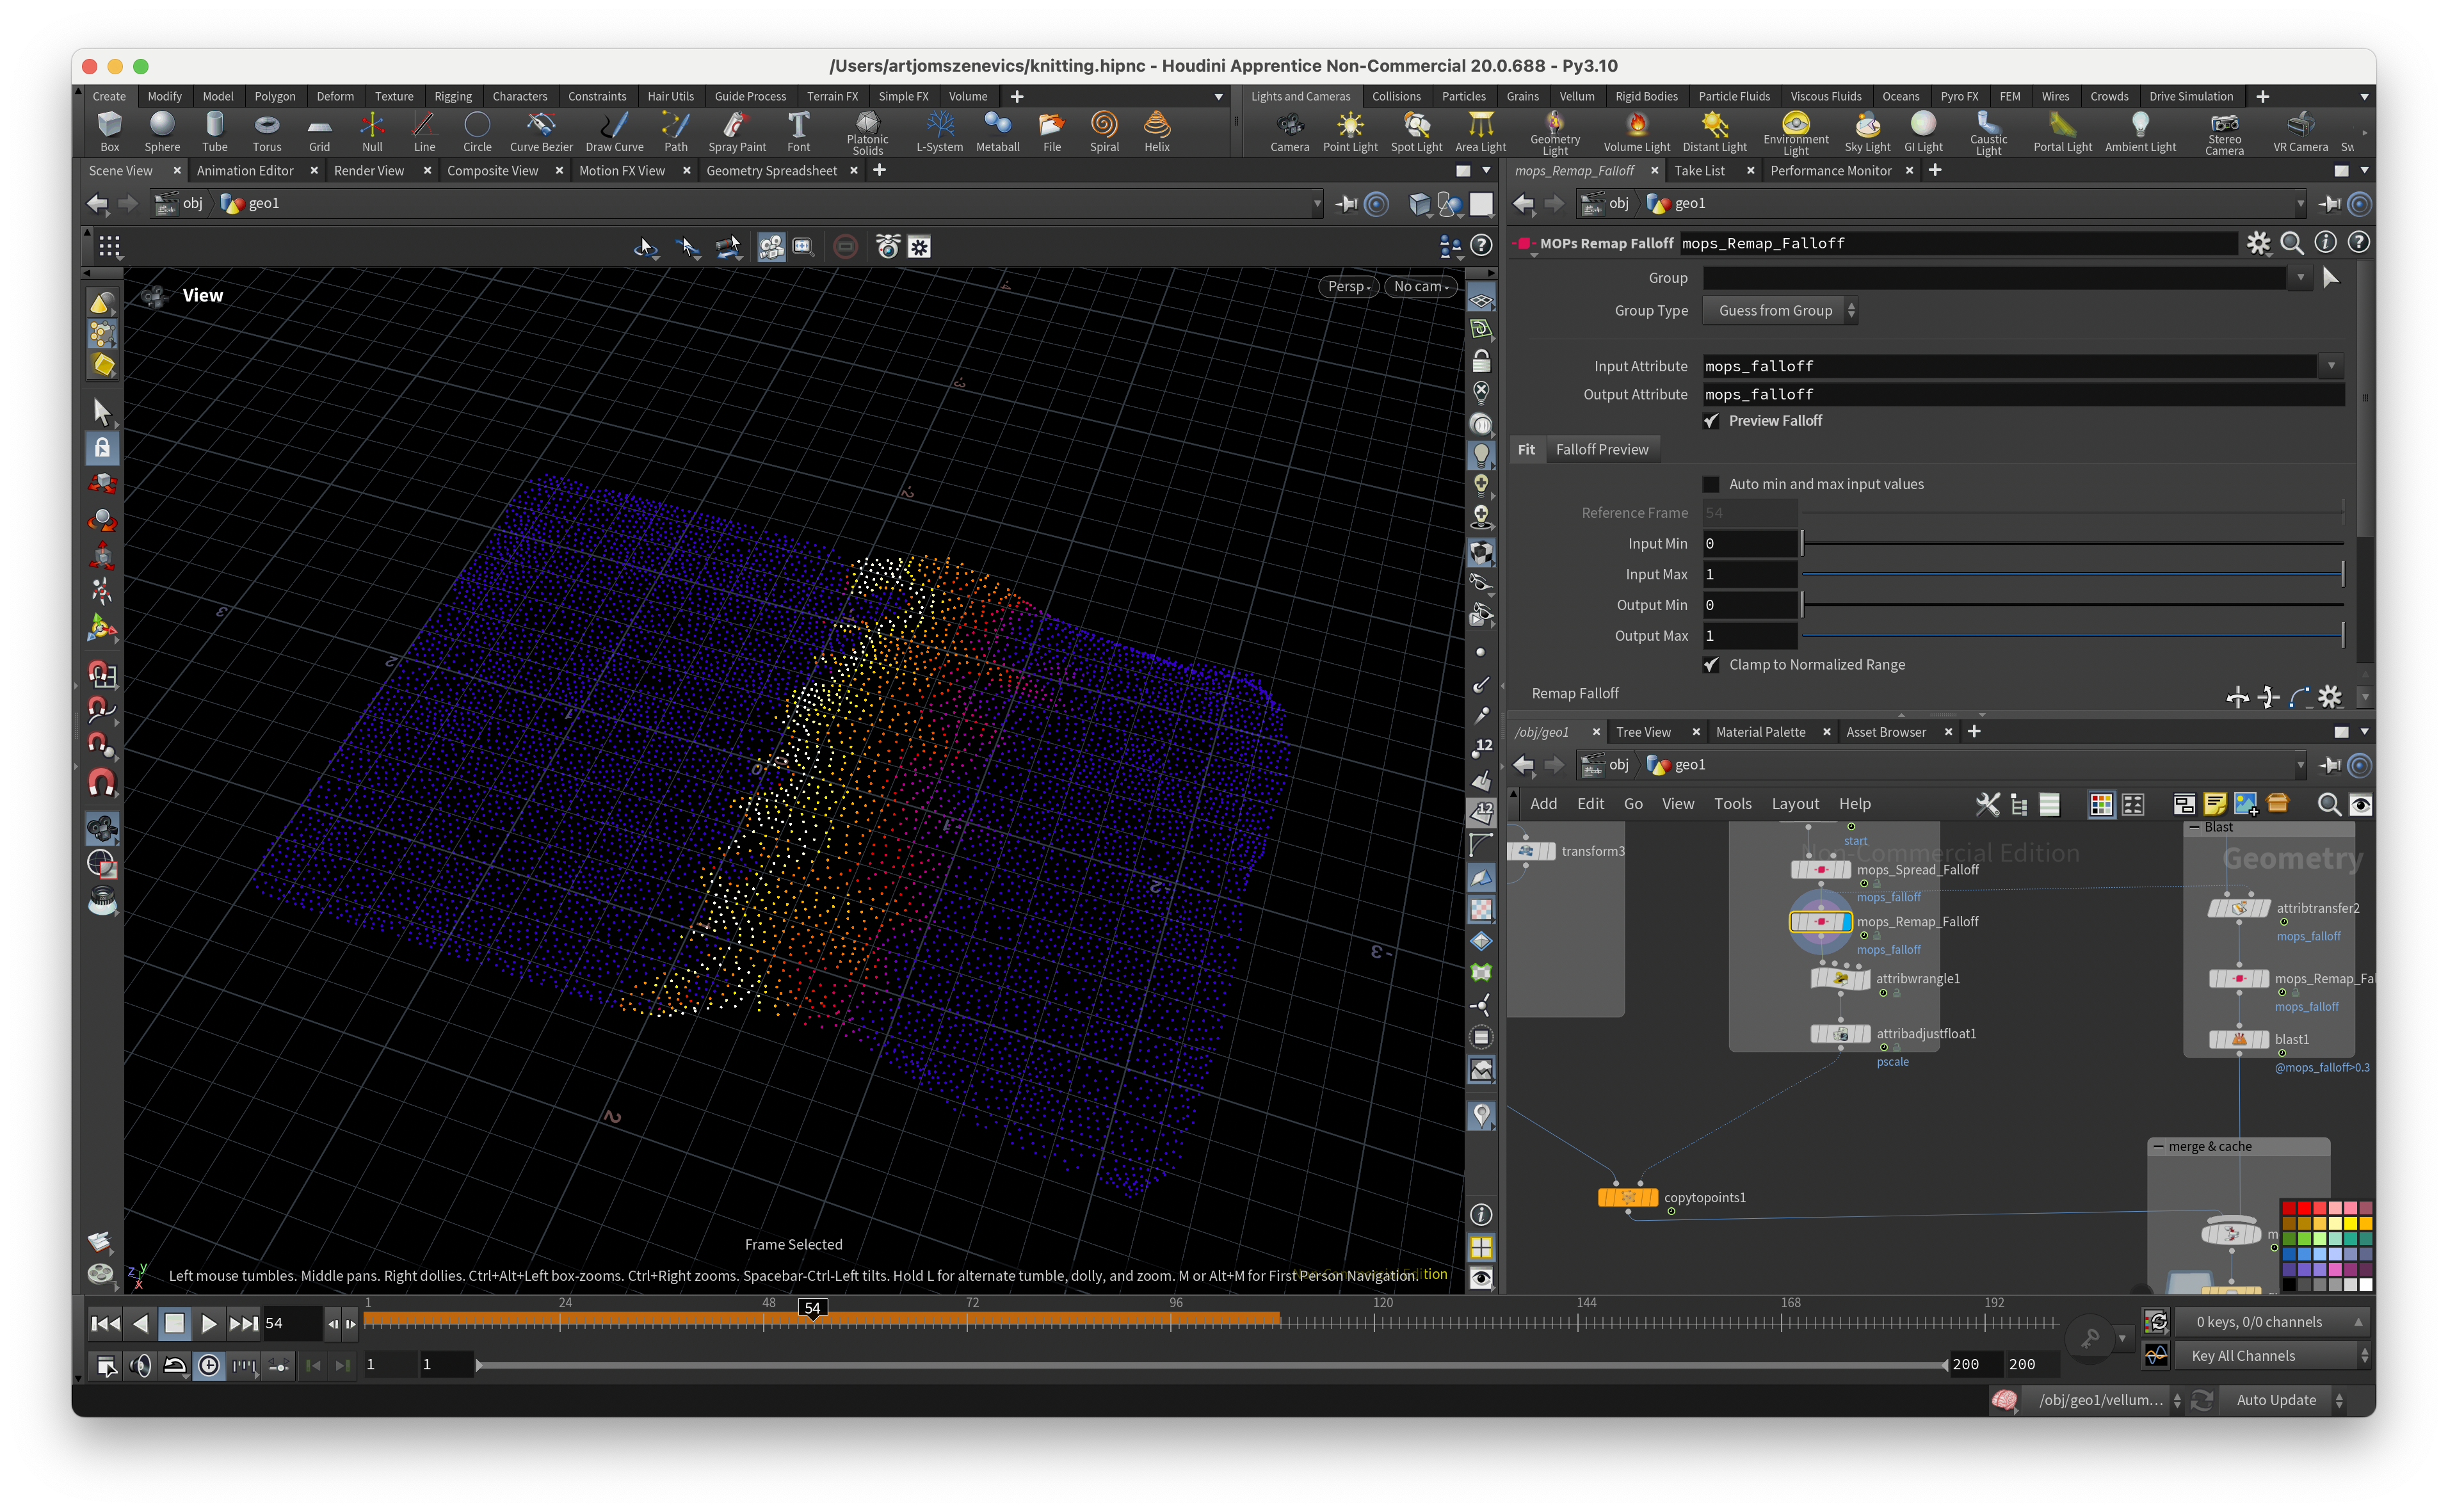
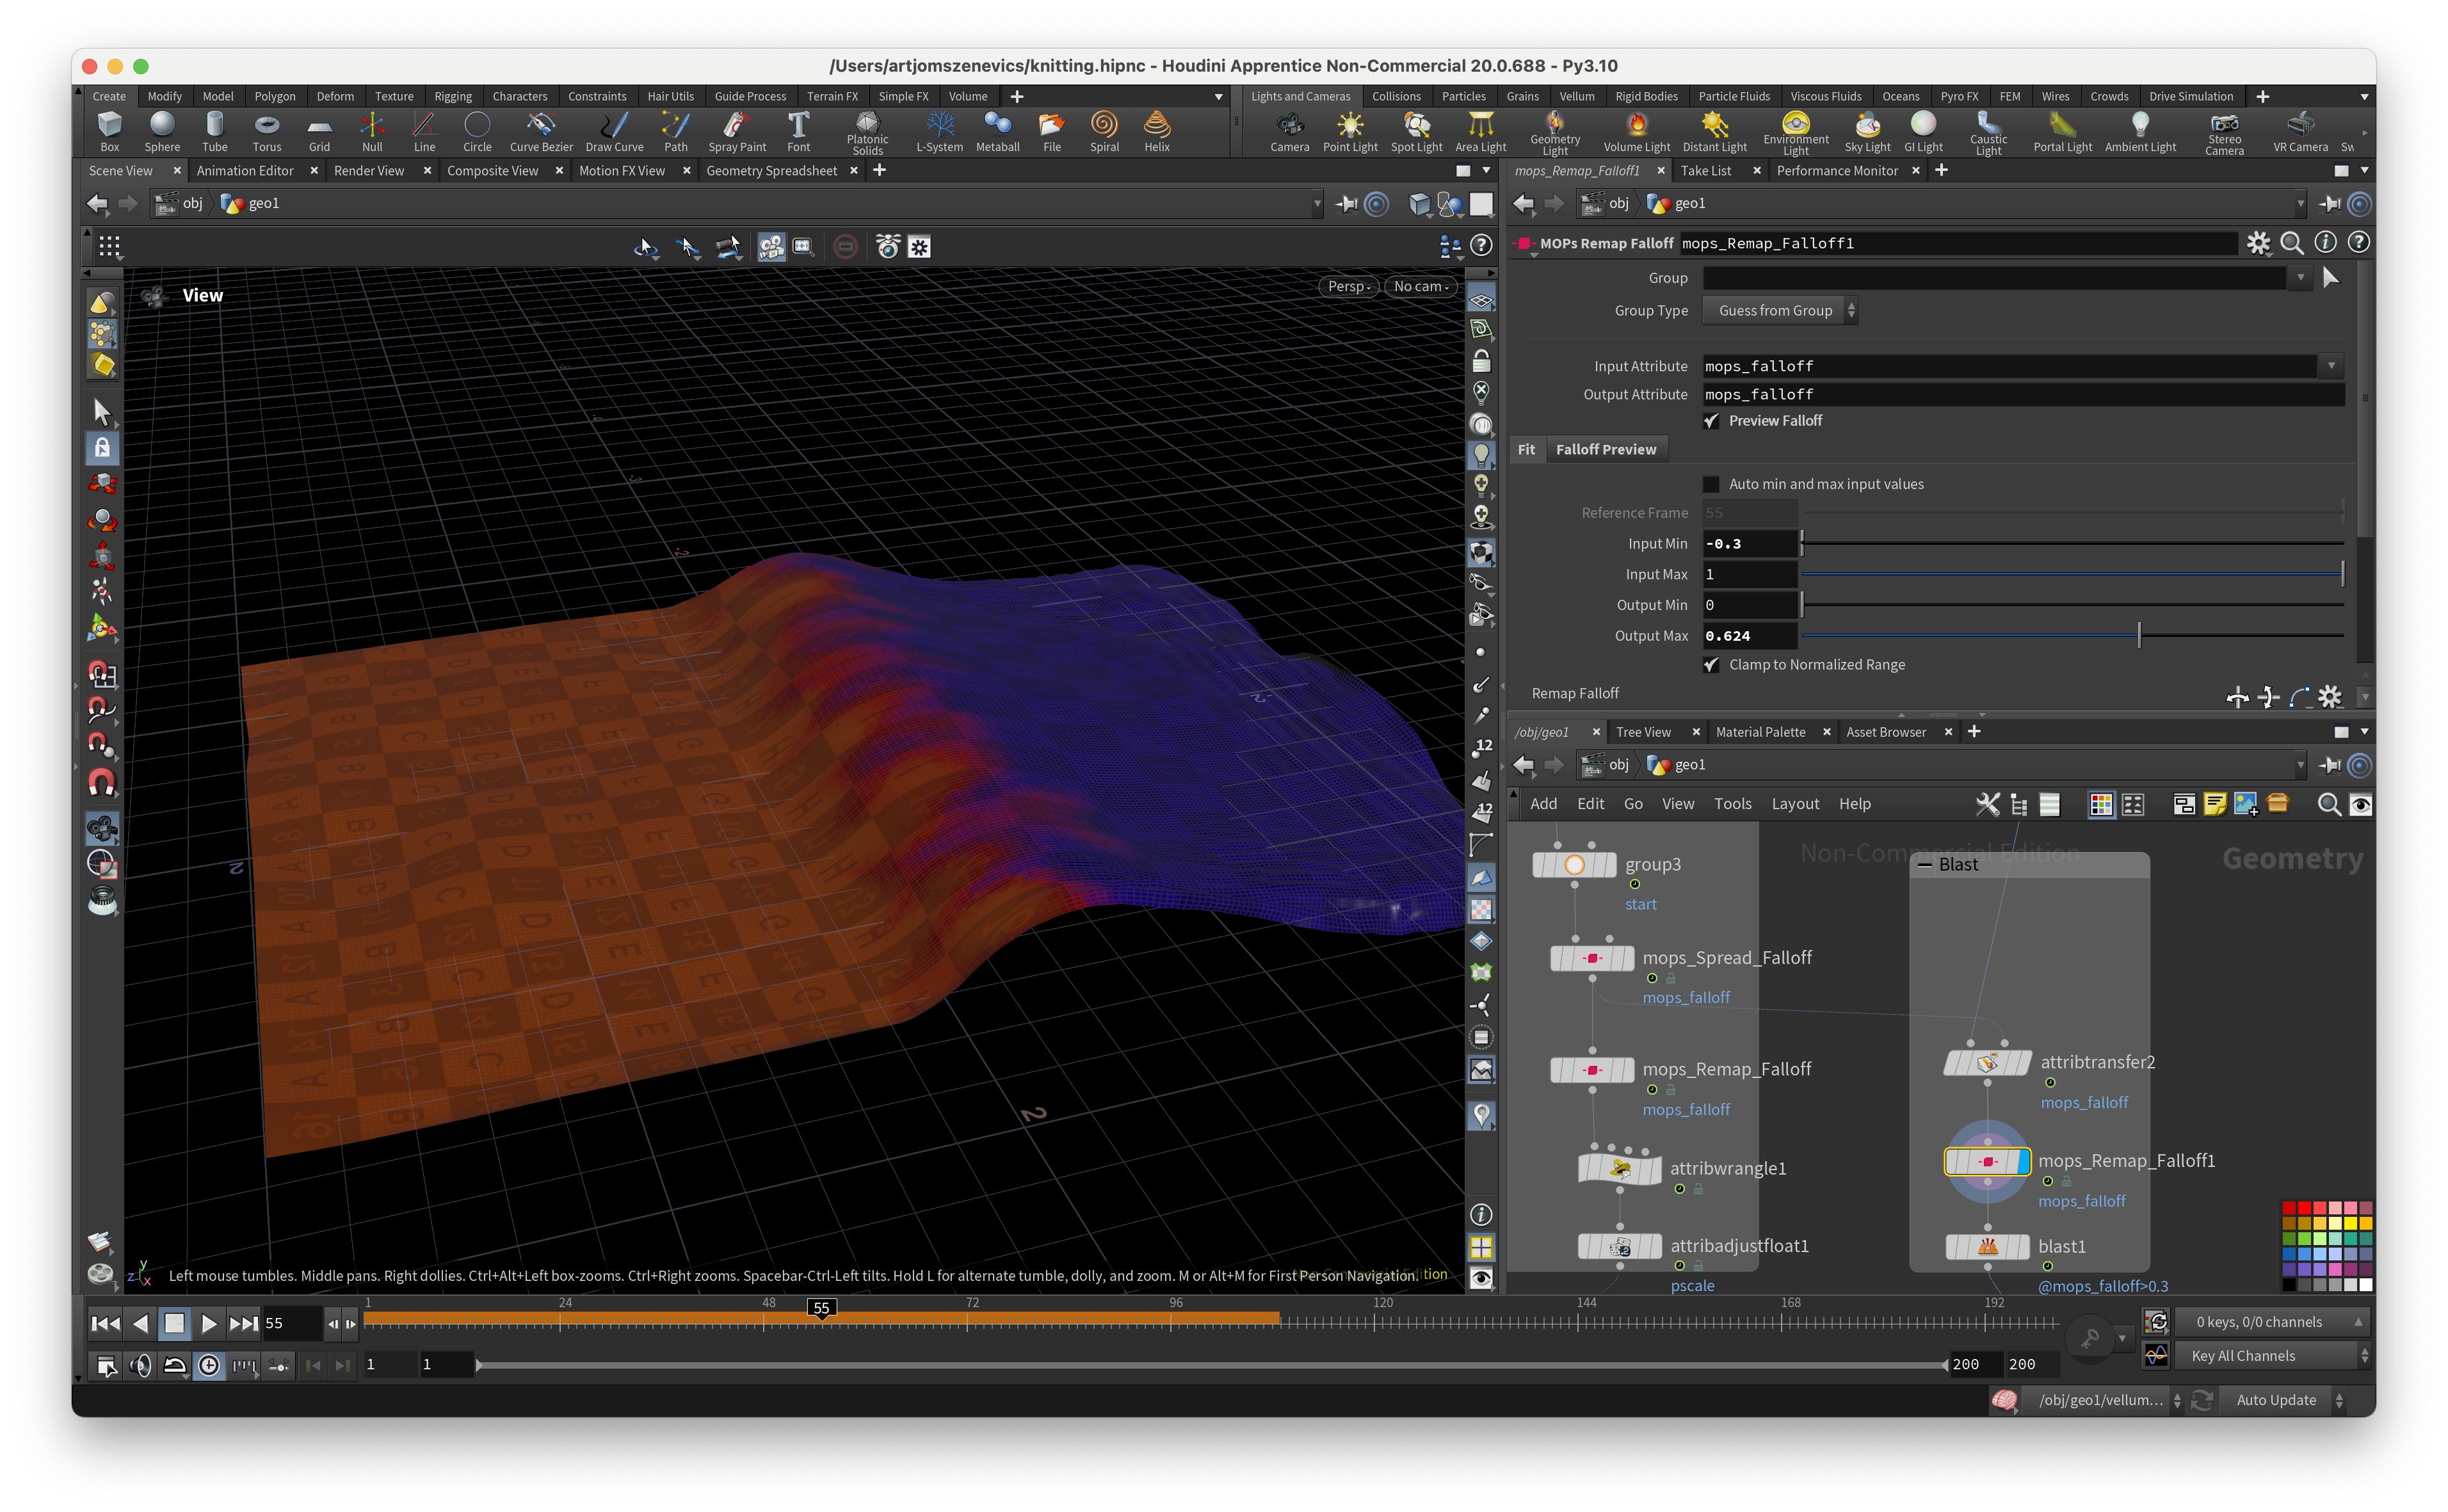
Step 2:
Next, we will create a separate MOP Remap Falloff to control the animation of the threads on the cloth. Although we could use the Remap option inside the MOP Spread Falloff, we prefer to have this as a separate node to control the width of the threads.
Step 3:
Let’s add an Attribute Wrangle and assign our pscale (scale of points) to the custom falloff we’ve just created. This will look like this:
f@pscale *=@mops_falloff;
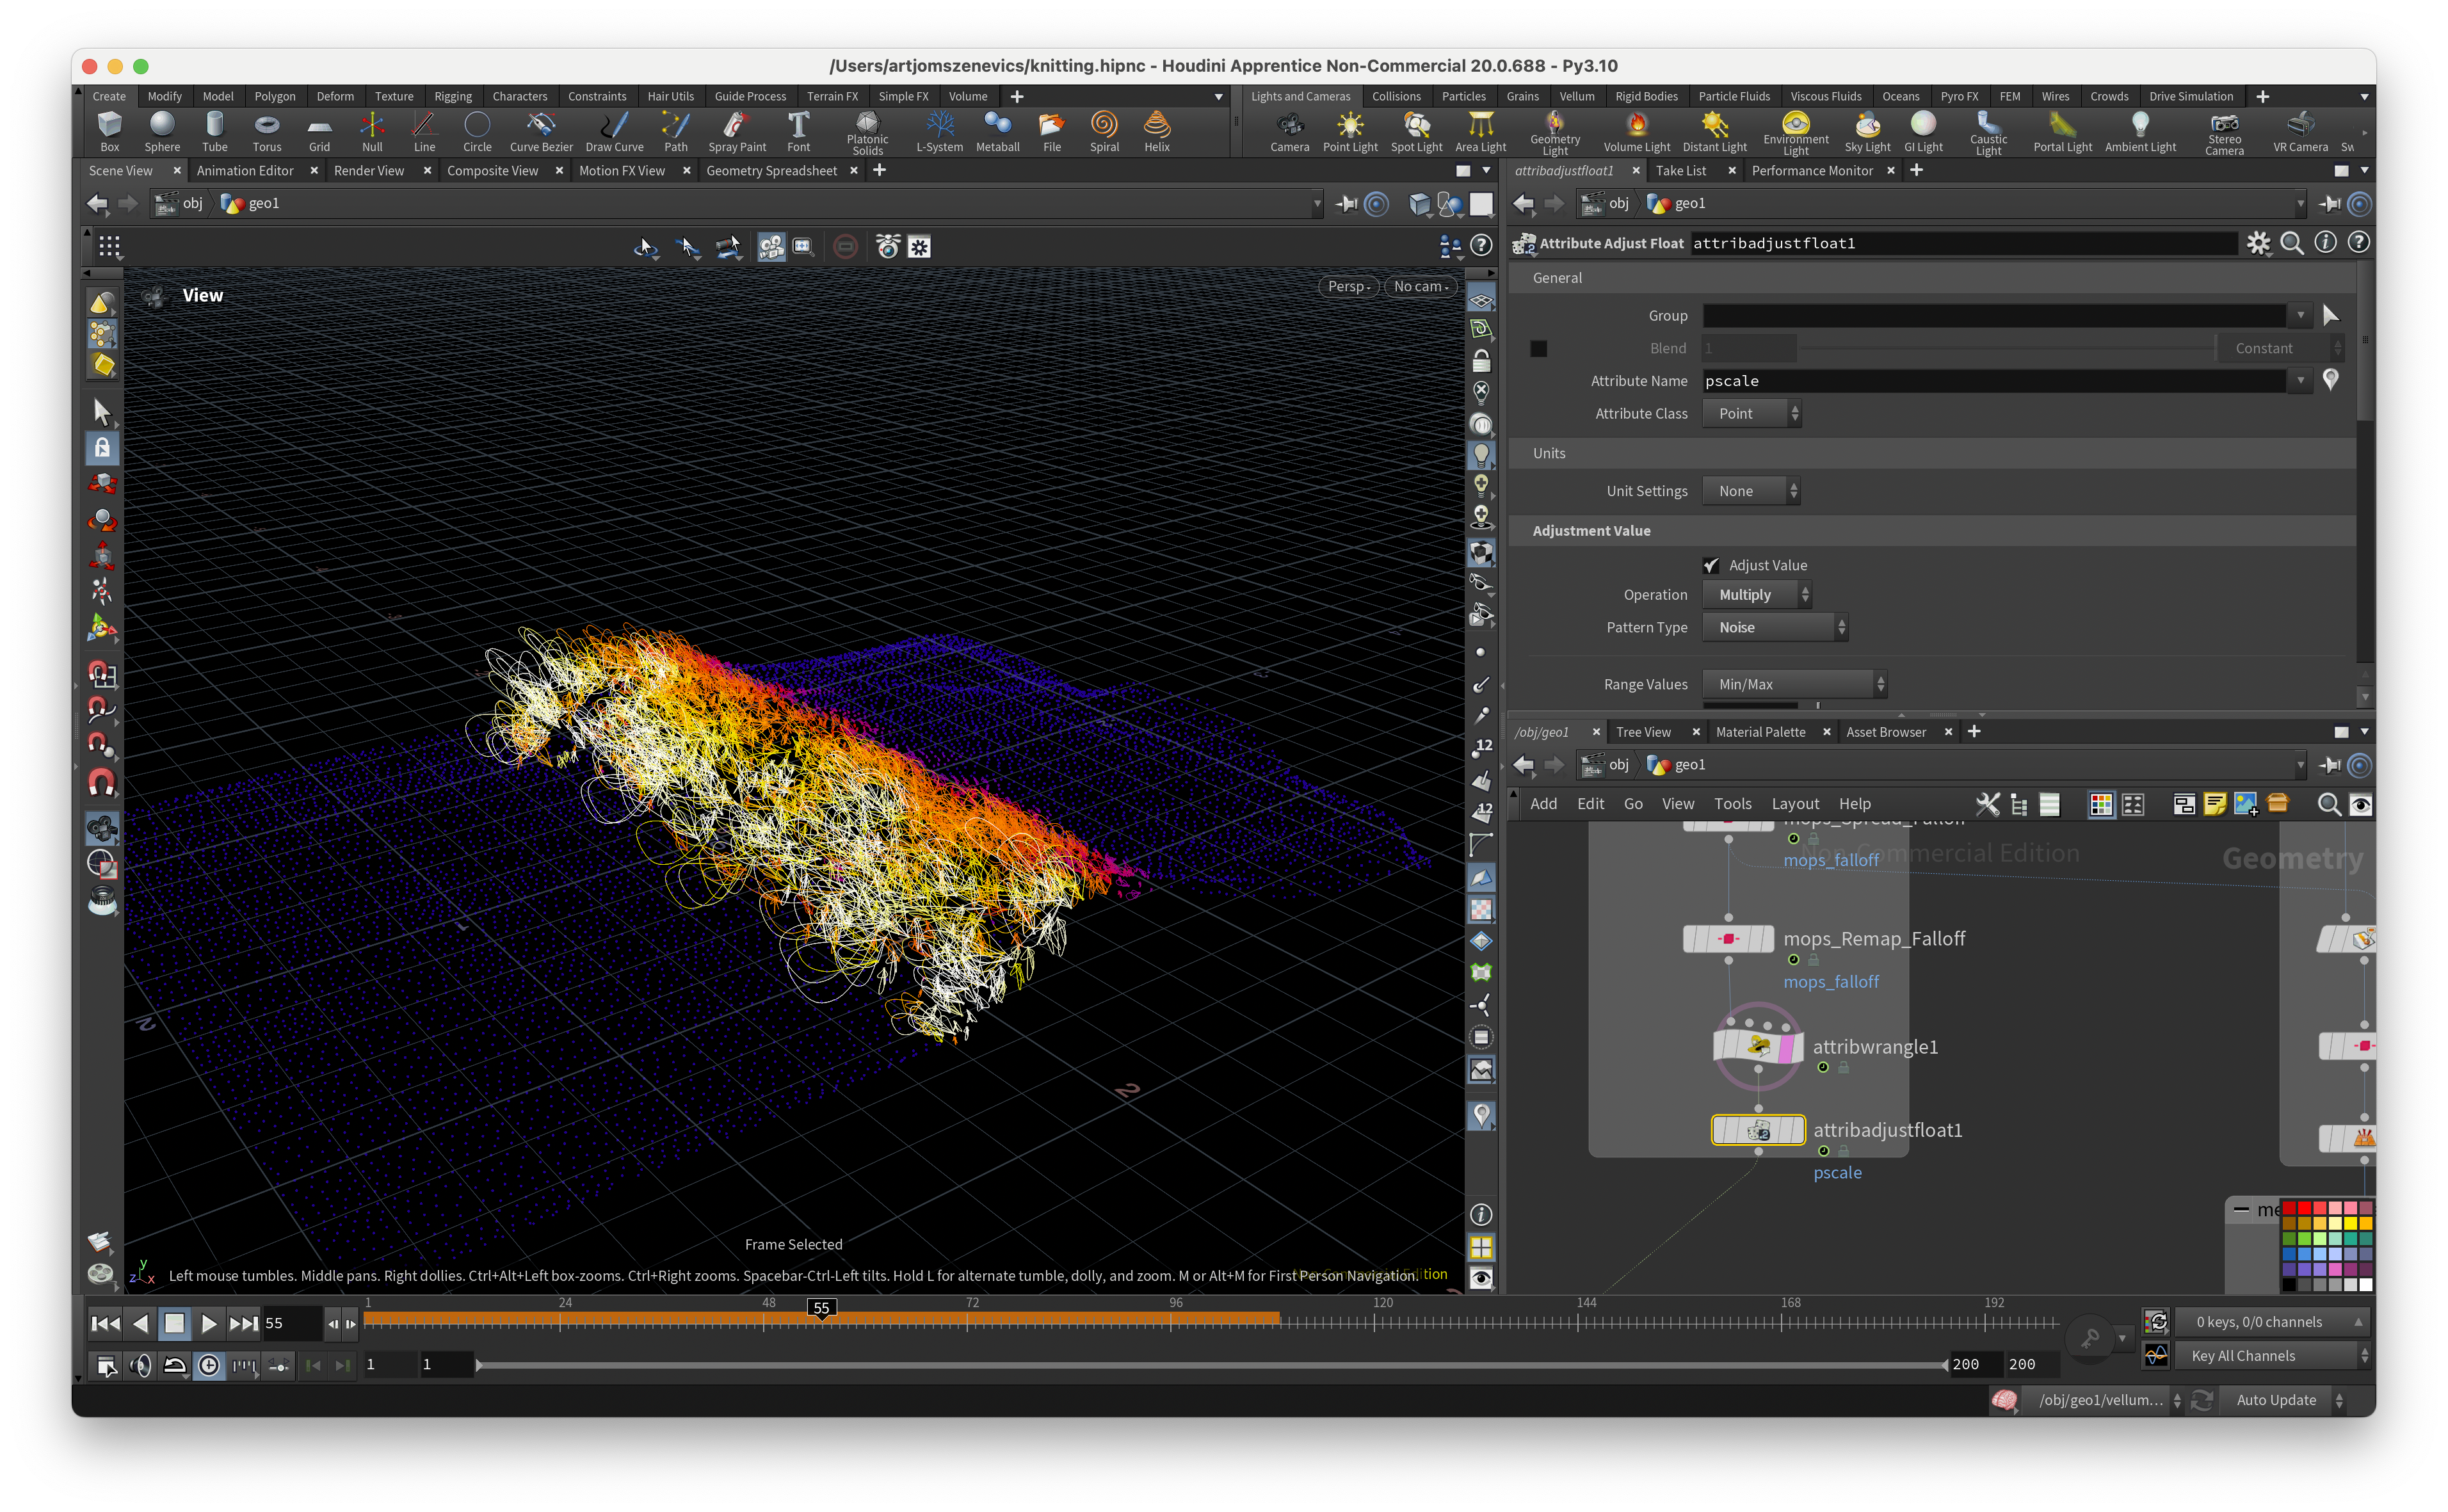
This updates the pscale value based on our recently set remap.
Step 4:
Next, we can add even more randomness to pscale with the Attribute Adjust Float node. We can set the pattern type to Noise or Random.
Step 5:
Now, we want to create a cloth appearance using our MOP Spread Falloff.
To do this, we use the Attribute Transfer node. Also, we need to specify in the Attributes Points that we want to transfer the mops_falloff attribute. And with the MOP Remap FallOff you can adjust the previous Spread FallOff.

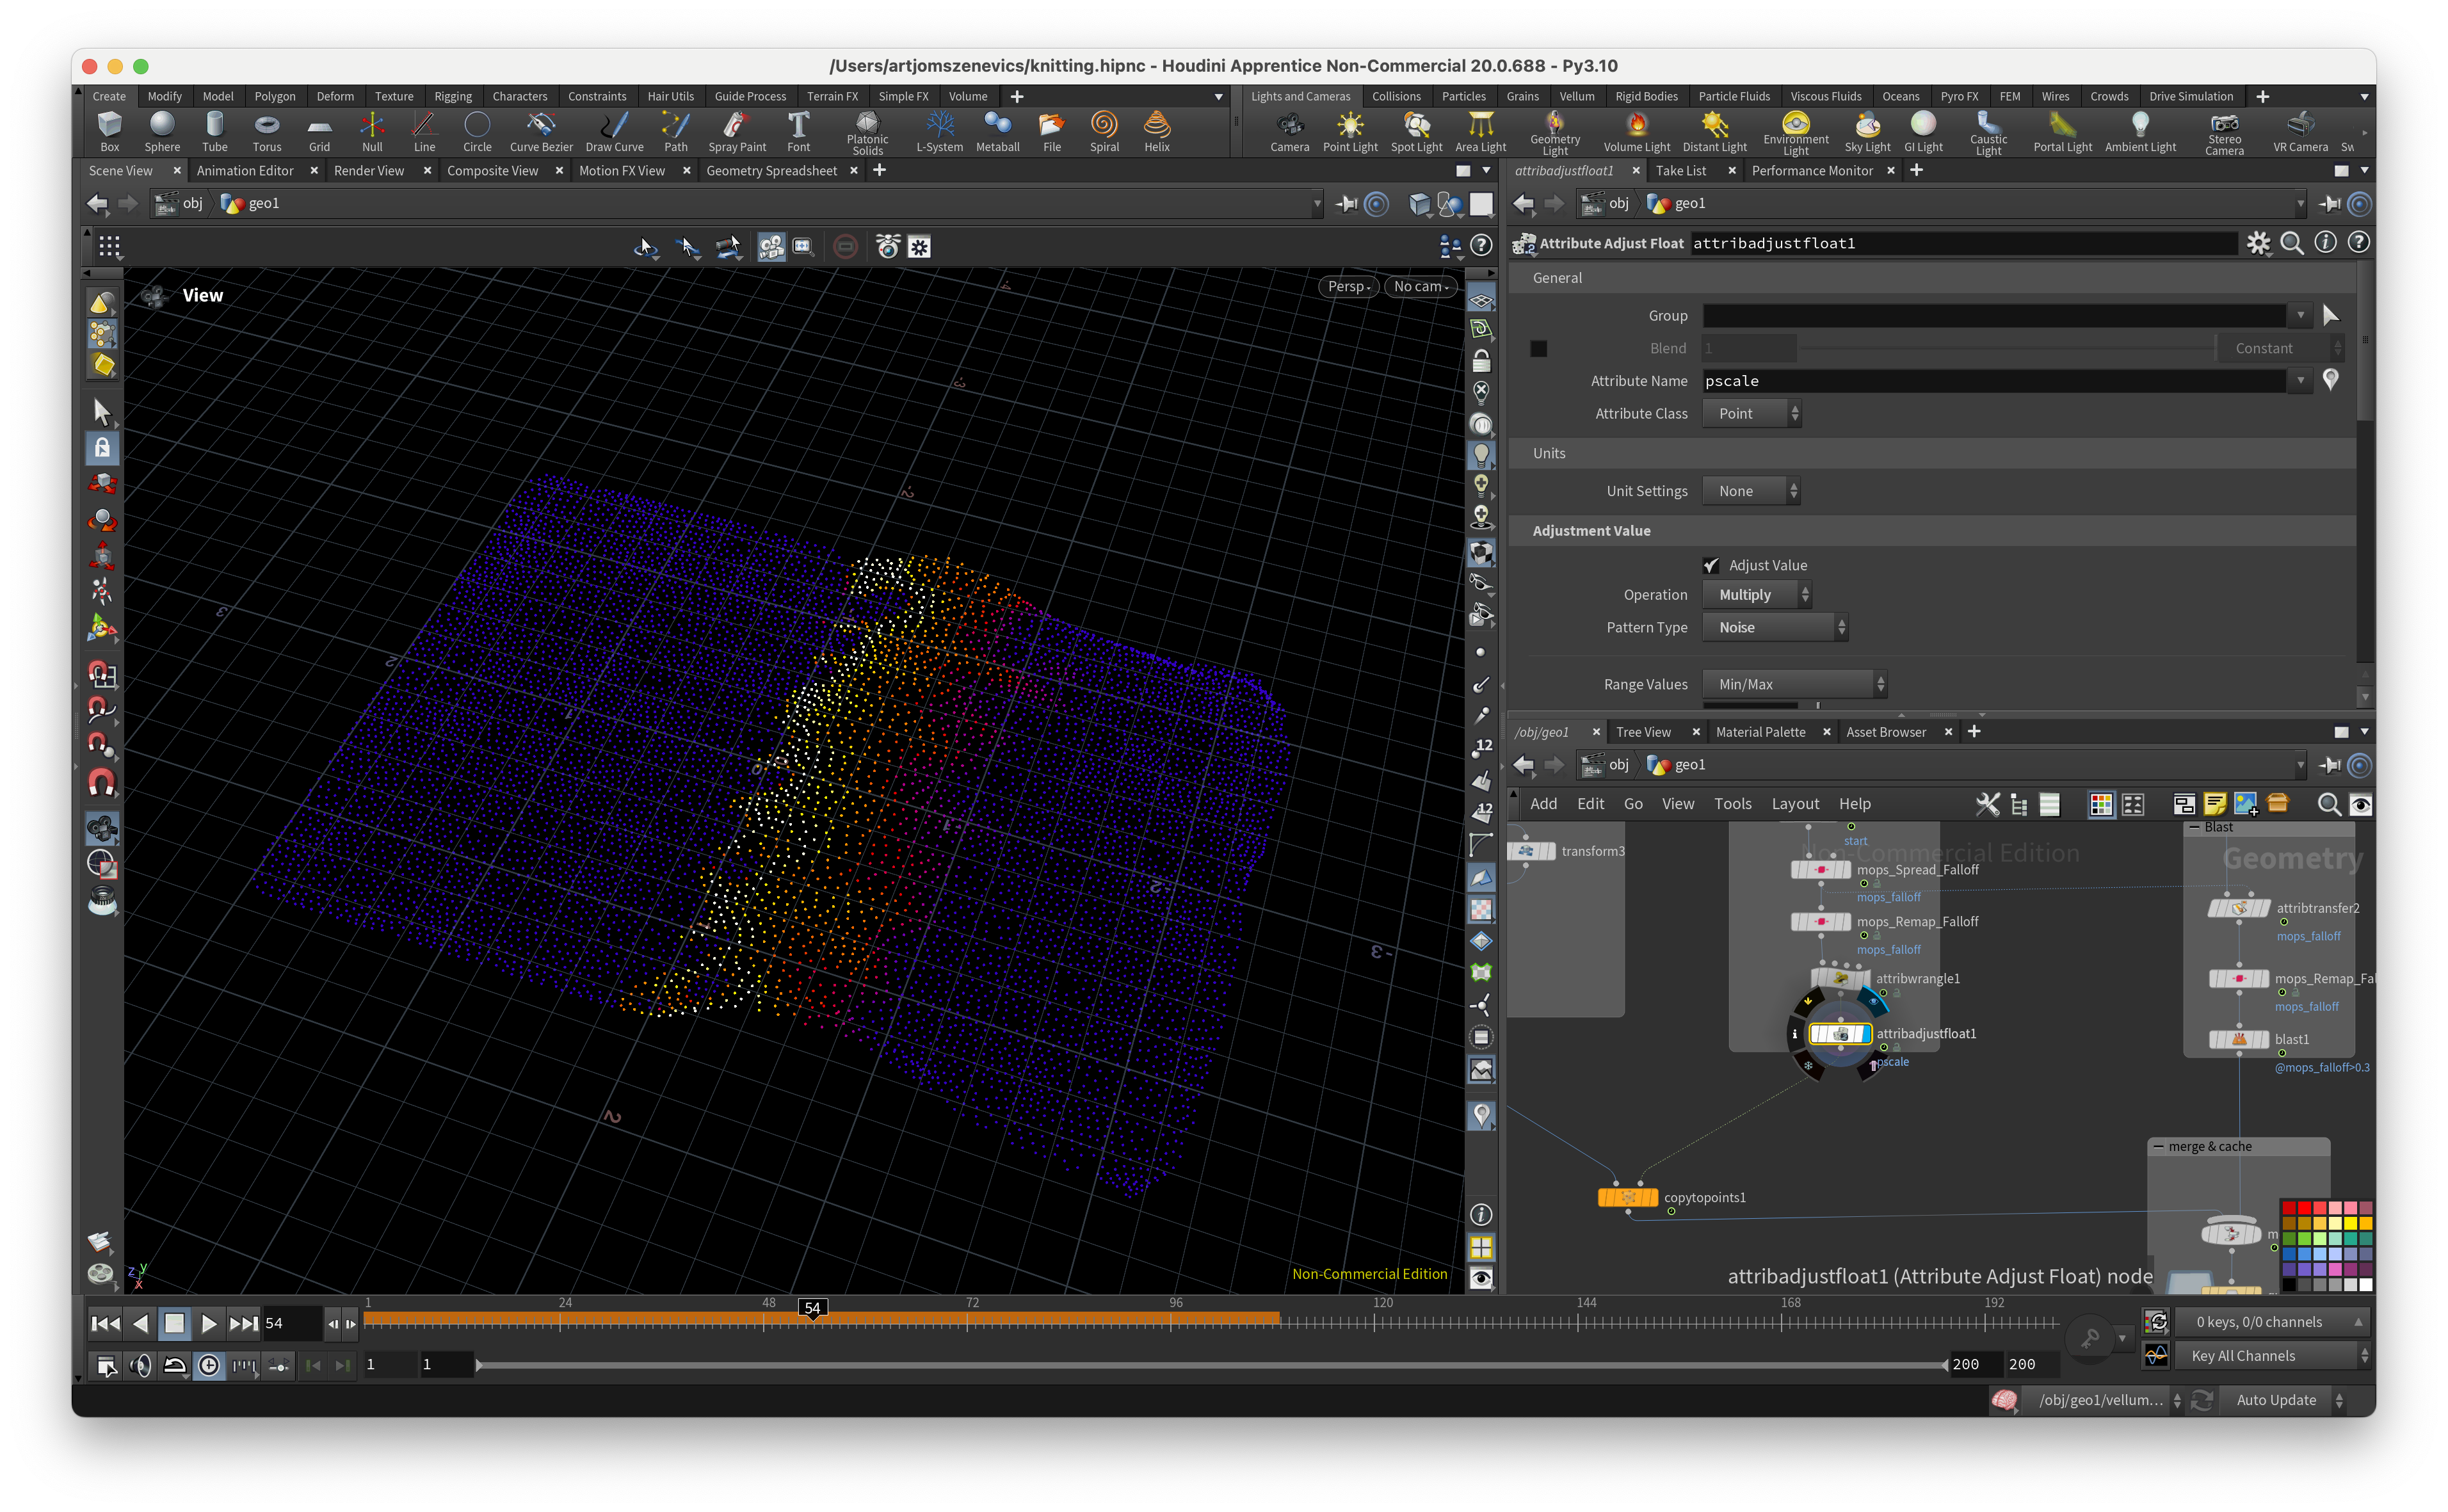
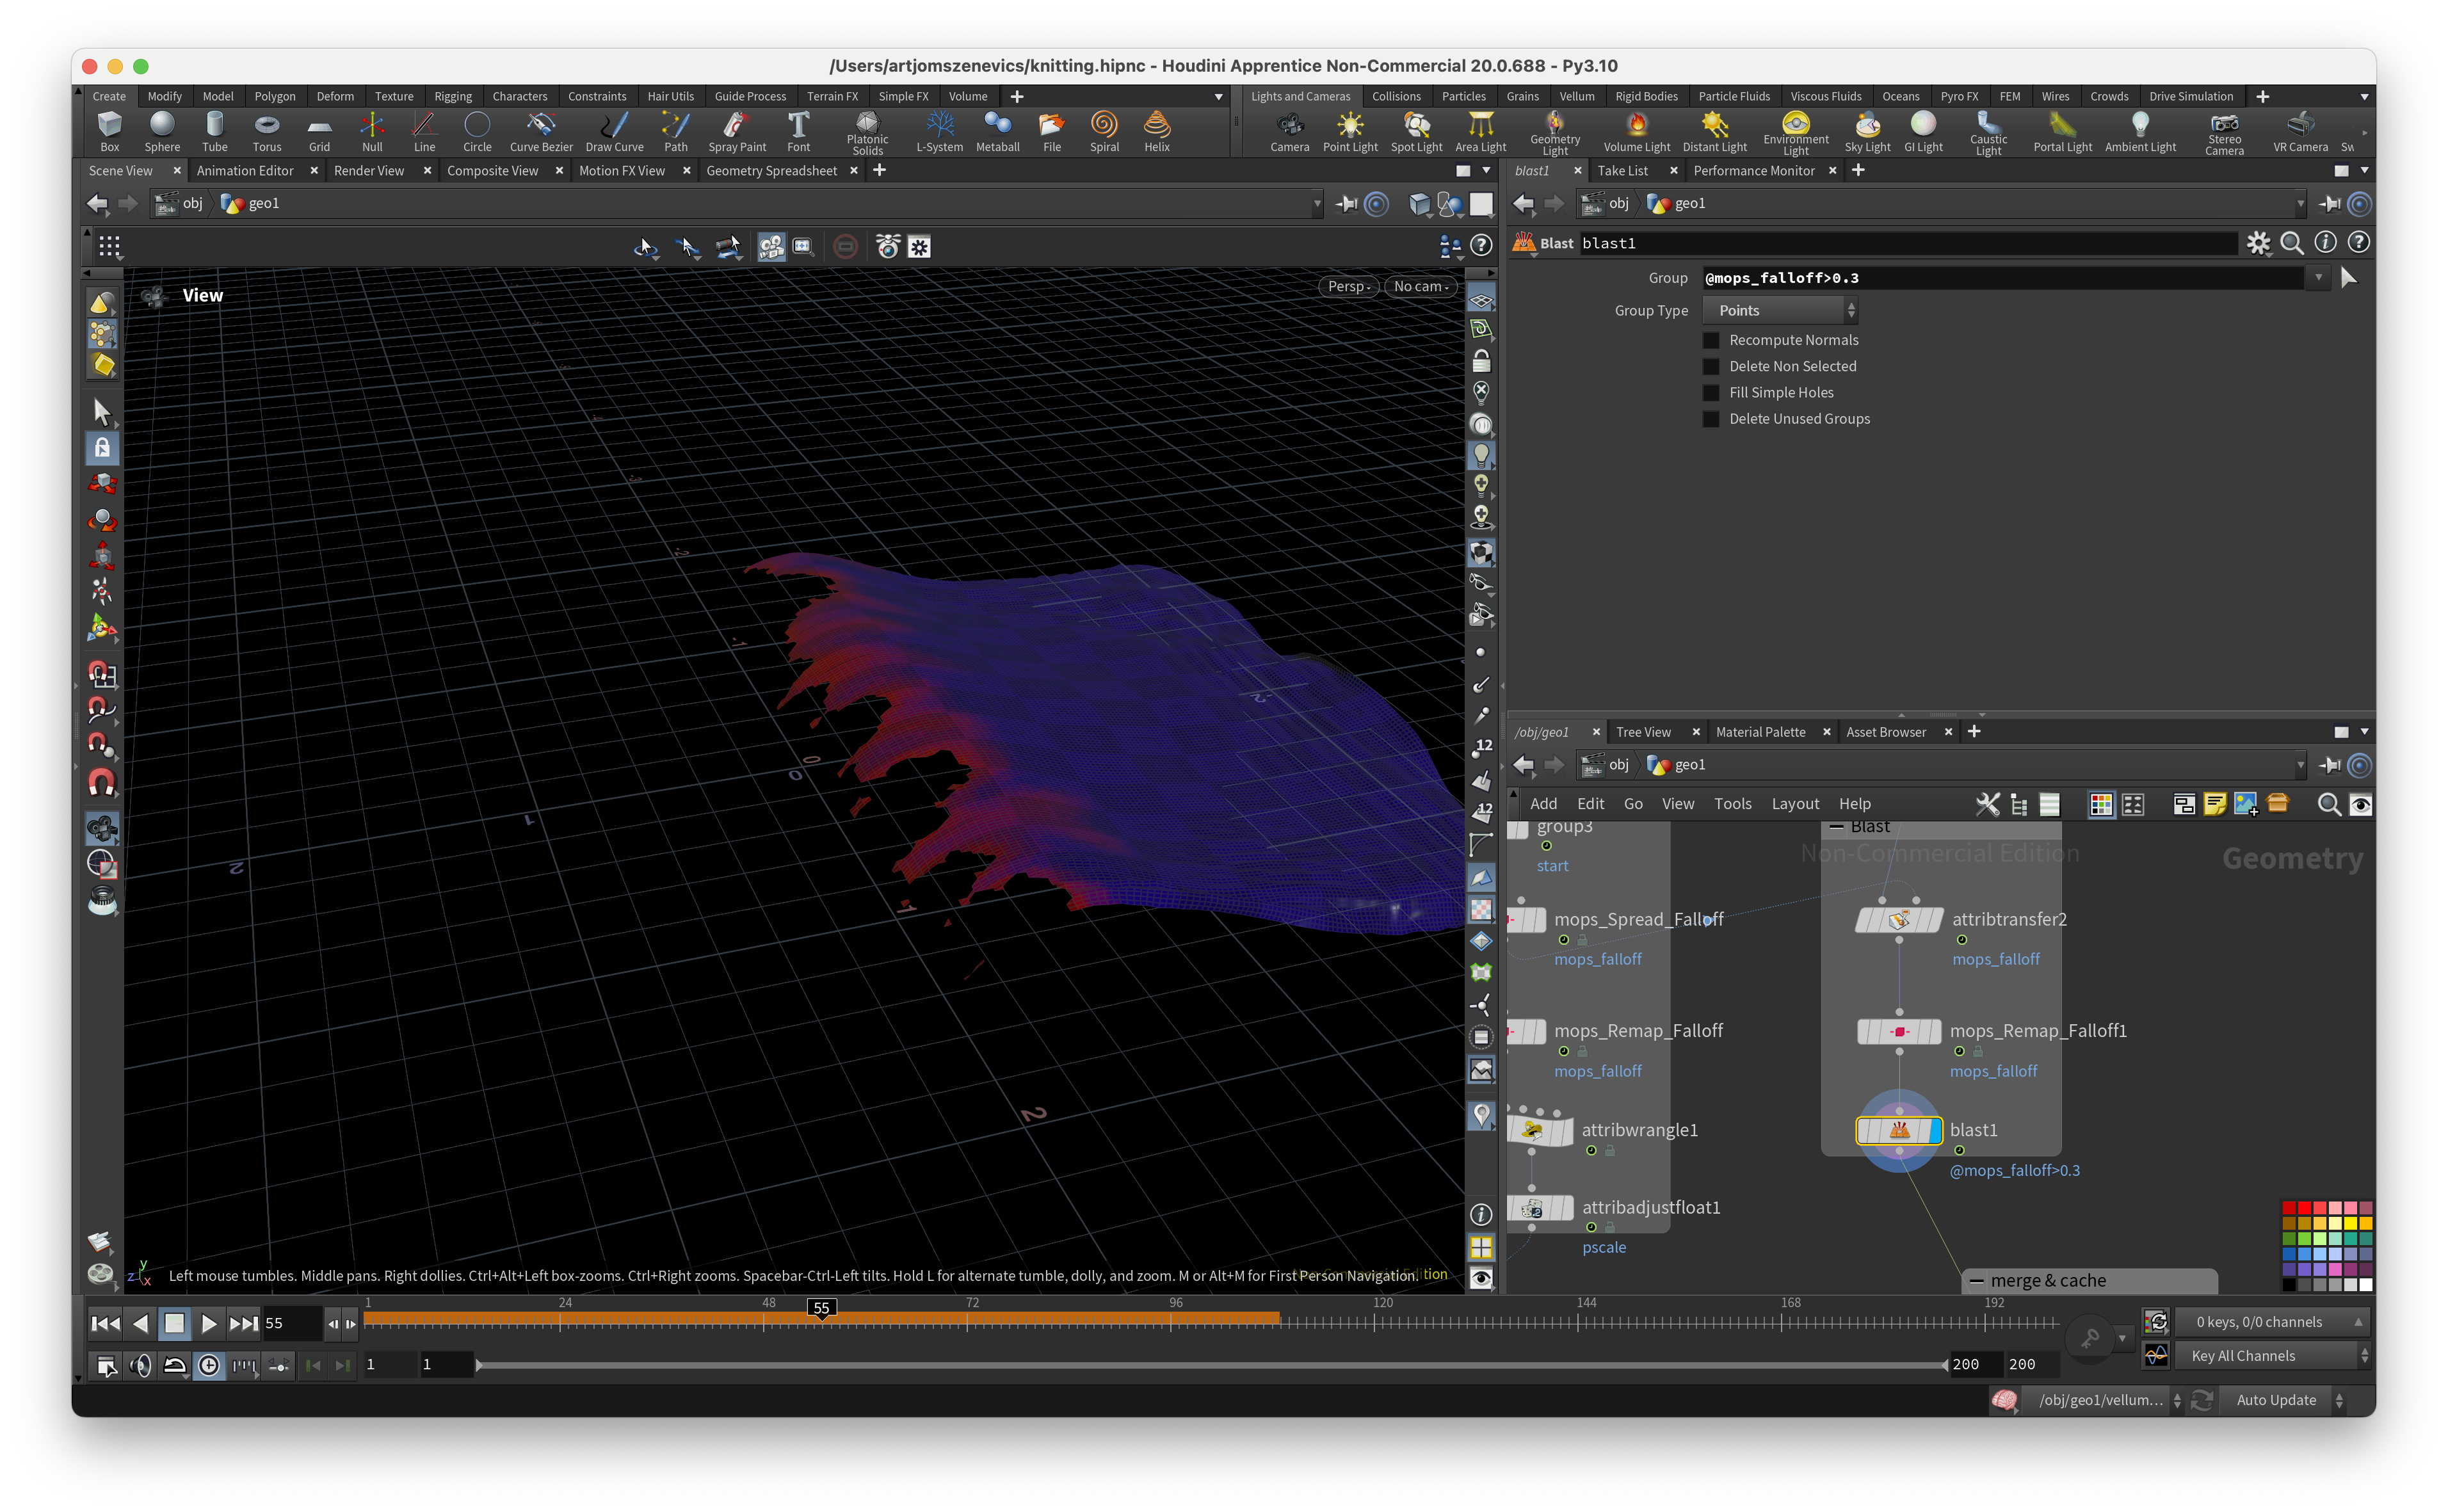
Step 6:
Finally, we’ll use the Blast node to create the appearance of the cloth. Although the Blast node is typically used to delete primitives, we’ll invert its function by unchecking “Delete Non-Selected” and setting the following condition:
@mops_falloff > 0.3;
This means we will remove all primitives with a value greater than 0.3.

Step. 7
And to wrap up our lesson let's merge all the nodes together and cache out the simulation.

CONCLUSION
At this stage, the main setup for the cloth appearance and knitting thread animation is complete. We can adjust the Spread/Remap Falloff to our liking, but this covers the core of this setup.