Greetings everyone!
To start off, I would like to say that this is my attempt No. 9504 in learning Houdini, but this time I’ve decided to write a short article and reverse engineer a few projects that I find interesting on Paul Esteves' Patreon page and tokeru.com/cgwiki/.
Since this article is mainly for the purpose of explaining to myself how things work in Houdini, if you find something not entirely clear, feel free to reach out or suggest a simpler solution. I'm always happy to hear an alternative view.
My goal with this article is to deconstruct every node or piece of VEX code in a Houdini network which I find interesting online, and at the same time continue my exploration further. Hopefully, this will keep me motivated to learn and grow.
For the first exploratory stage, I've decided to deconstruct Paul Esteves' procedural petal setup from his Patreon page and try to create a set of different procedural petals.
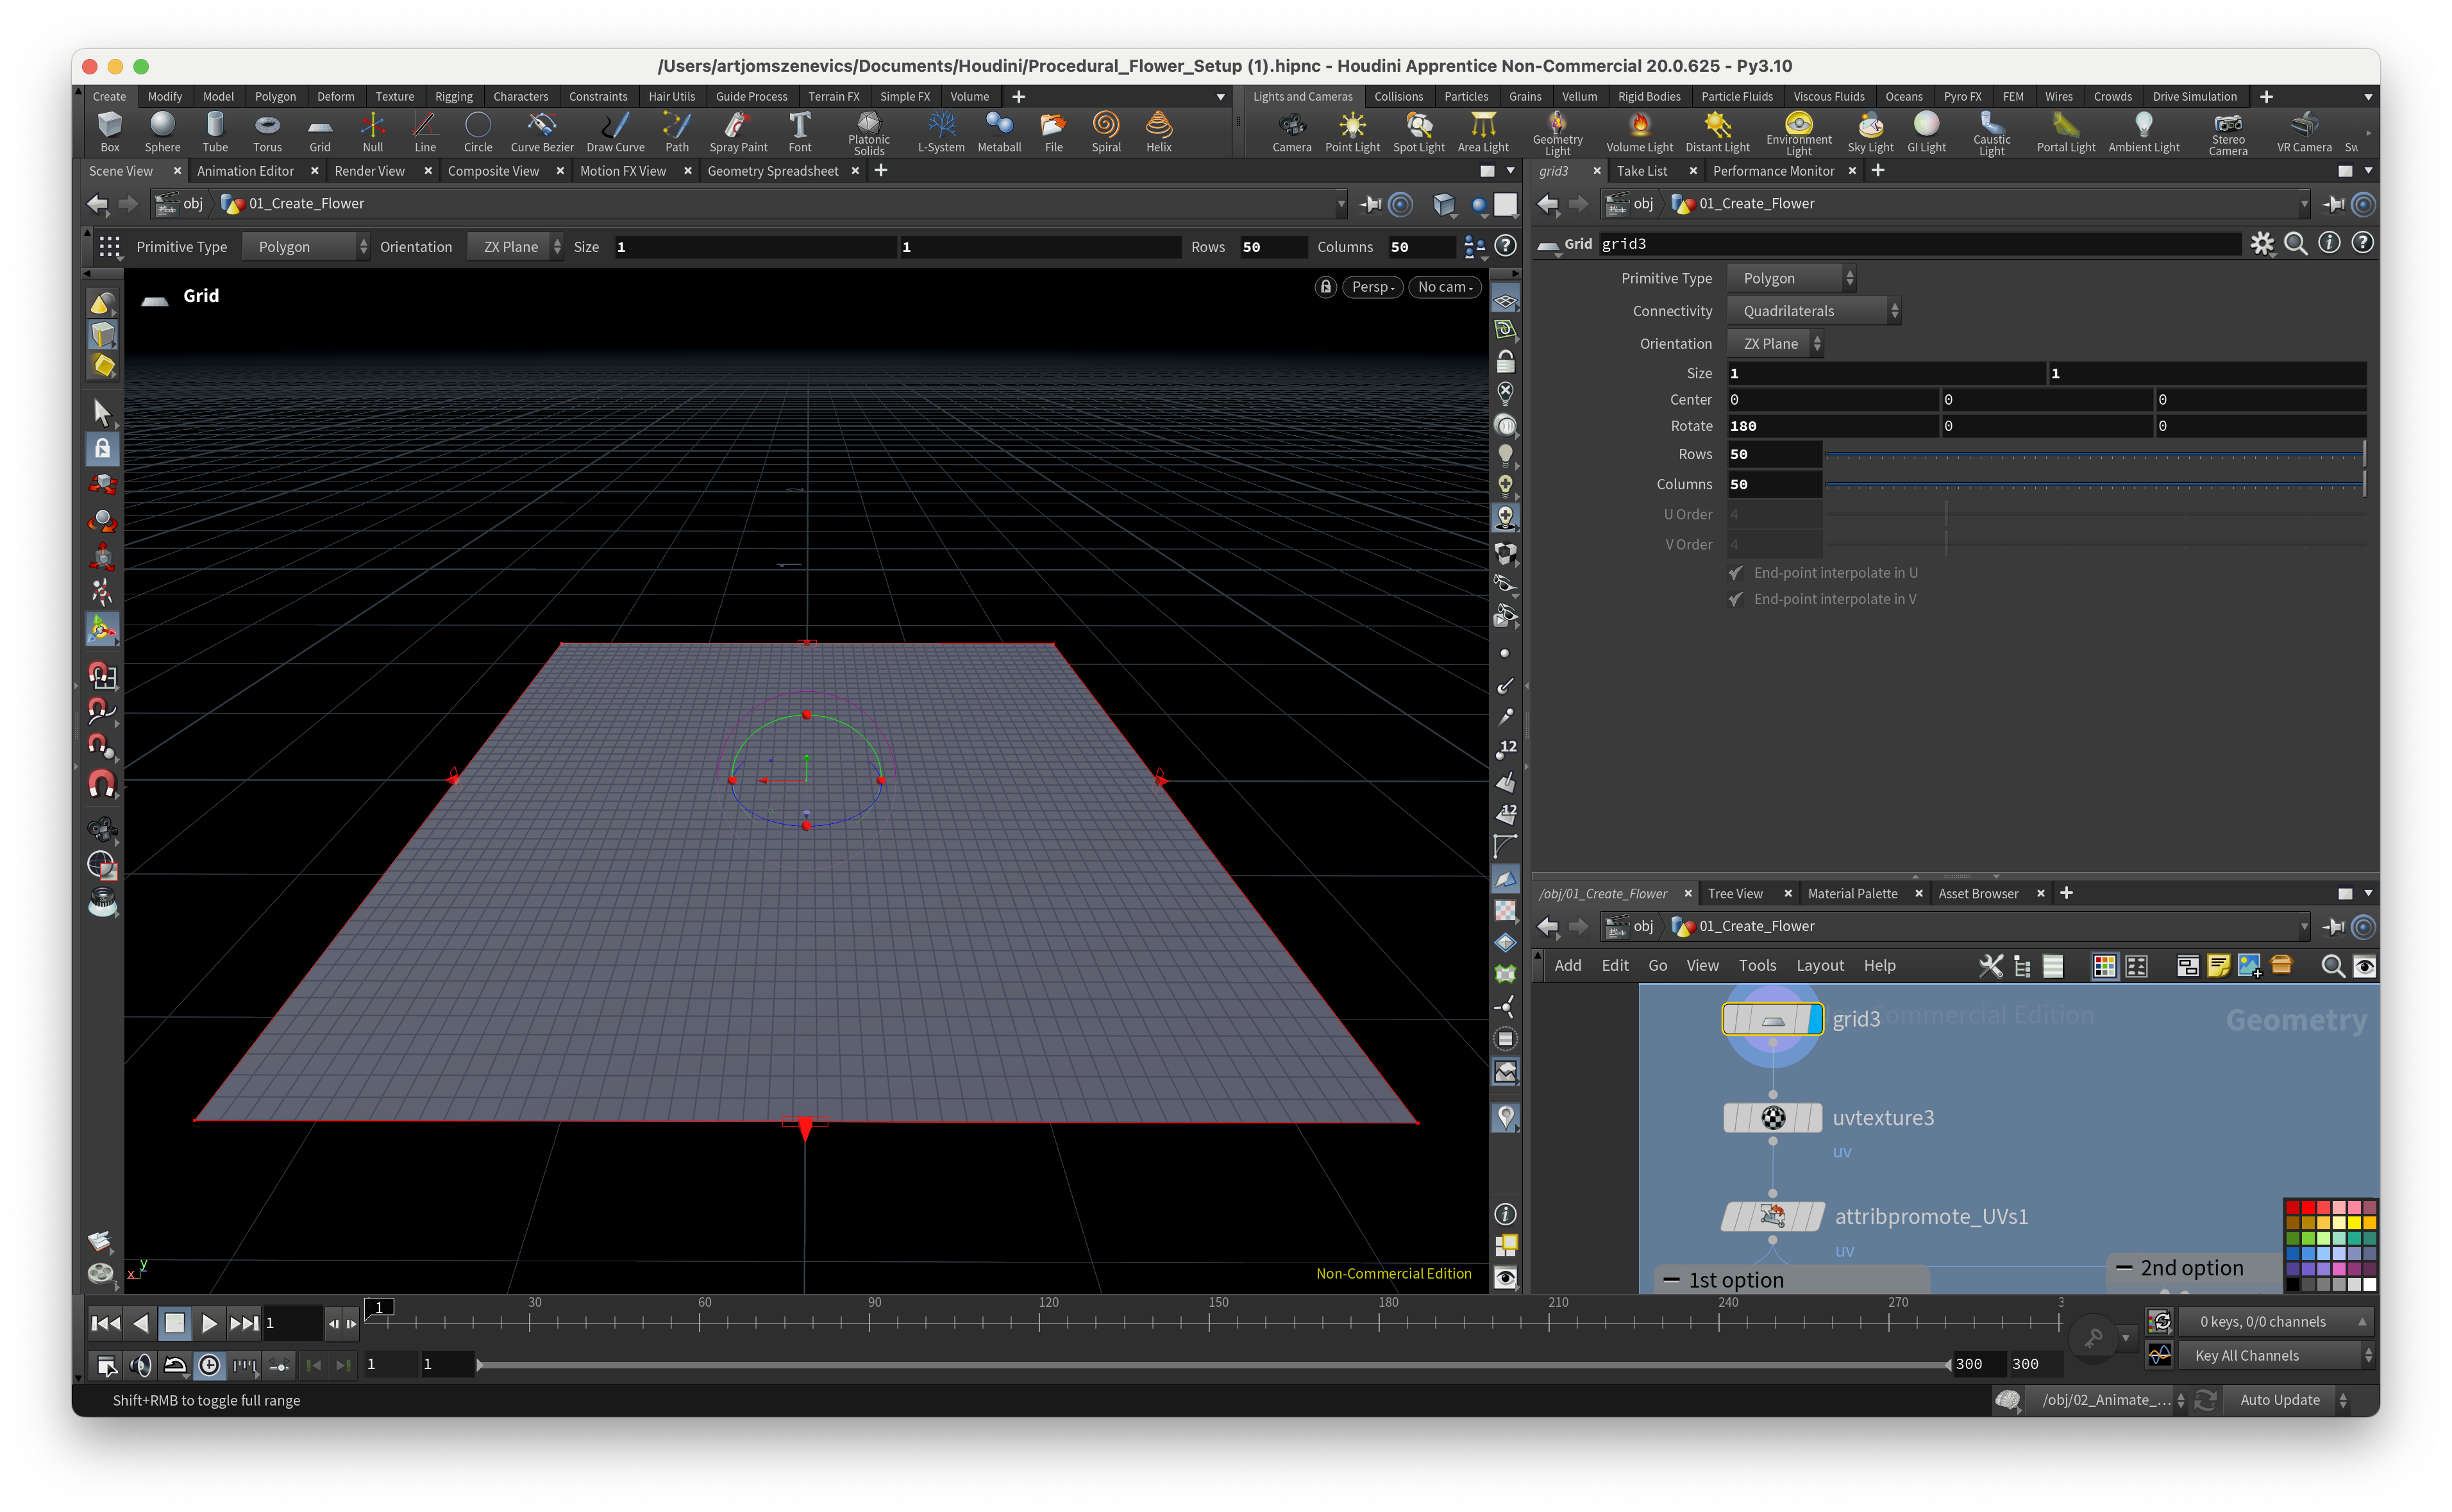
Step 1 - Create a grid and and flip it 180 degrees so that Normals are facing downwards.(Later it will make sense)
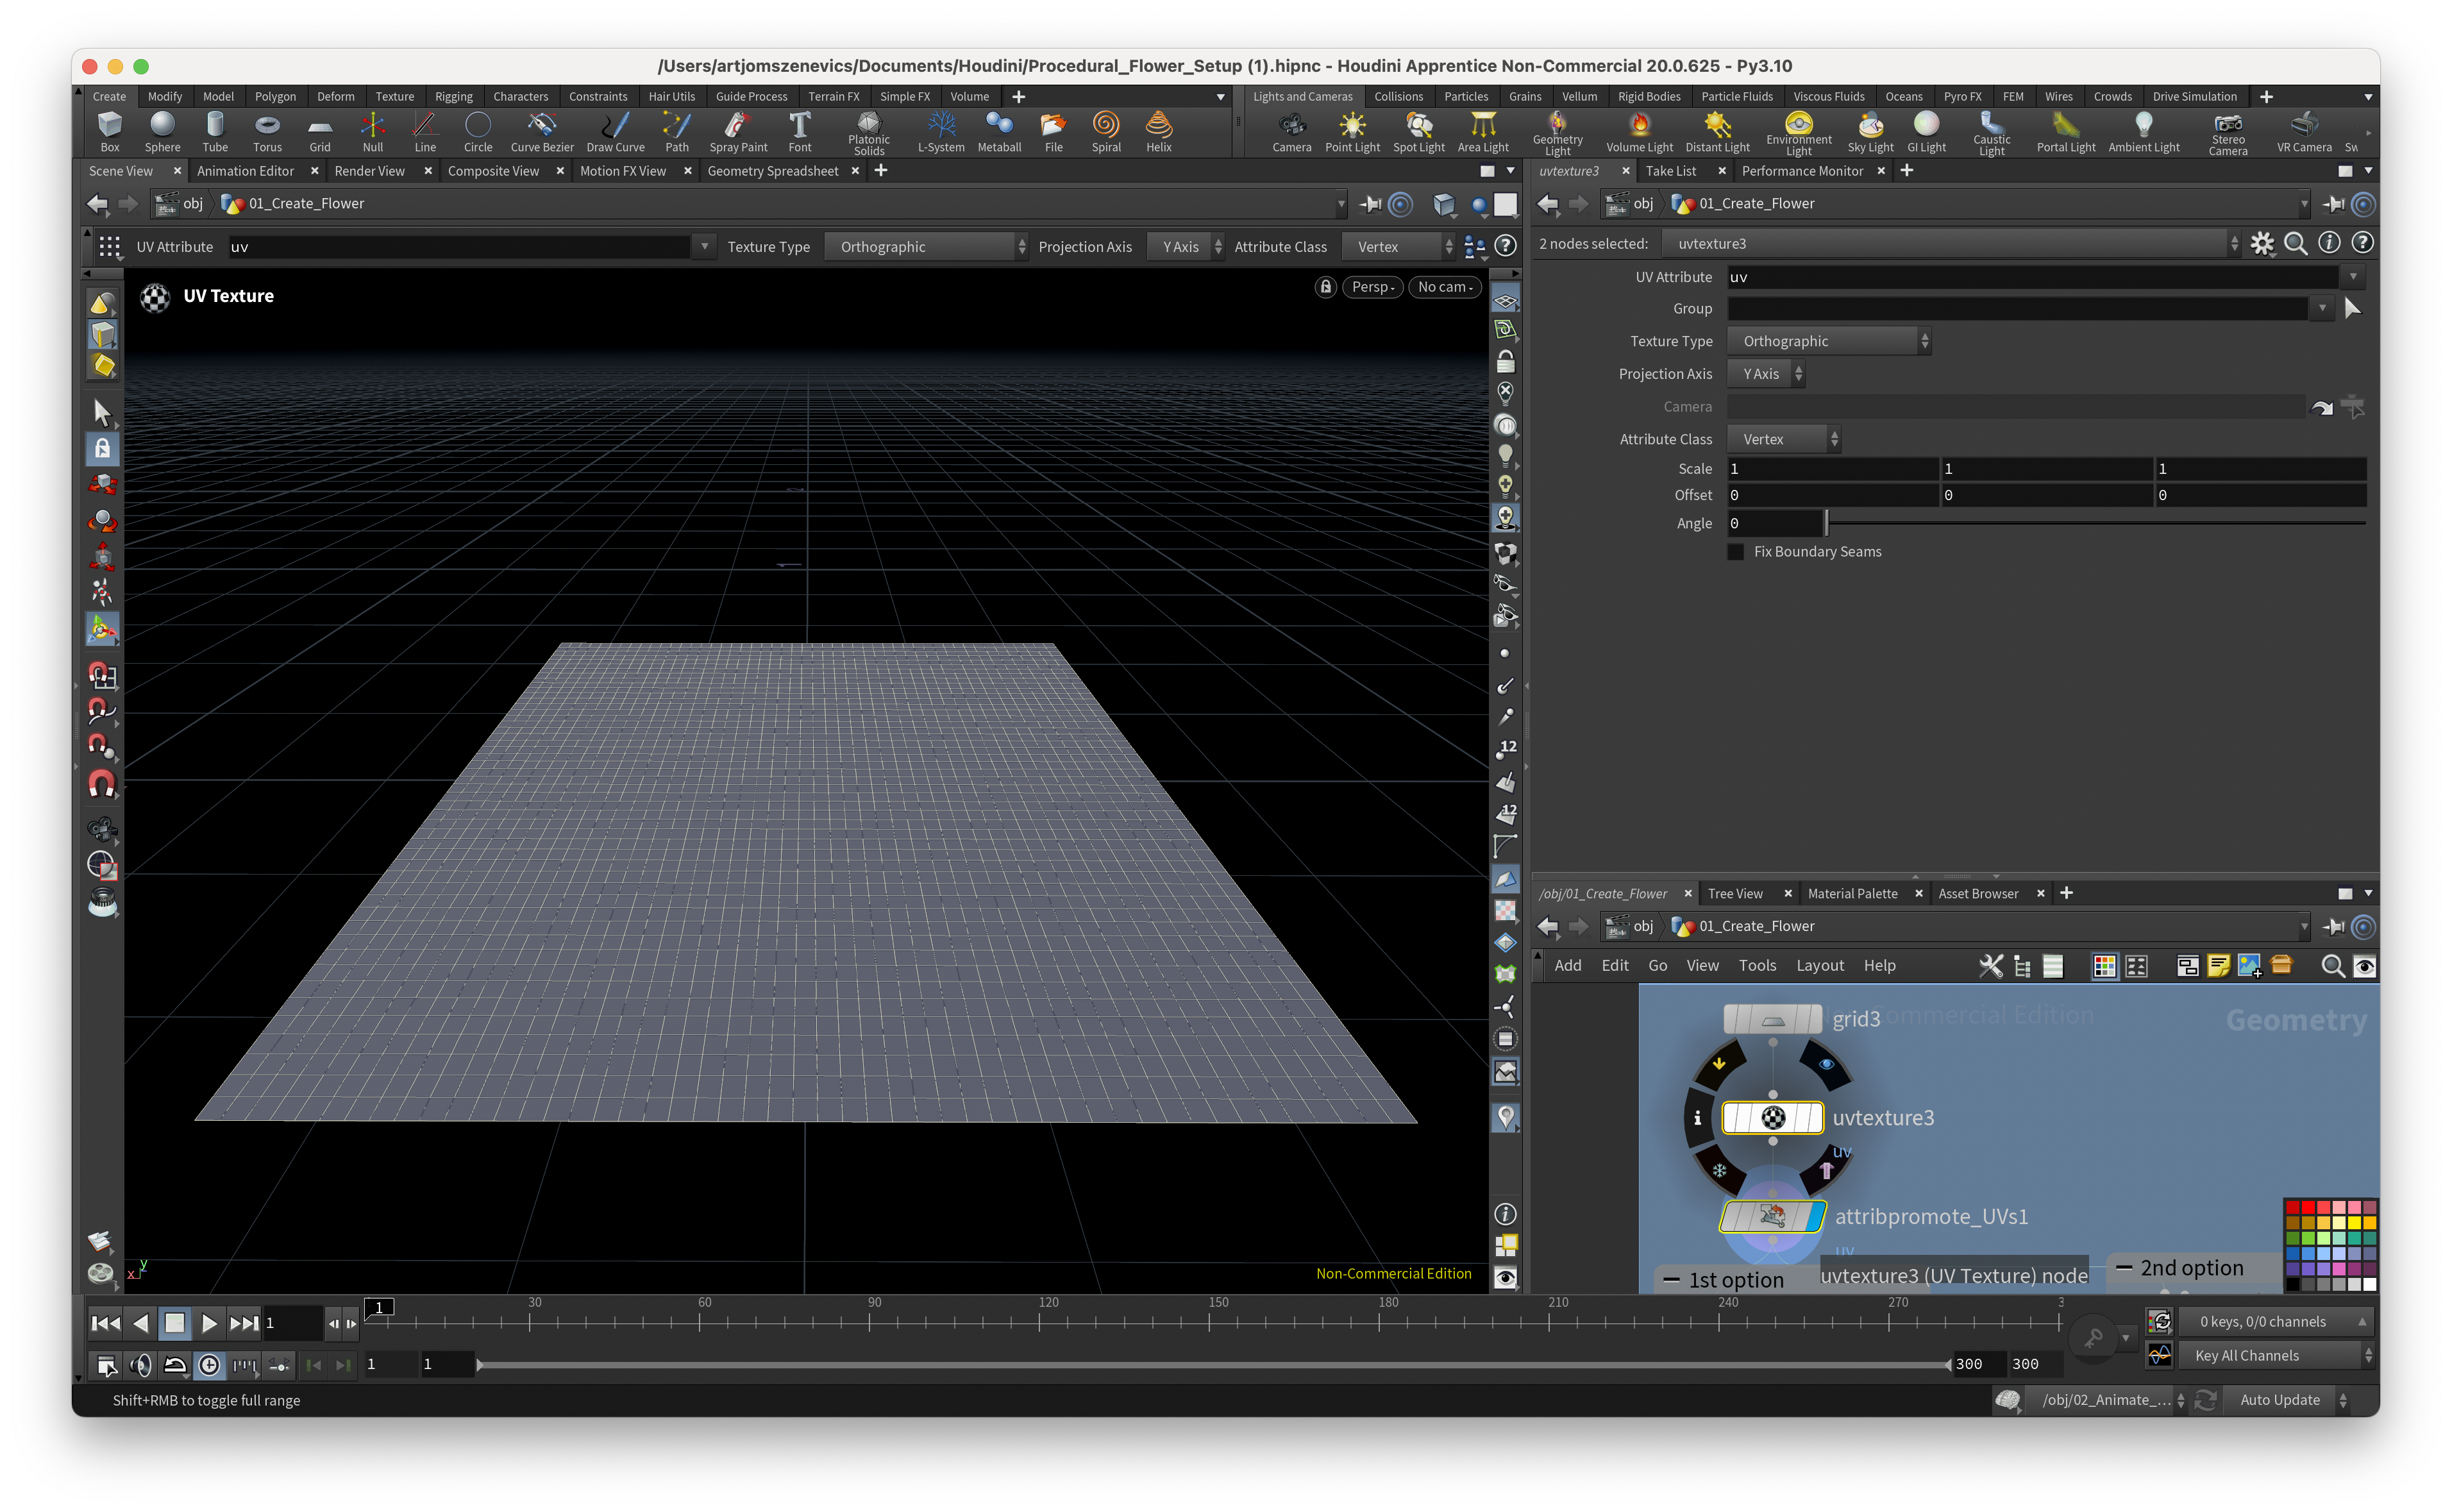
Step 2 - Promoting uv attribute as a vertex. Try avoiding promoting uv on points since then uv loses it's unique position.
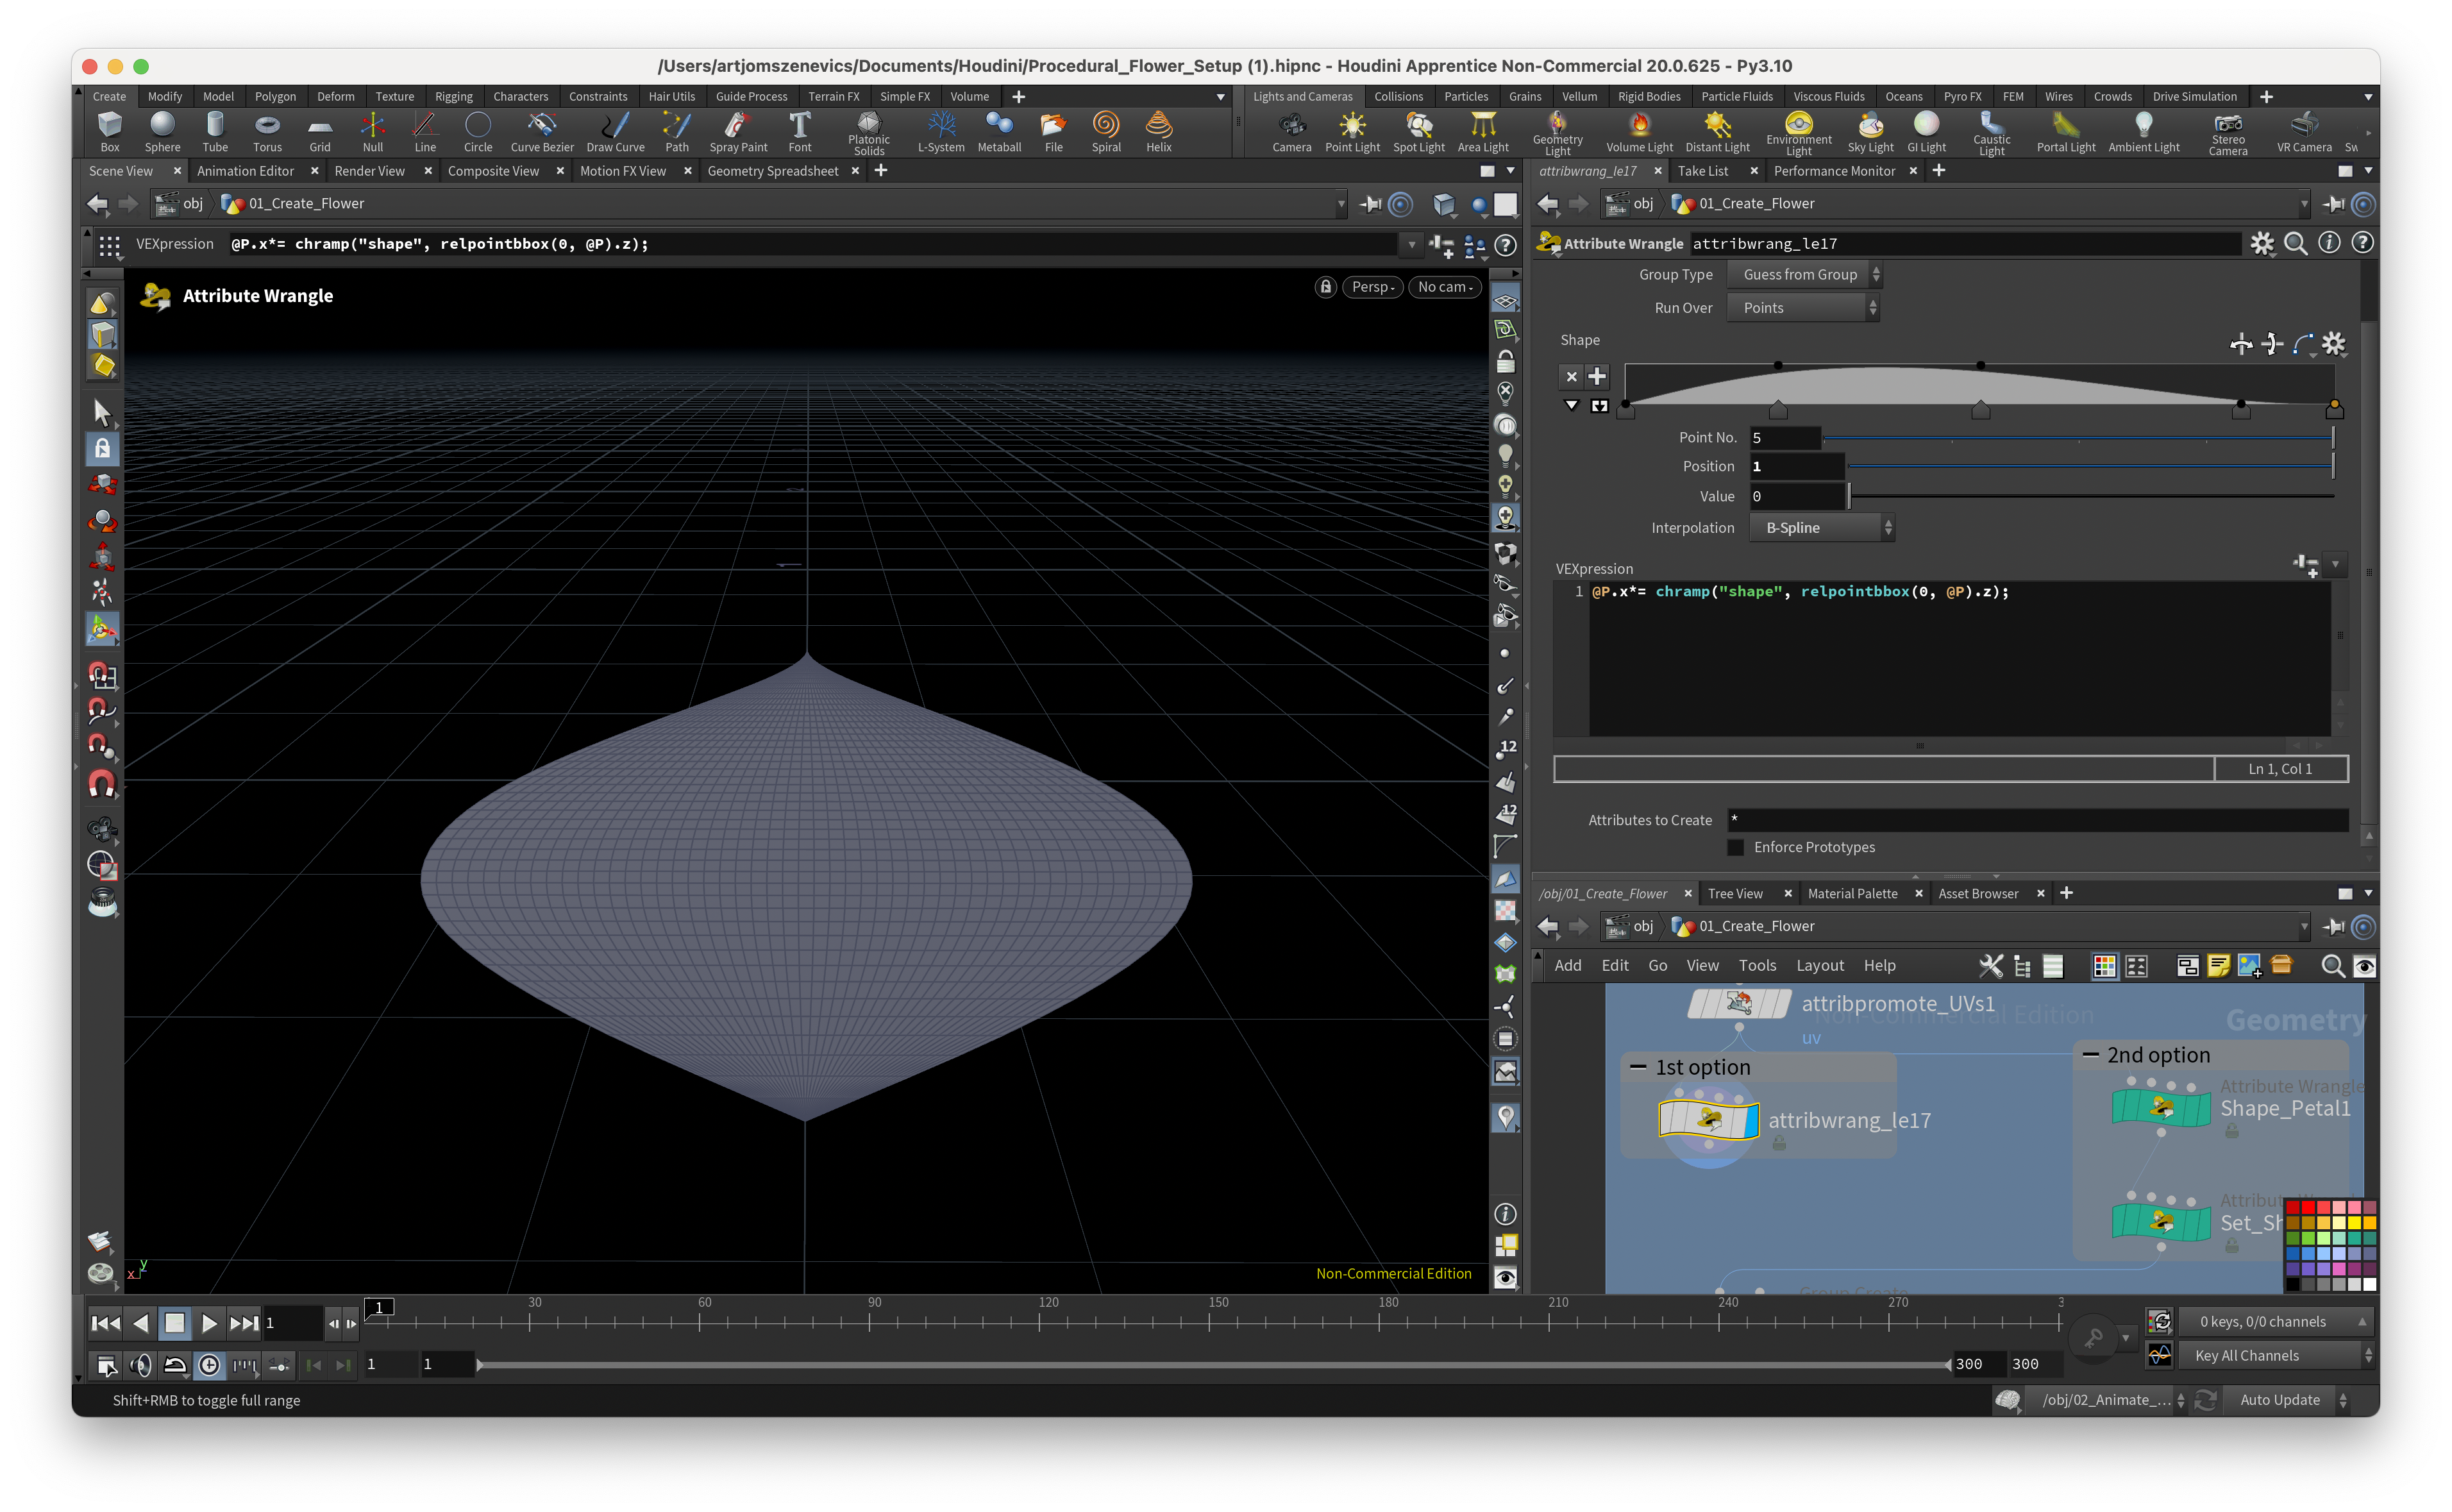
Step 3 . This option I've decided to create on my own which is fairly simple and versatile.
Function relpointbox() - Returns the relative position of the point given with respect to the bounding box of the geometry.
chramp() - Evaluates a ramp parameter and return its value.
In simple words I get a bounding box which is tied to custom channel ramp and then I multiply all existing points with this parameter. Channel ramp deforms the bounding box thus deforming the main geometry which is inside the bounding box.
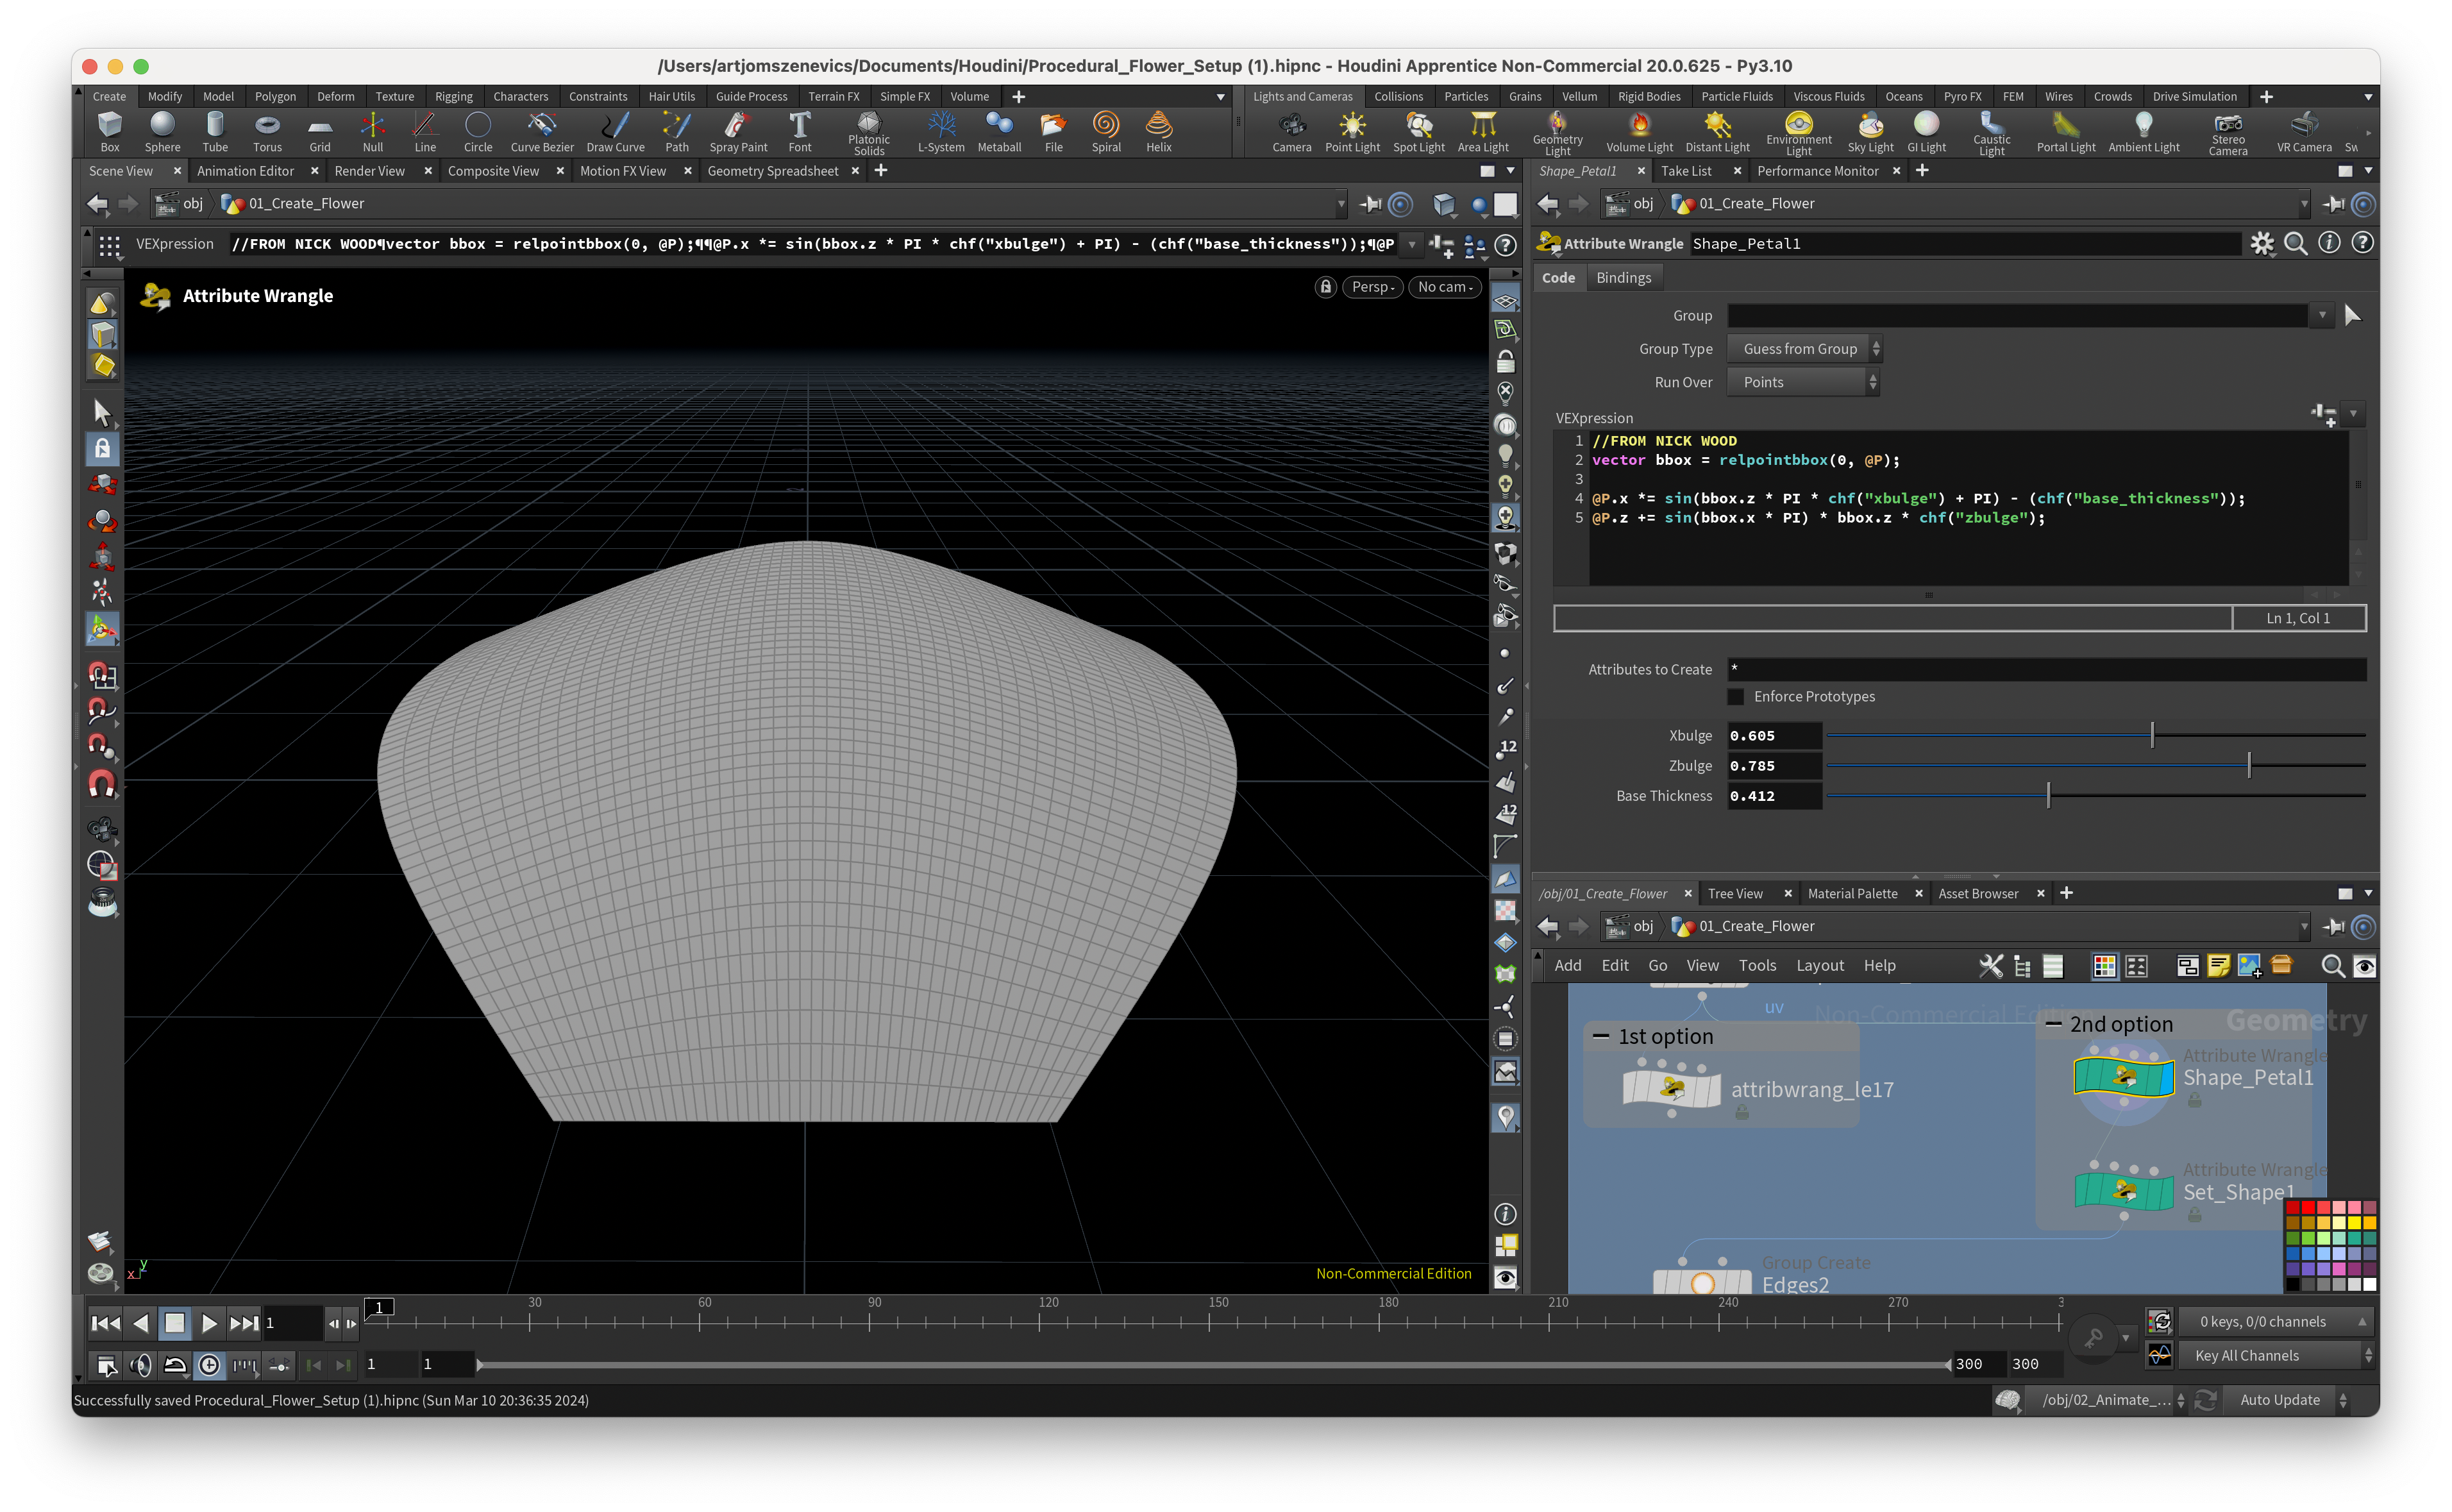
Step 3.1 In the node editor you can see that I've marked the nodes as "2nd option" and this is what Paul Esteves does. He uses VEX code from Nick Wood. And what I've done is just paste this code to ChatGPT and it explained me step-by-step how it works:
vector bbox = relpointbbox(0, @P);:- This line calculates the bounding box (
bbox) of the geometry relative to the current point@P. It returns a vector wherex,y, andzcomponents represent the dimensions of the bounding box along the x, y, and z axes respectively.
- This line calculates the bounding box (
@P.x *= sin(bbox.z * PI * chf("xbulge") + PI) - (chf("base_thickness"));:- This line modifies the x component of the current point
@P. It multiplies it by the result of the sine function applied to the product ofbbox.z, π (pi), a channel float value named "xbulge", and π (pi) again, then subtracts the value of a channel float named "base_thickness".
- This line modifies the x component of the current point
@P.z += sin(bbox.x * PI) * bbox.z * chf("zbulge");:- This line modifies the z component of the current point
@P. It adds to it the result of the sine function applied to the product ofbbox.xand π (pi), multiplied bybbox.zand a channel float named "zbulge".
- This line modifies the z component of the current point
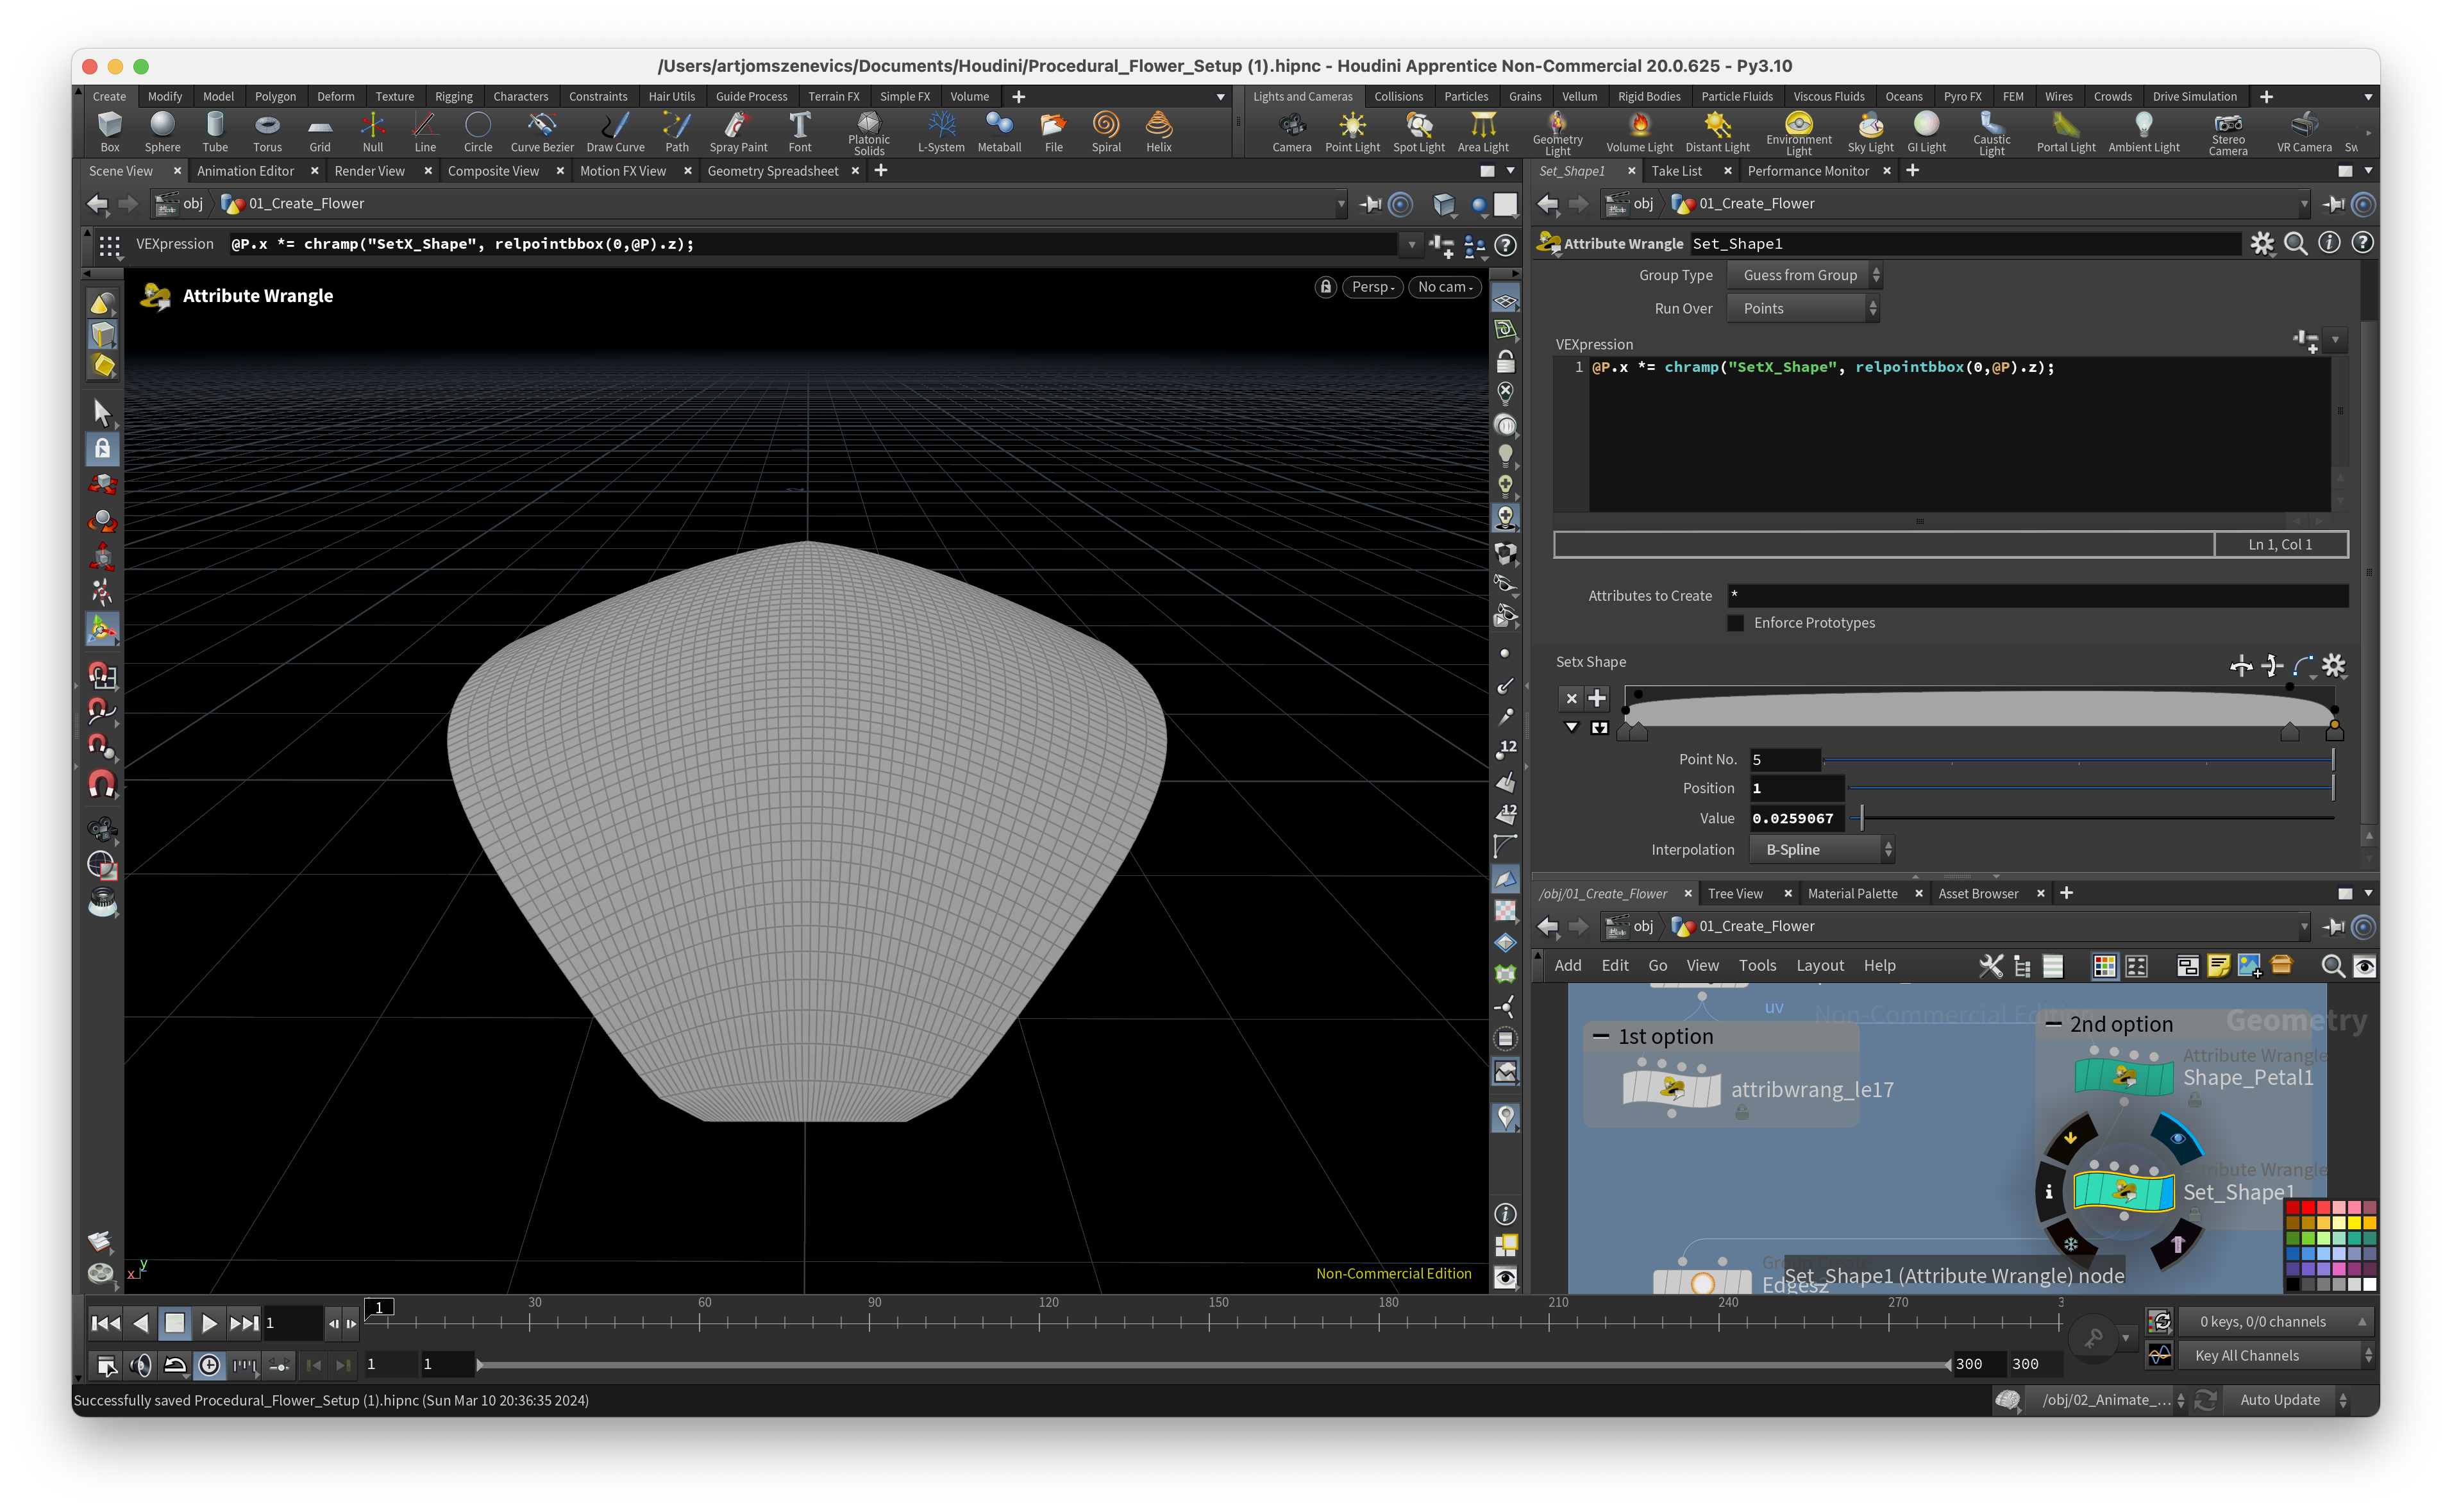
Step 3.2 - As you can see it's the same as my 1st setup which you can use to deform grid but this time it uses the same ramp channel to deform above shape. Further I've decided to go with both setups because it gave me more flexibility for petal modelling.
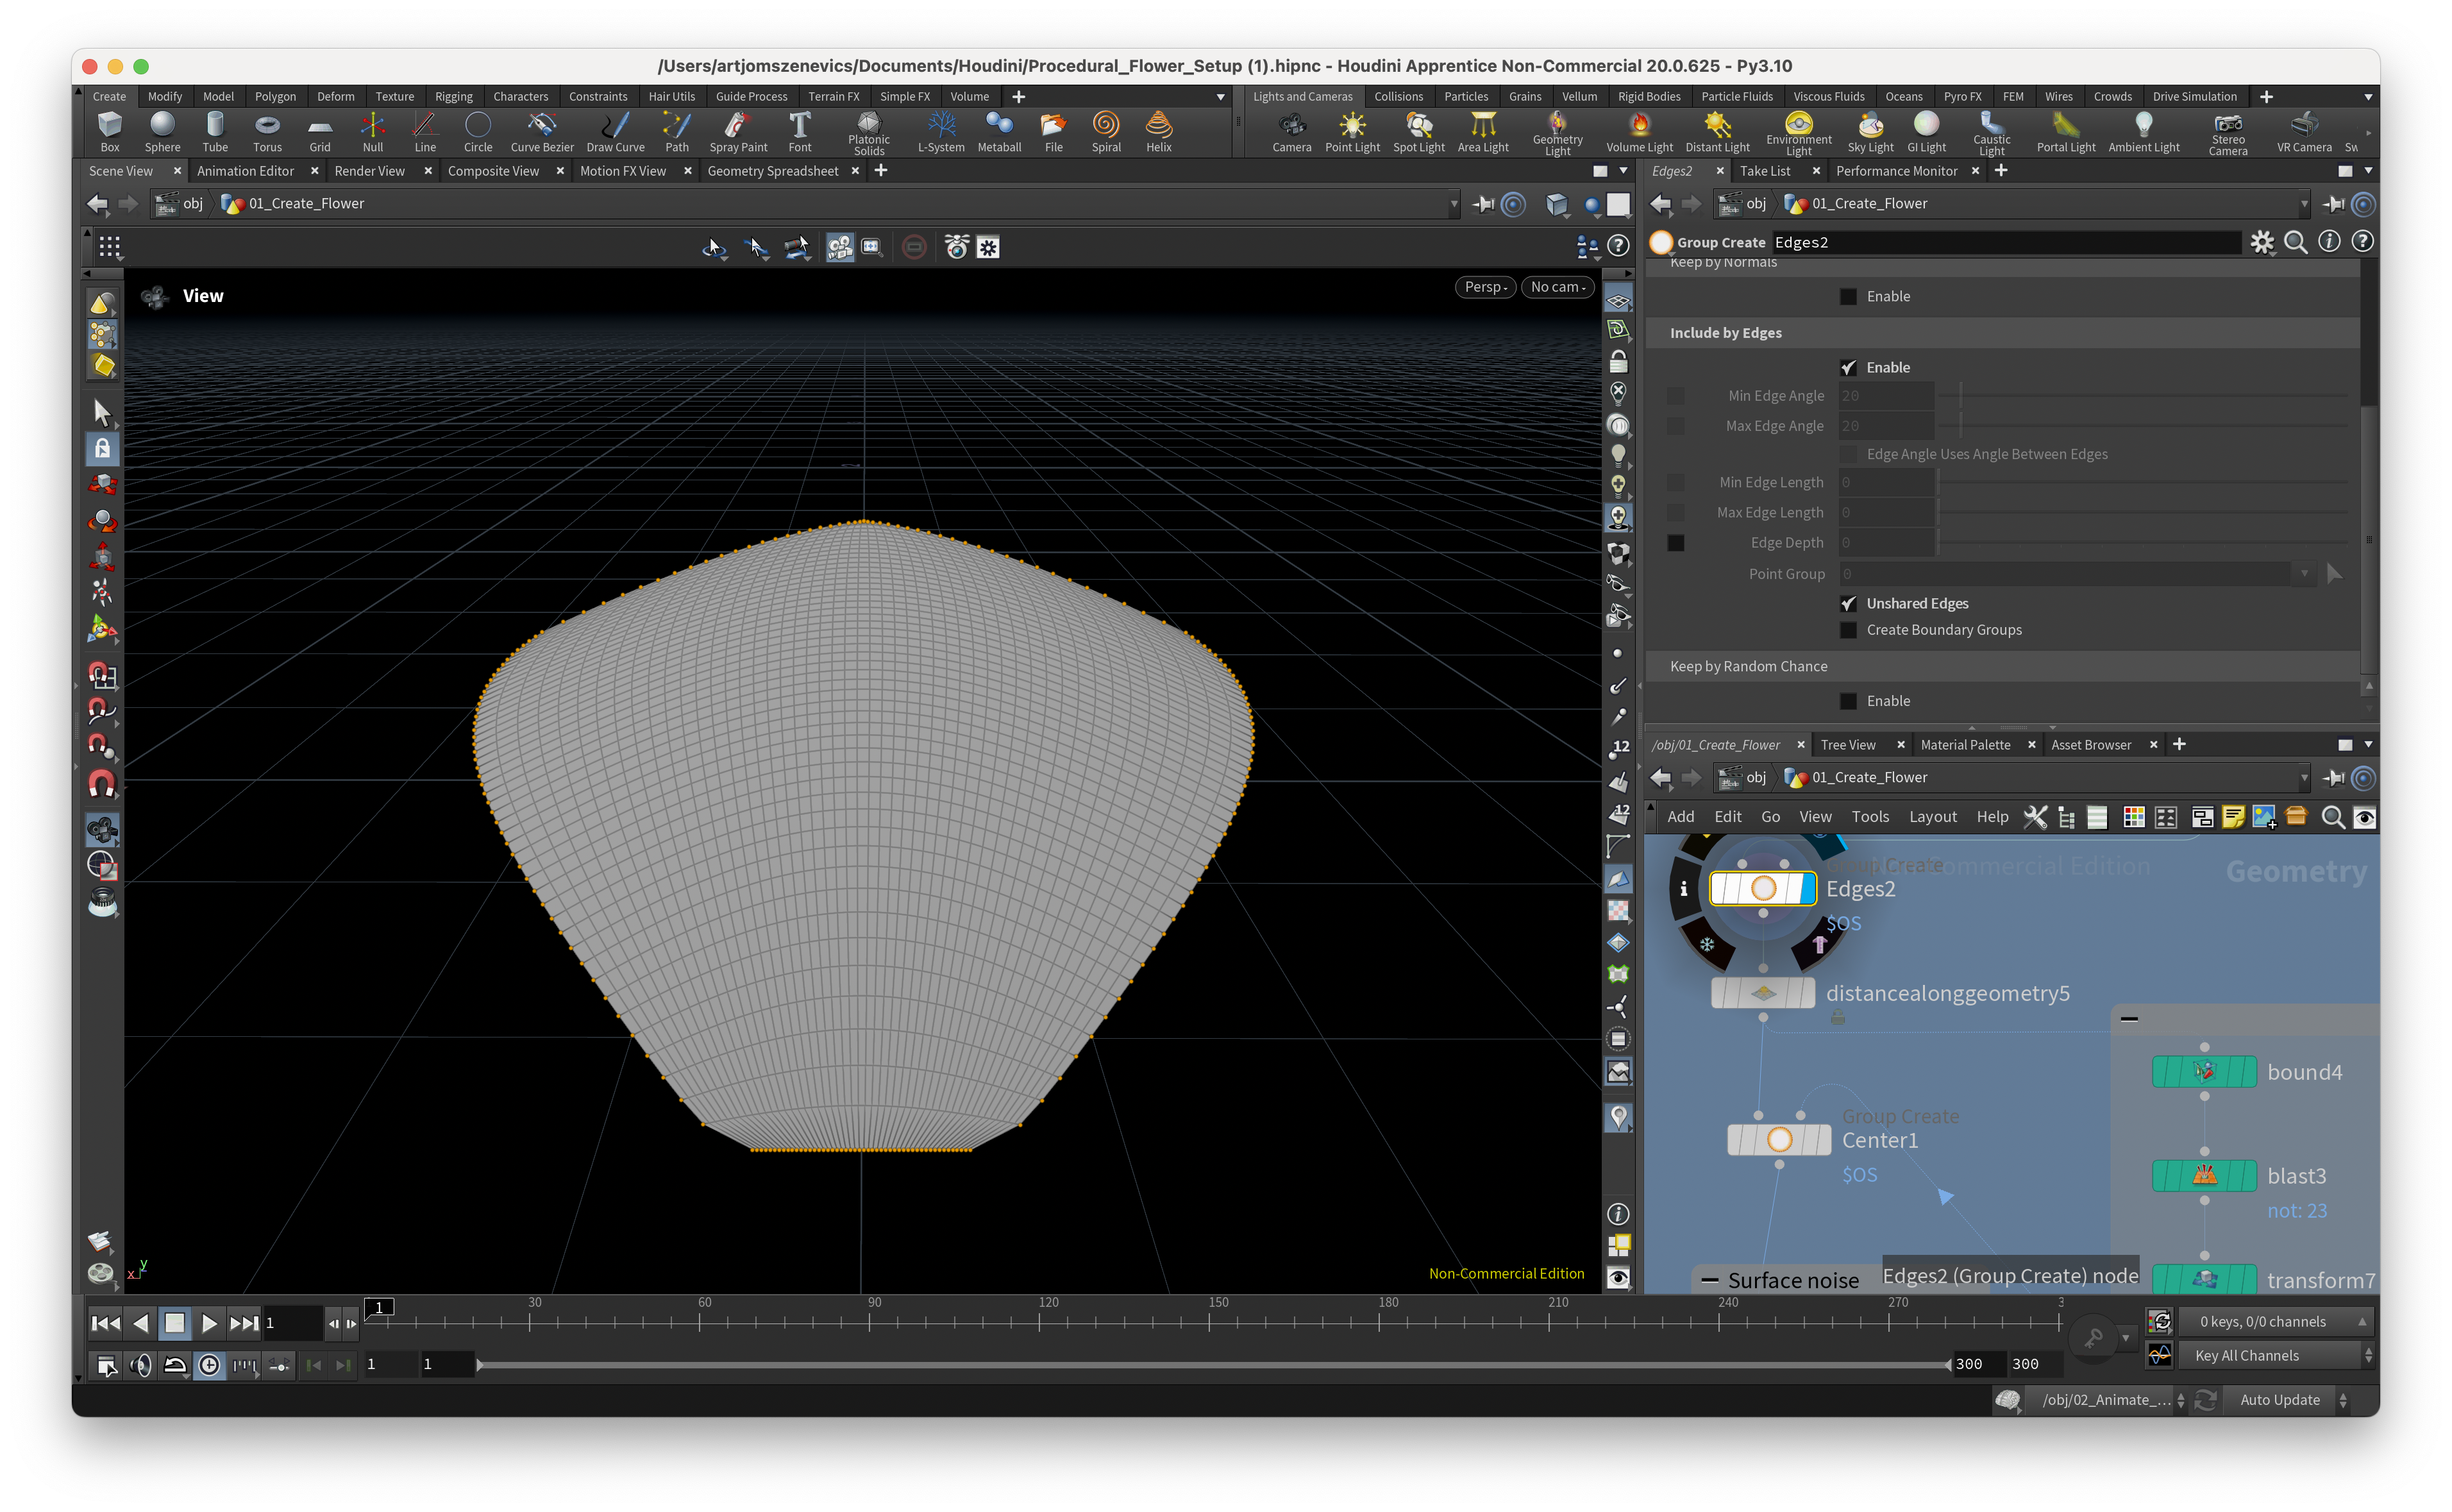
Step 4 - Next this node I find very useful because it allows us to select all the edges that are unshared. Simply by clicking "Unshared Edges". Overall Group node can be used in many different ways.
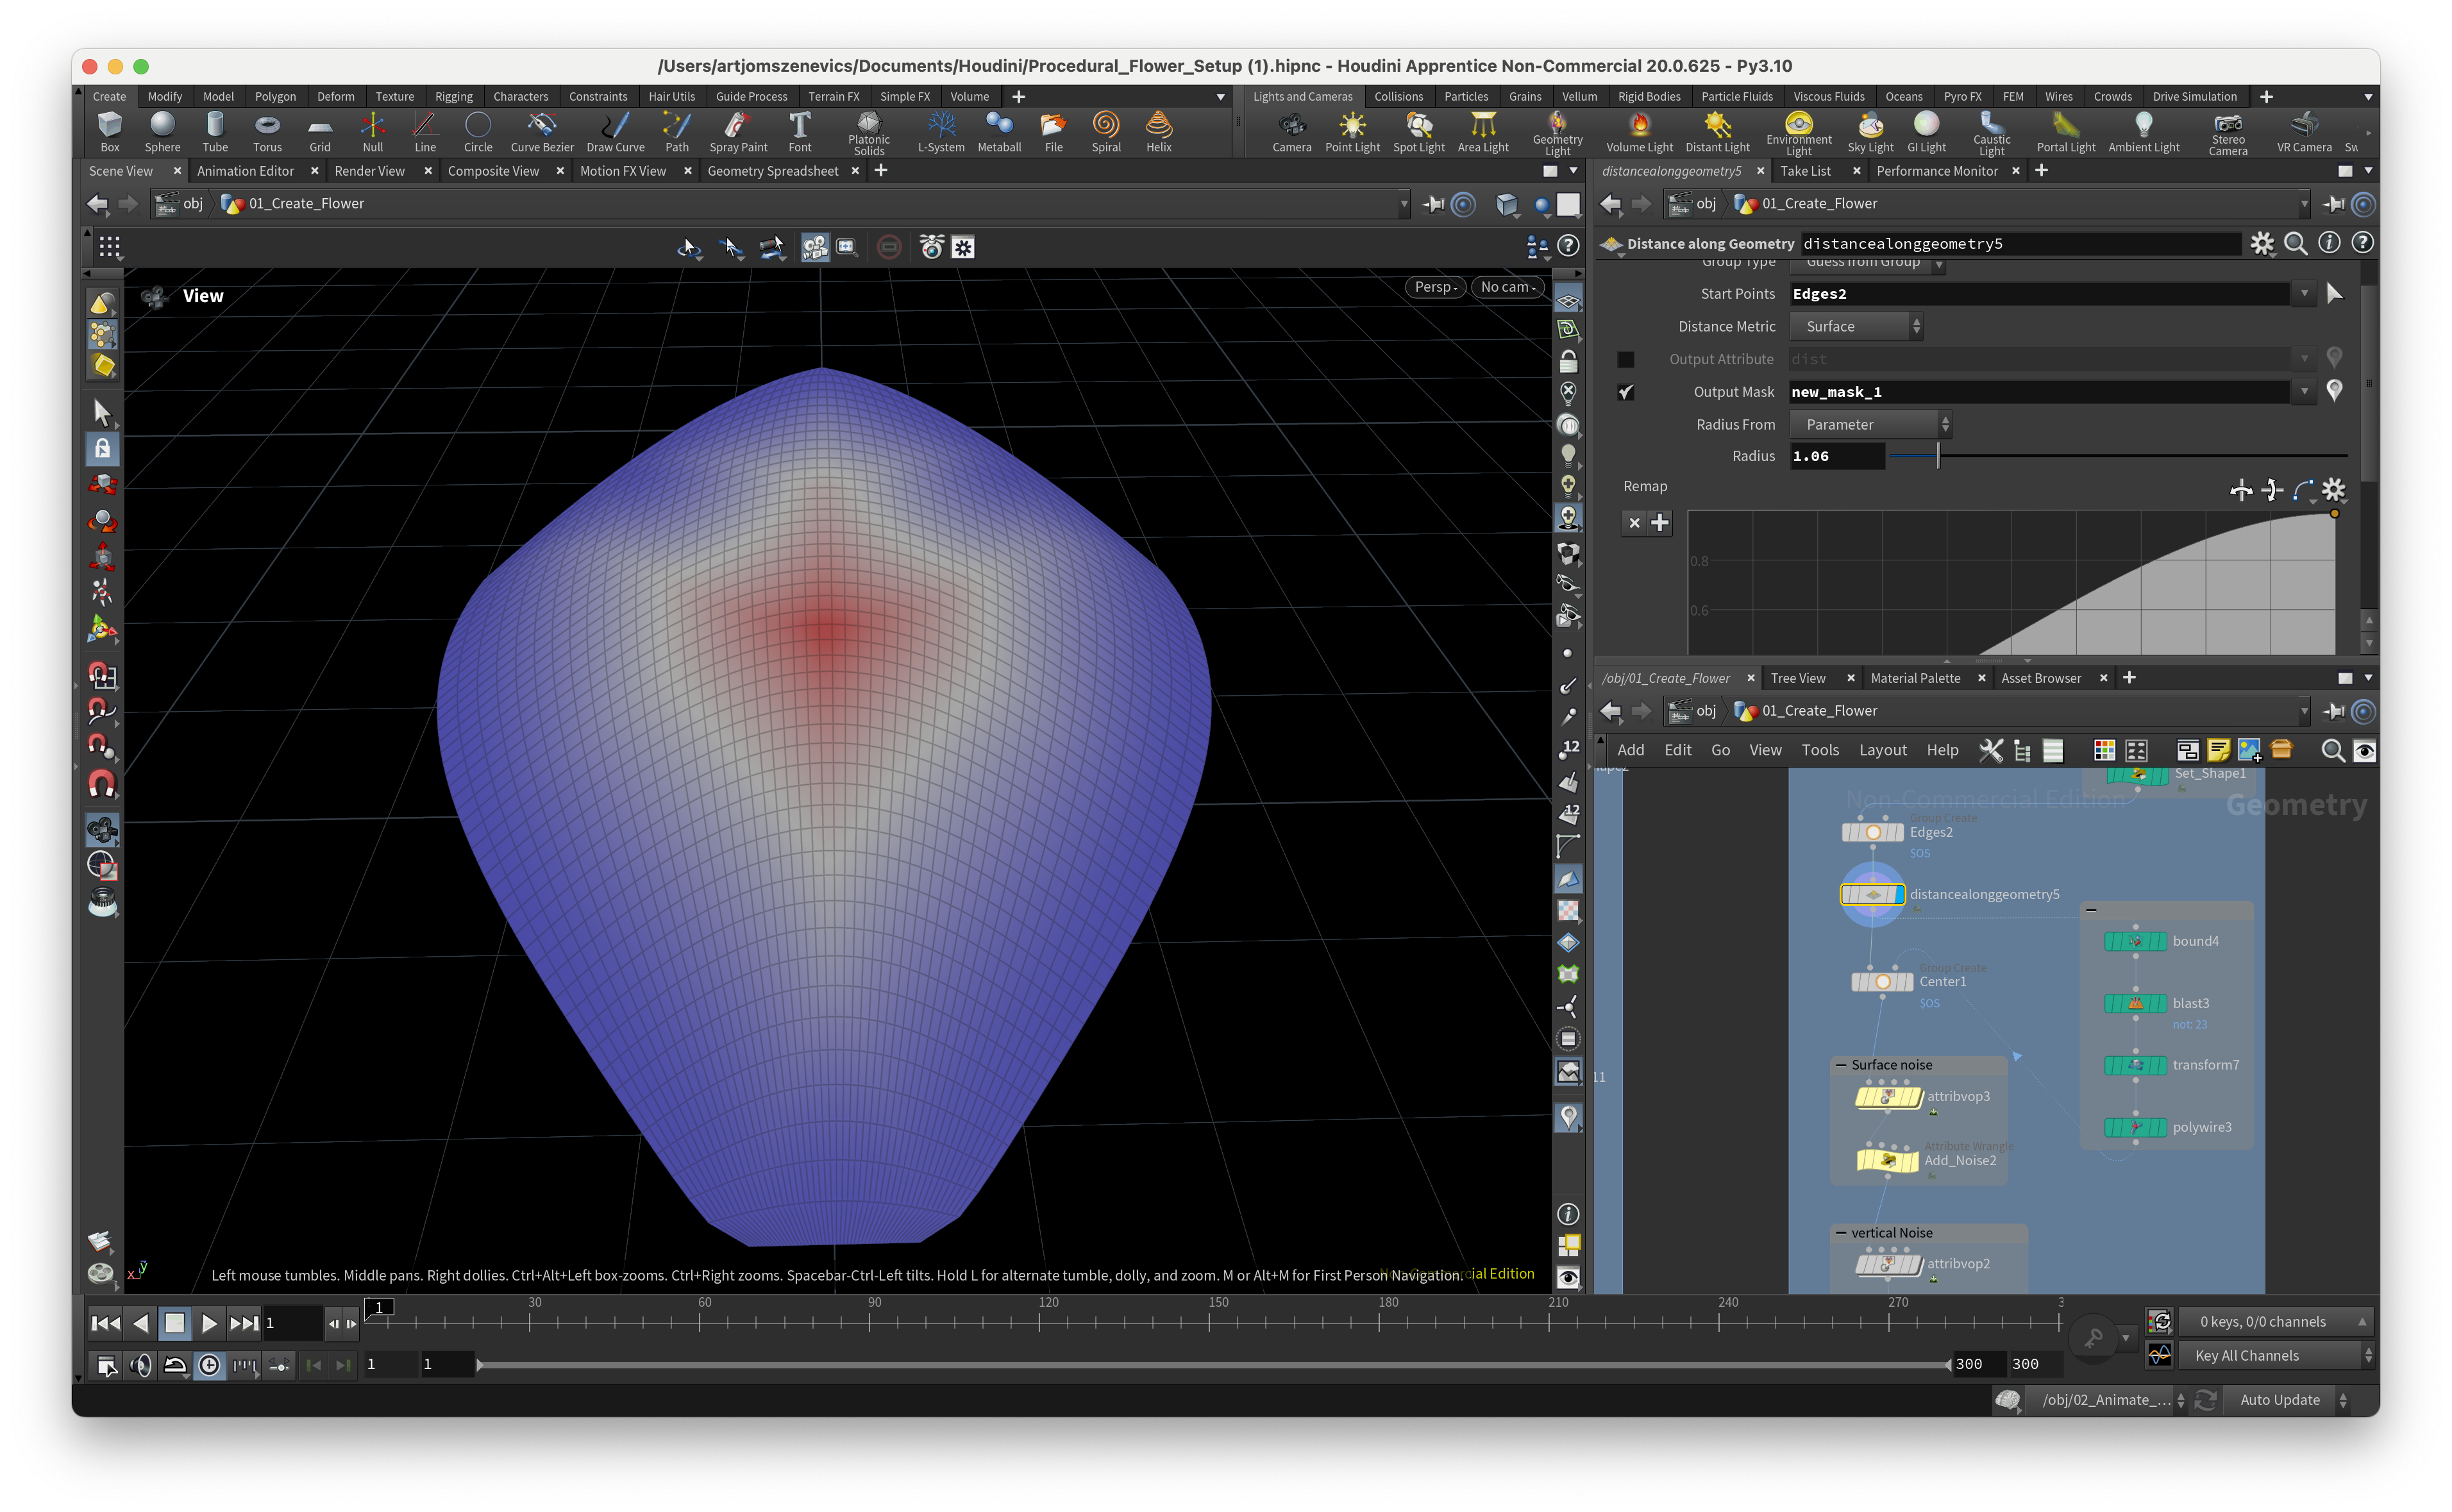
Step 5 - Next we input previously selected point edges as Start Points in "distance along geometry" node.
"Distance along geometry" node - Measures the distance of the shortest path along the geometry’s edges or surfaces from each start point.
And we can visualise it as the output mask by controlling its both radius size and ramp.
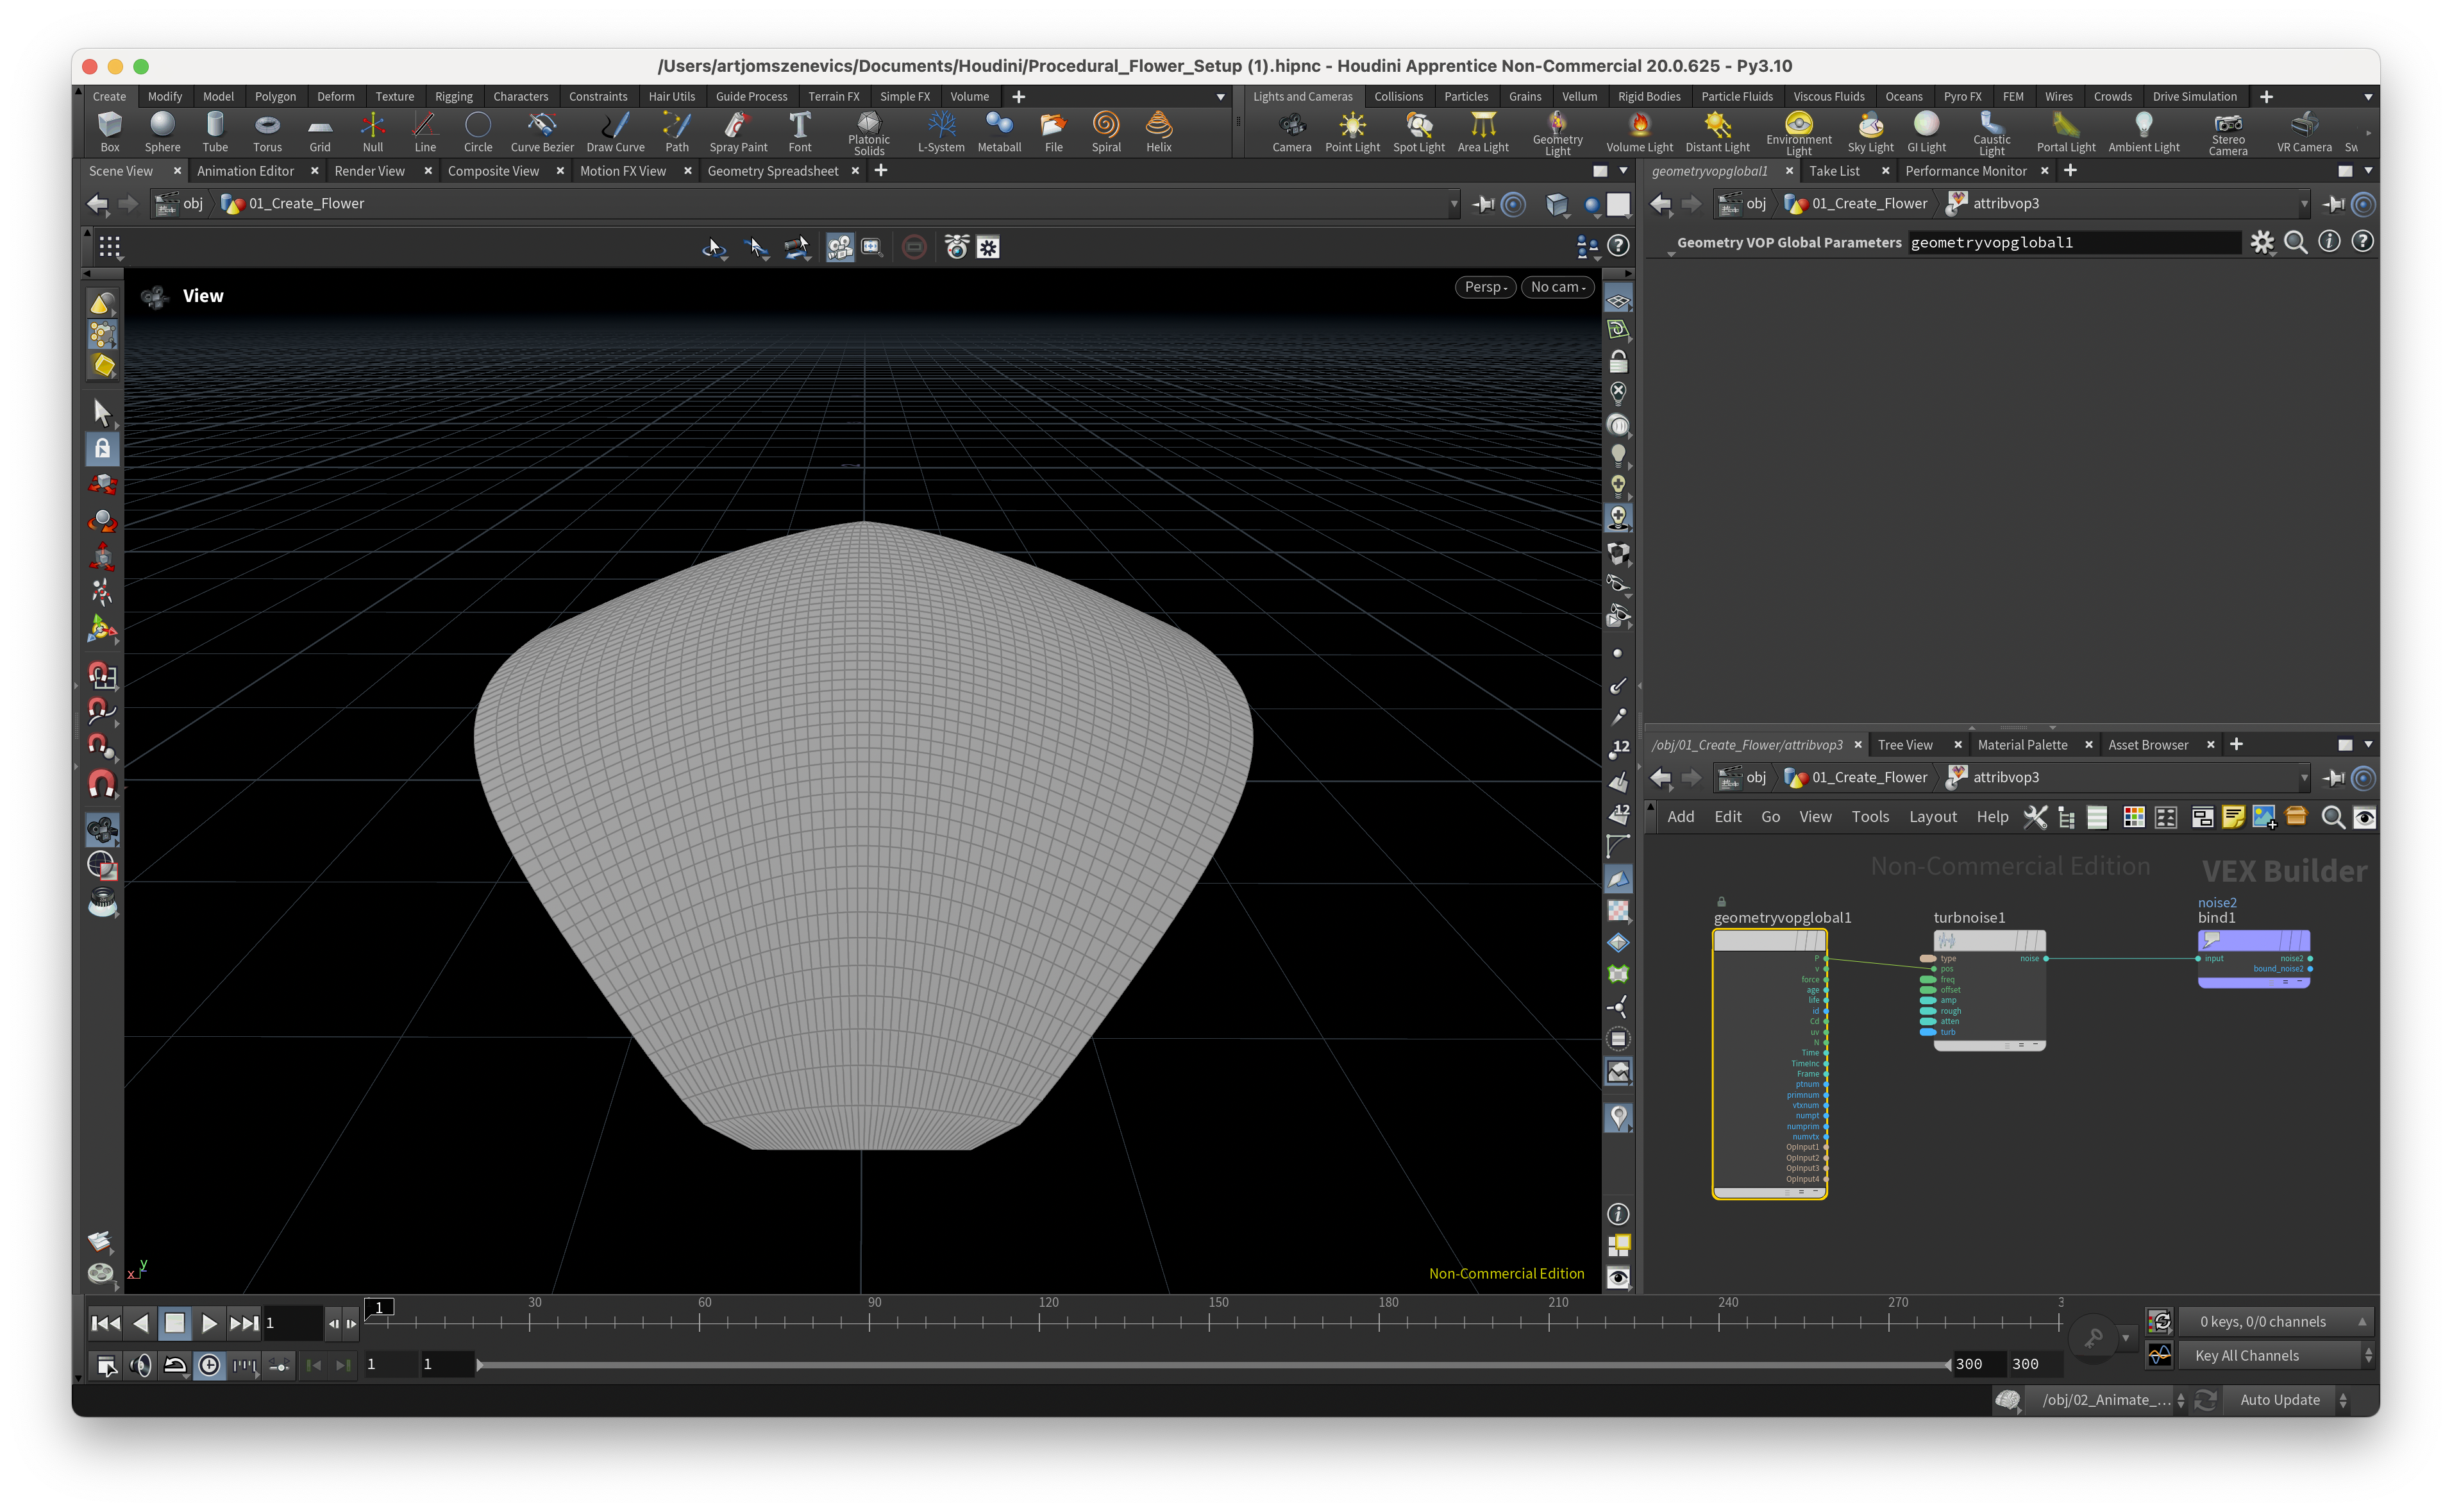
Step 6 - In the attribute VOP (more info here: https://www.sidefx.com/docs/houdini/nodes/sop/attribvop.html) in short is smth similar to Expresso C4D Node-based system however this time it makes much more sense and you can create your own deformers.
Here what Paul did is promote Turbulent noise in the "Export Bind" so that later I can reuse in the Attribute Wrangler. Visually this doesn't give us any results.

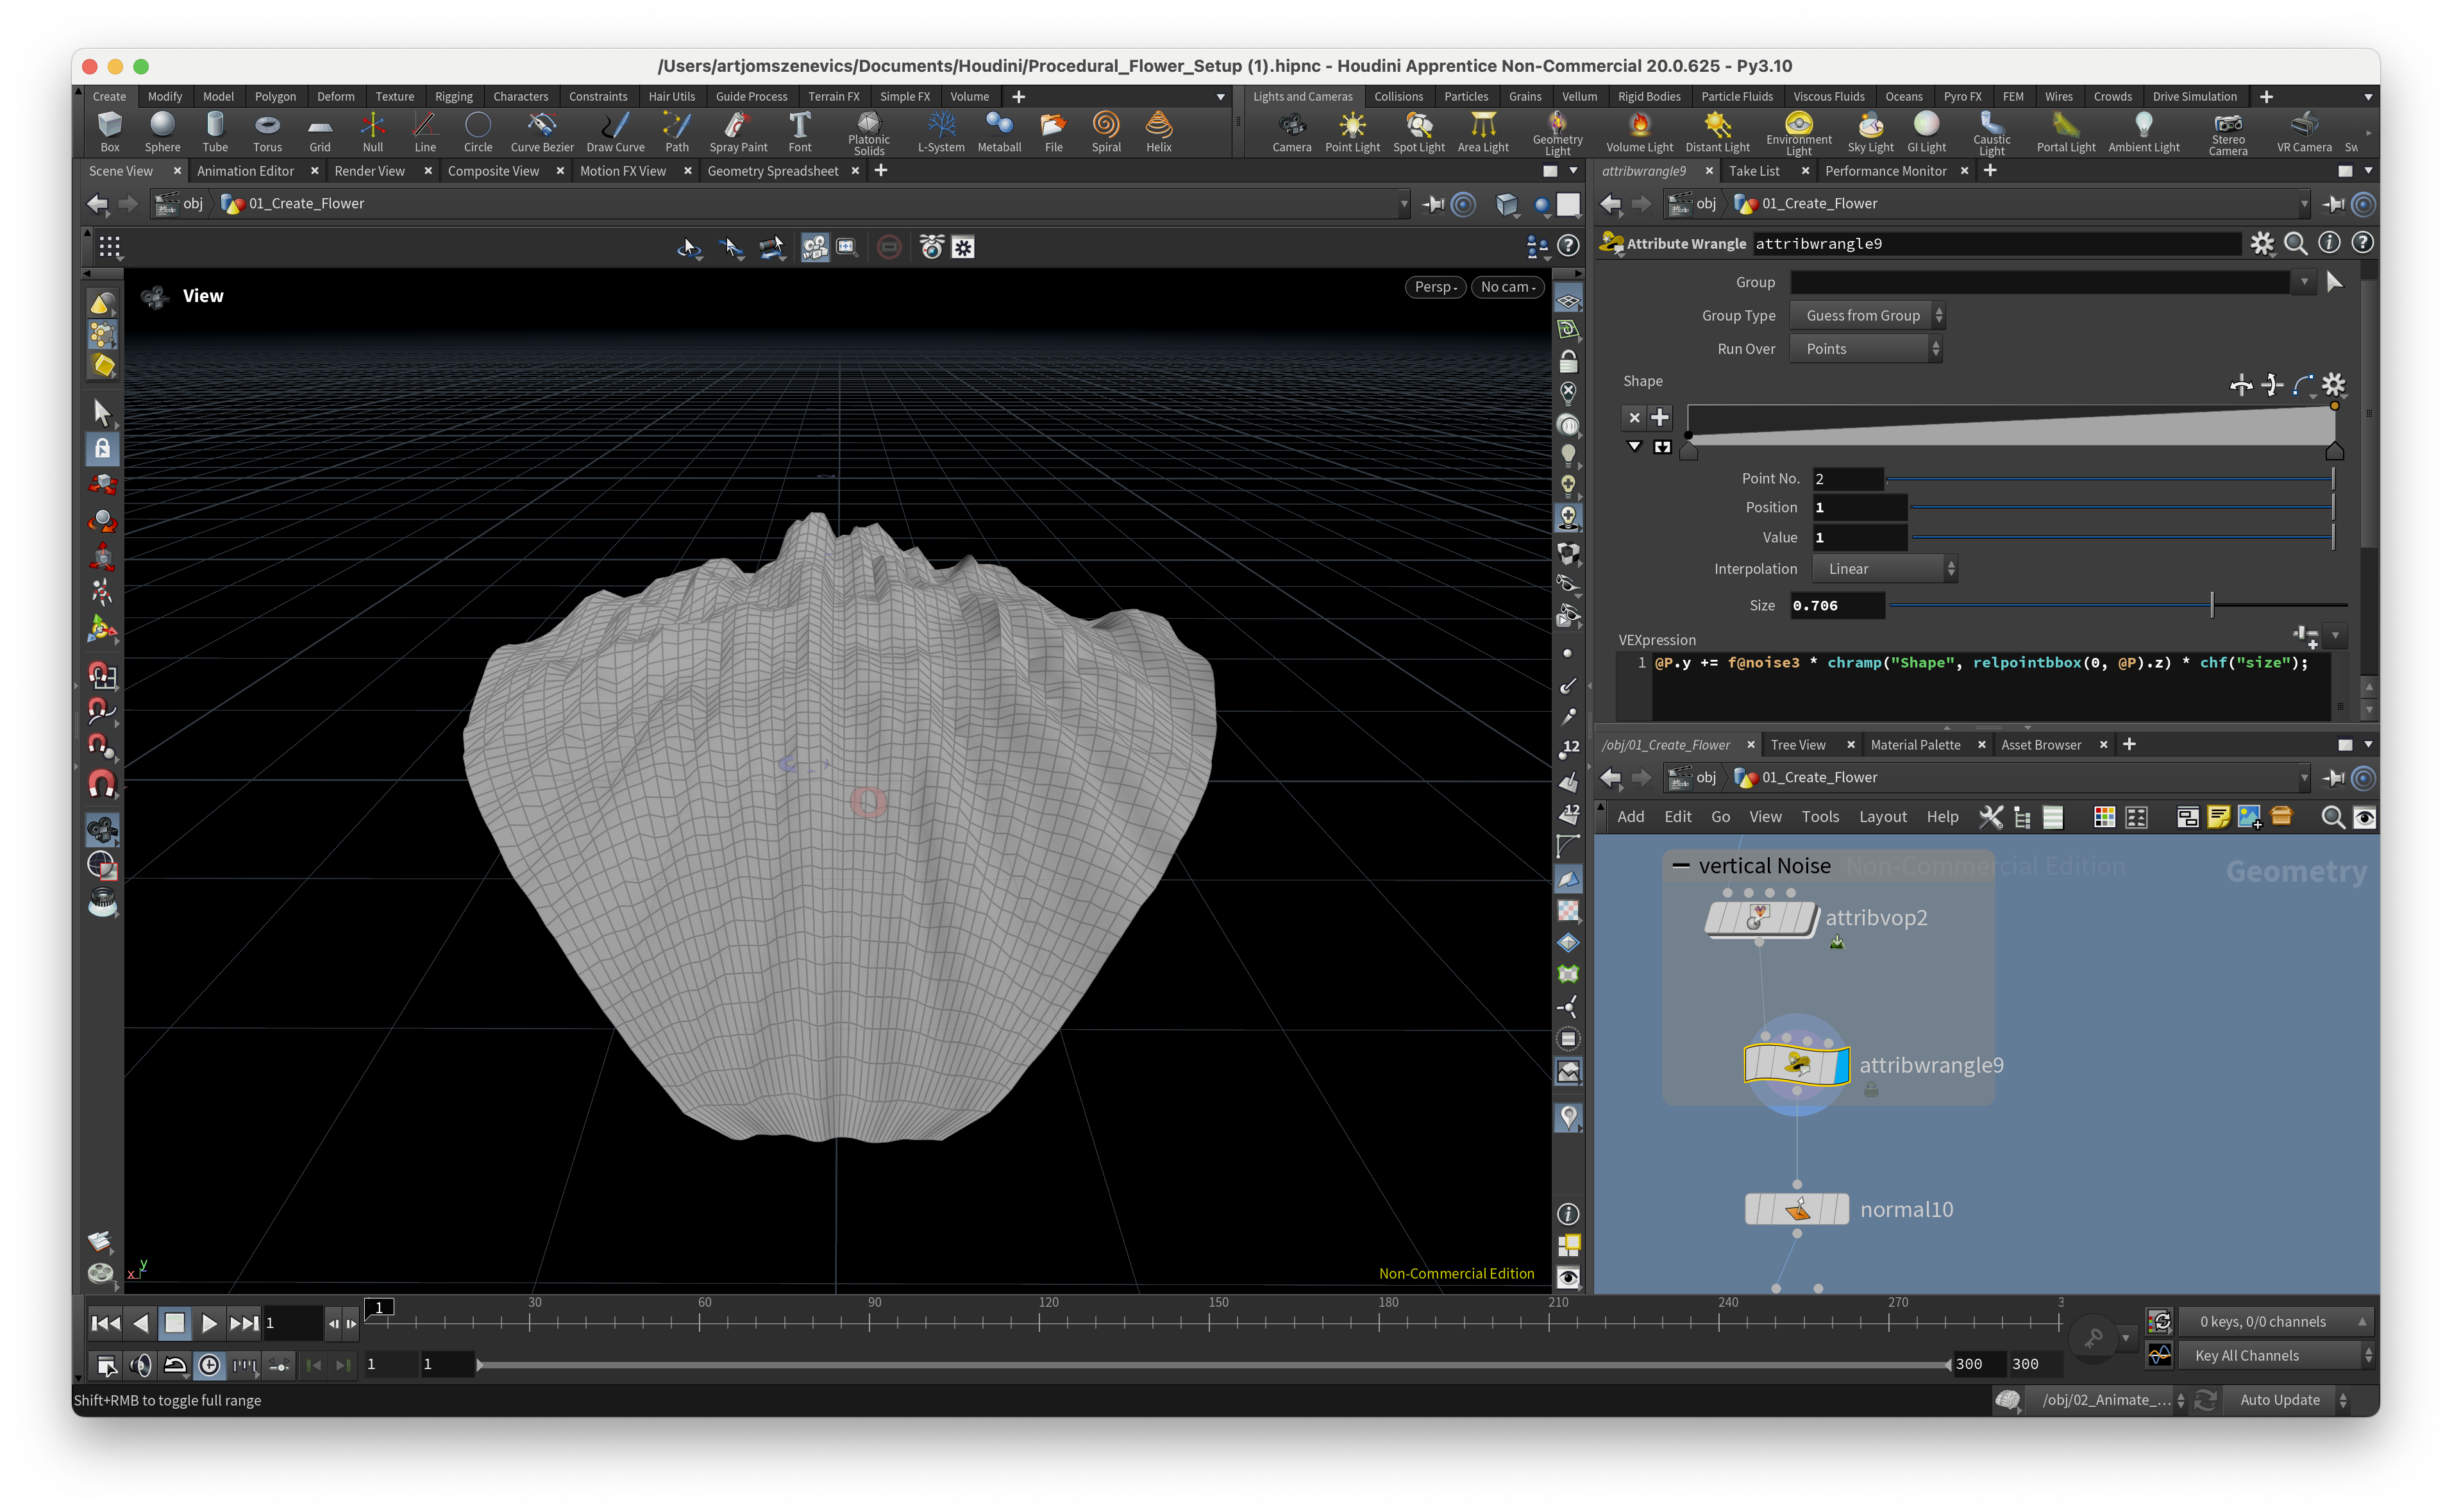
Step 7 - As you can see we're promoting noise as float attribute. Multiplying it again with our channel ramp with boundingbox and additional channel float. In the result we have a smooth gradient of noise along our geometry.

Step 8 - I've applied the same Attribute VOP but this time with Curl Noise instead of Turbulence noise in the Export Bind. Just for a more variety in noises.
Step 9 - Same approach as the above with how we implement our noise inside the Attribute VOP. I find it more flexible to have it applied in Attribute Wrangler with bounding box in channel ramp. The Curl Noise it self is more stretched along "Z" axis to give us rails along geometry.
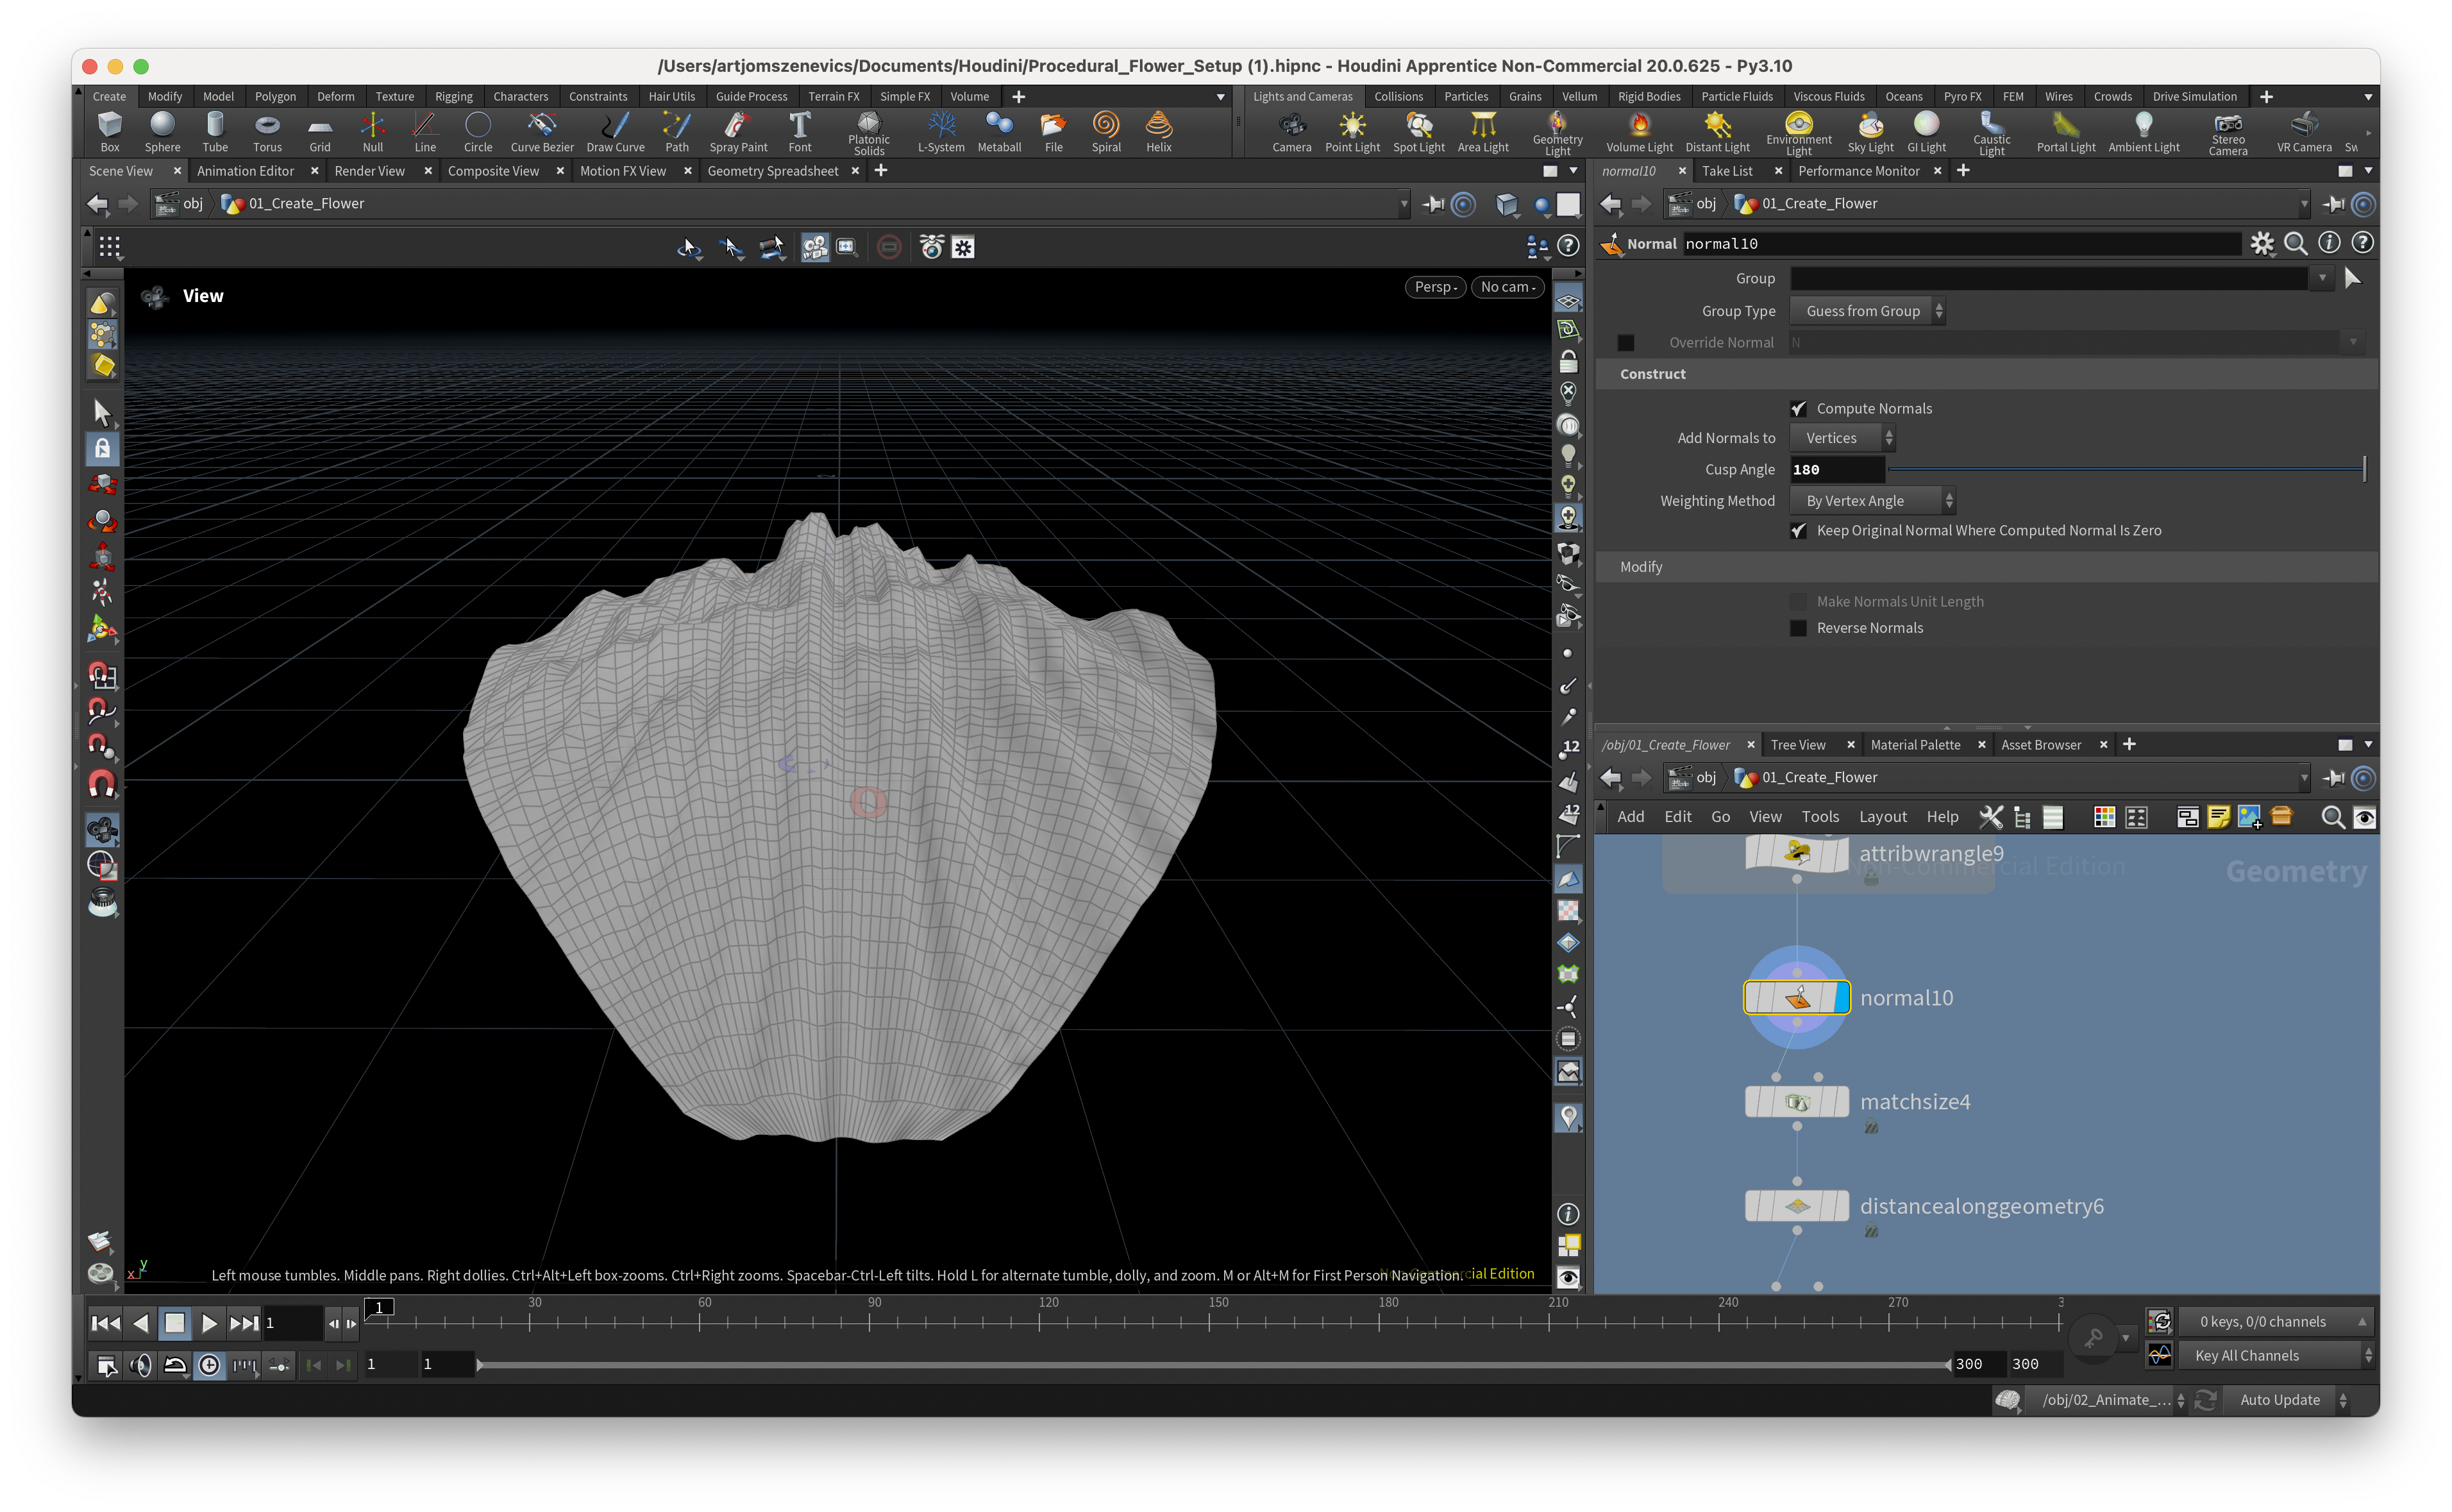
Step 10 - Is simply applying the Normals
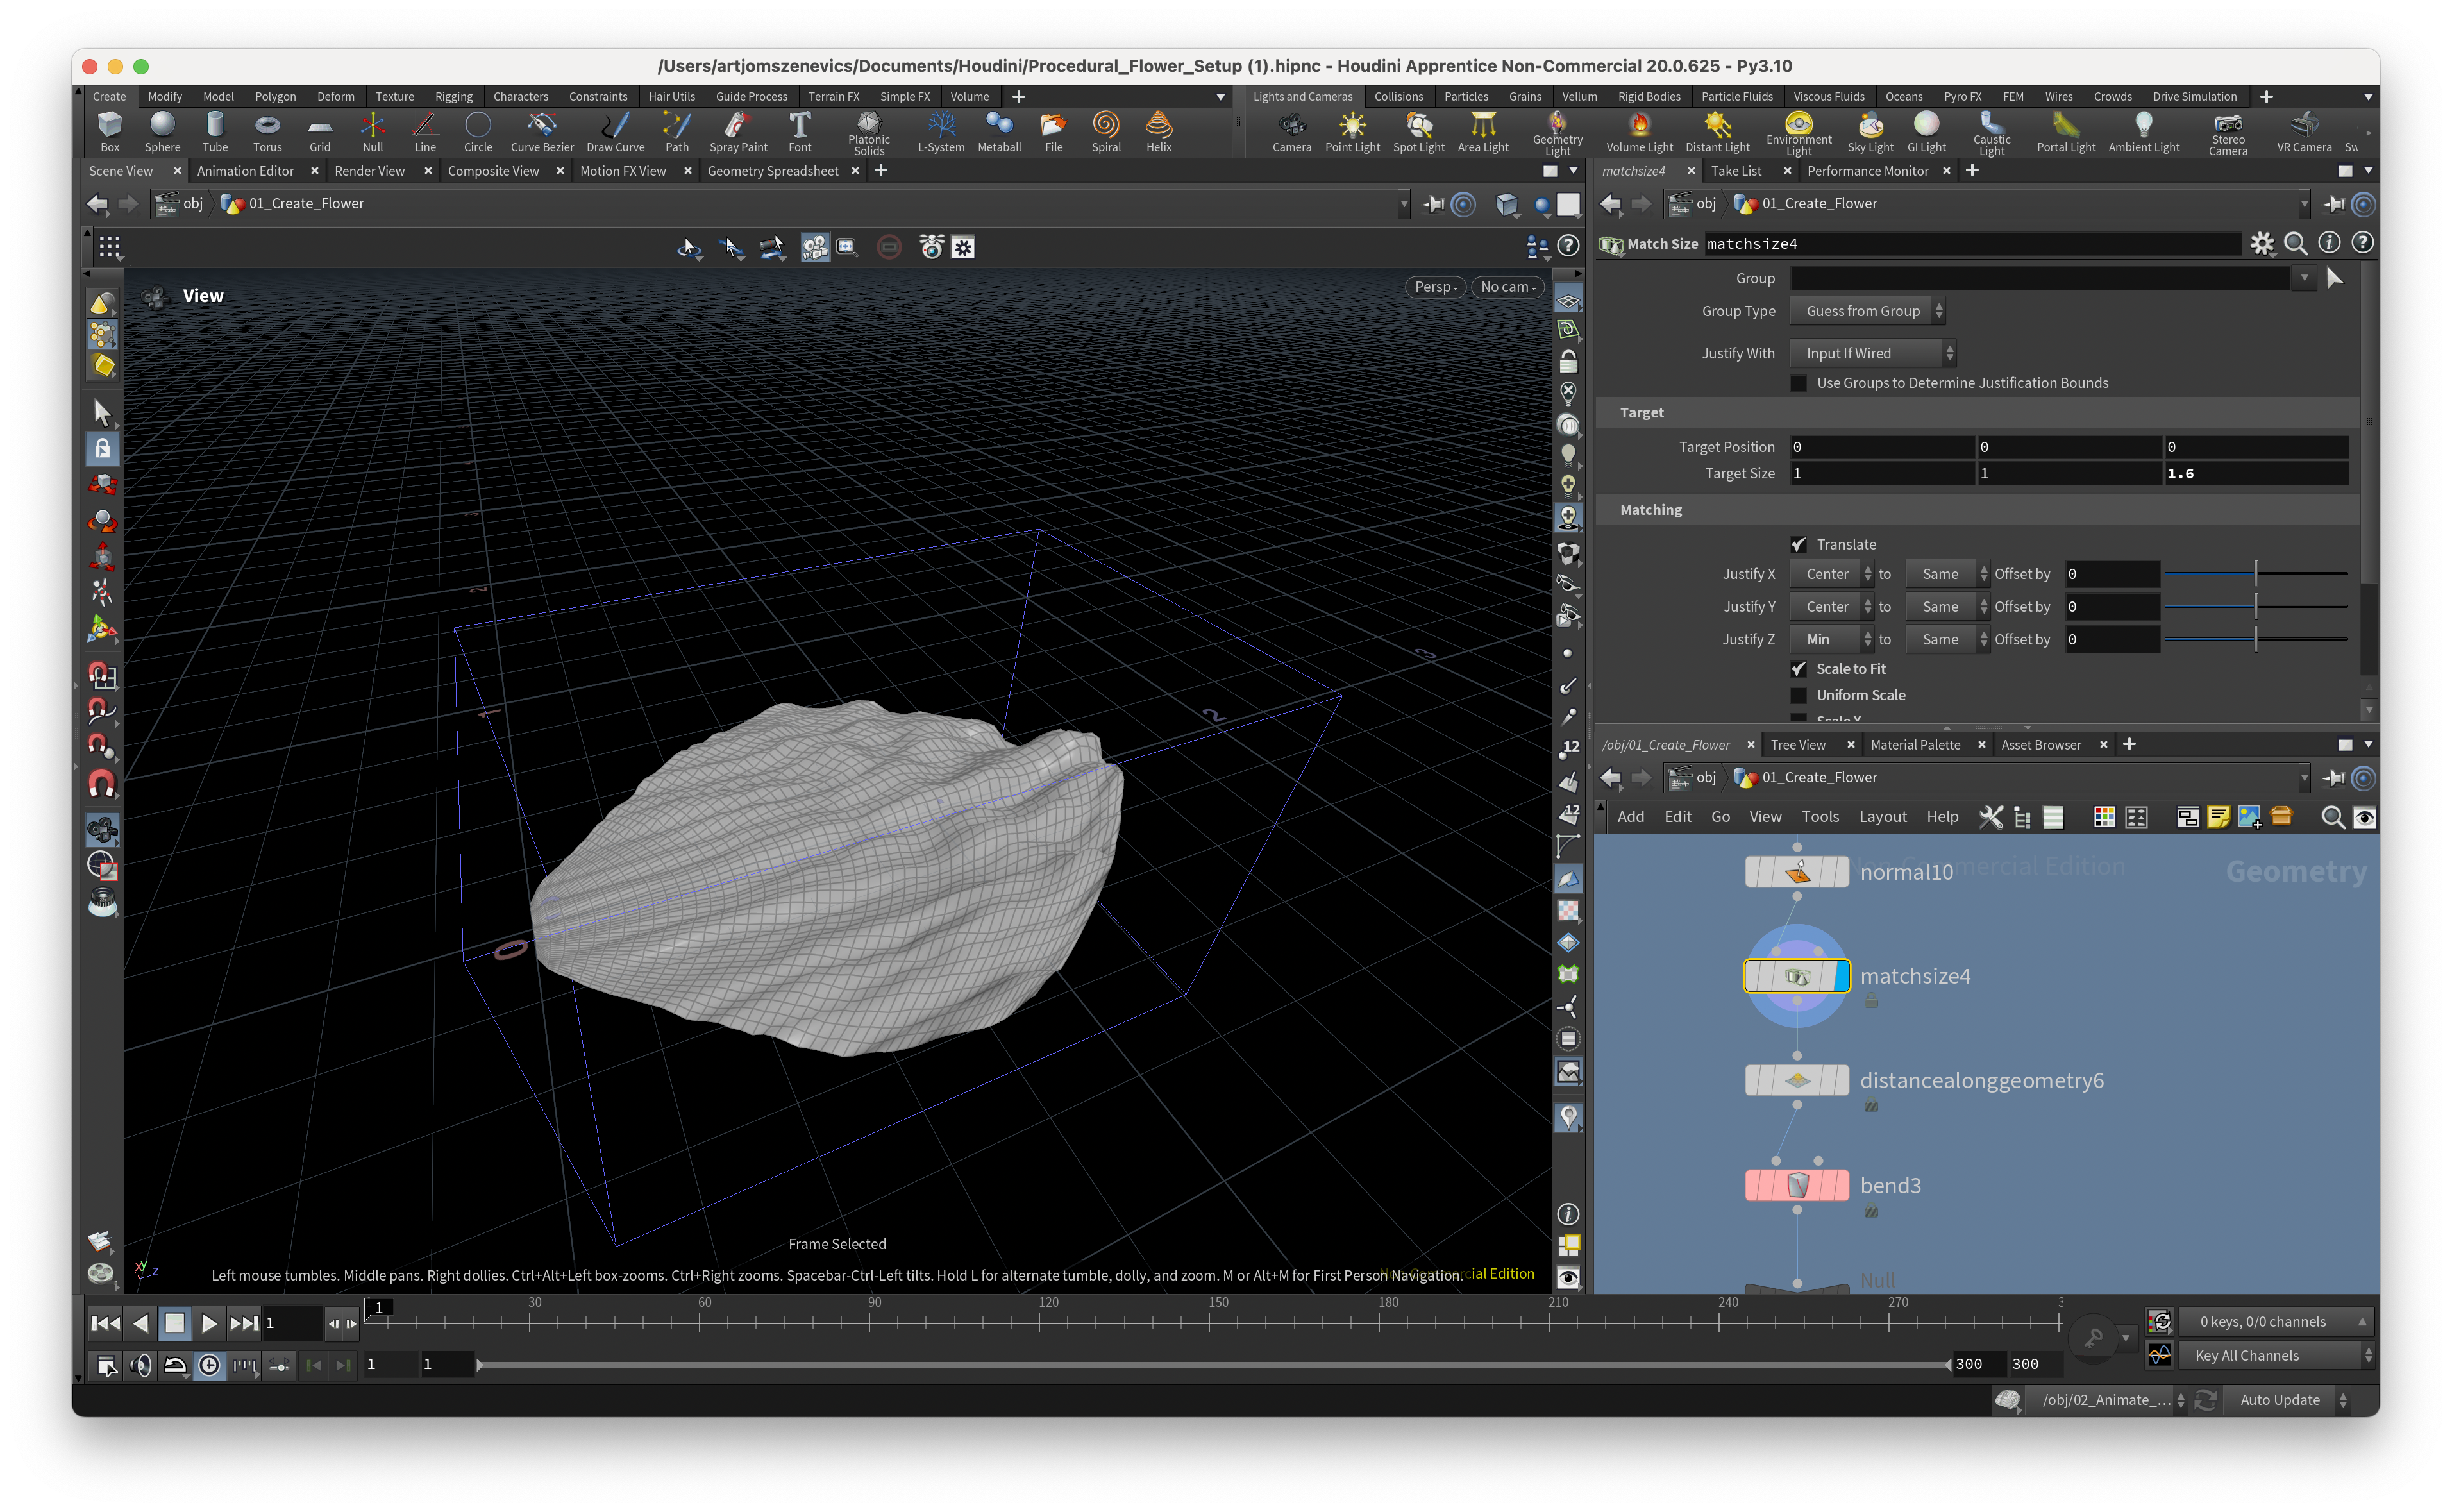
Step 11 - Match Size Node -Resizes and recenters the input geometry to match a reference bounding box.
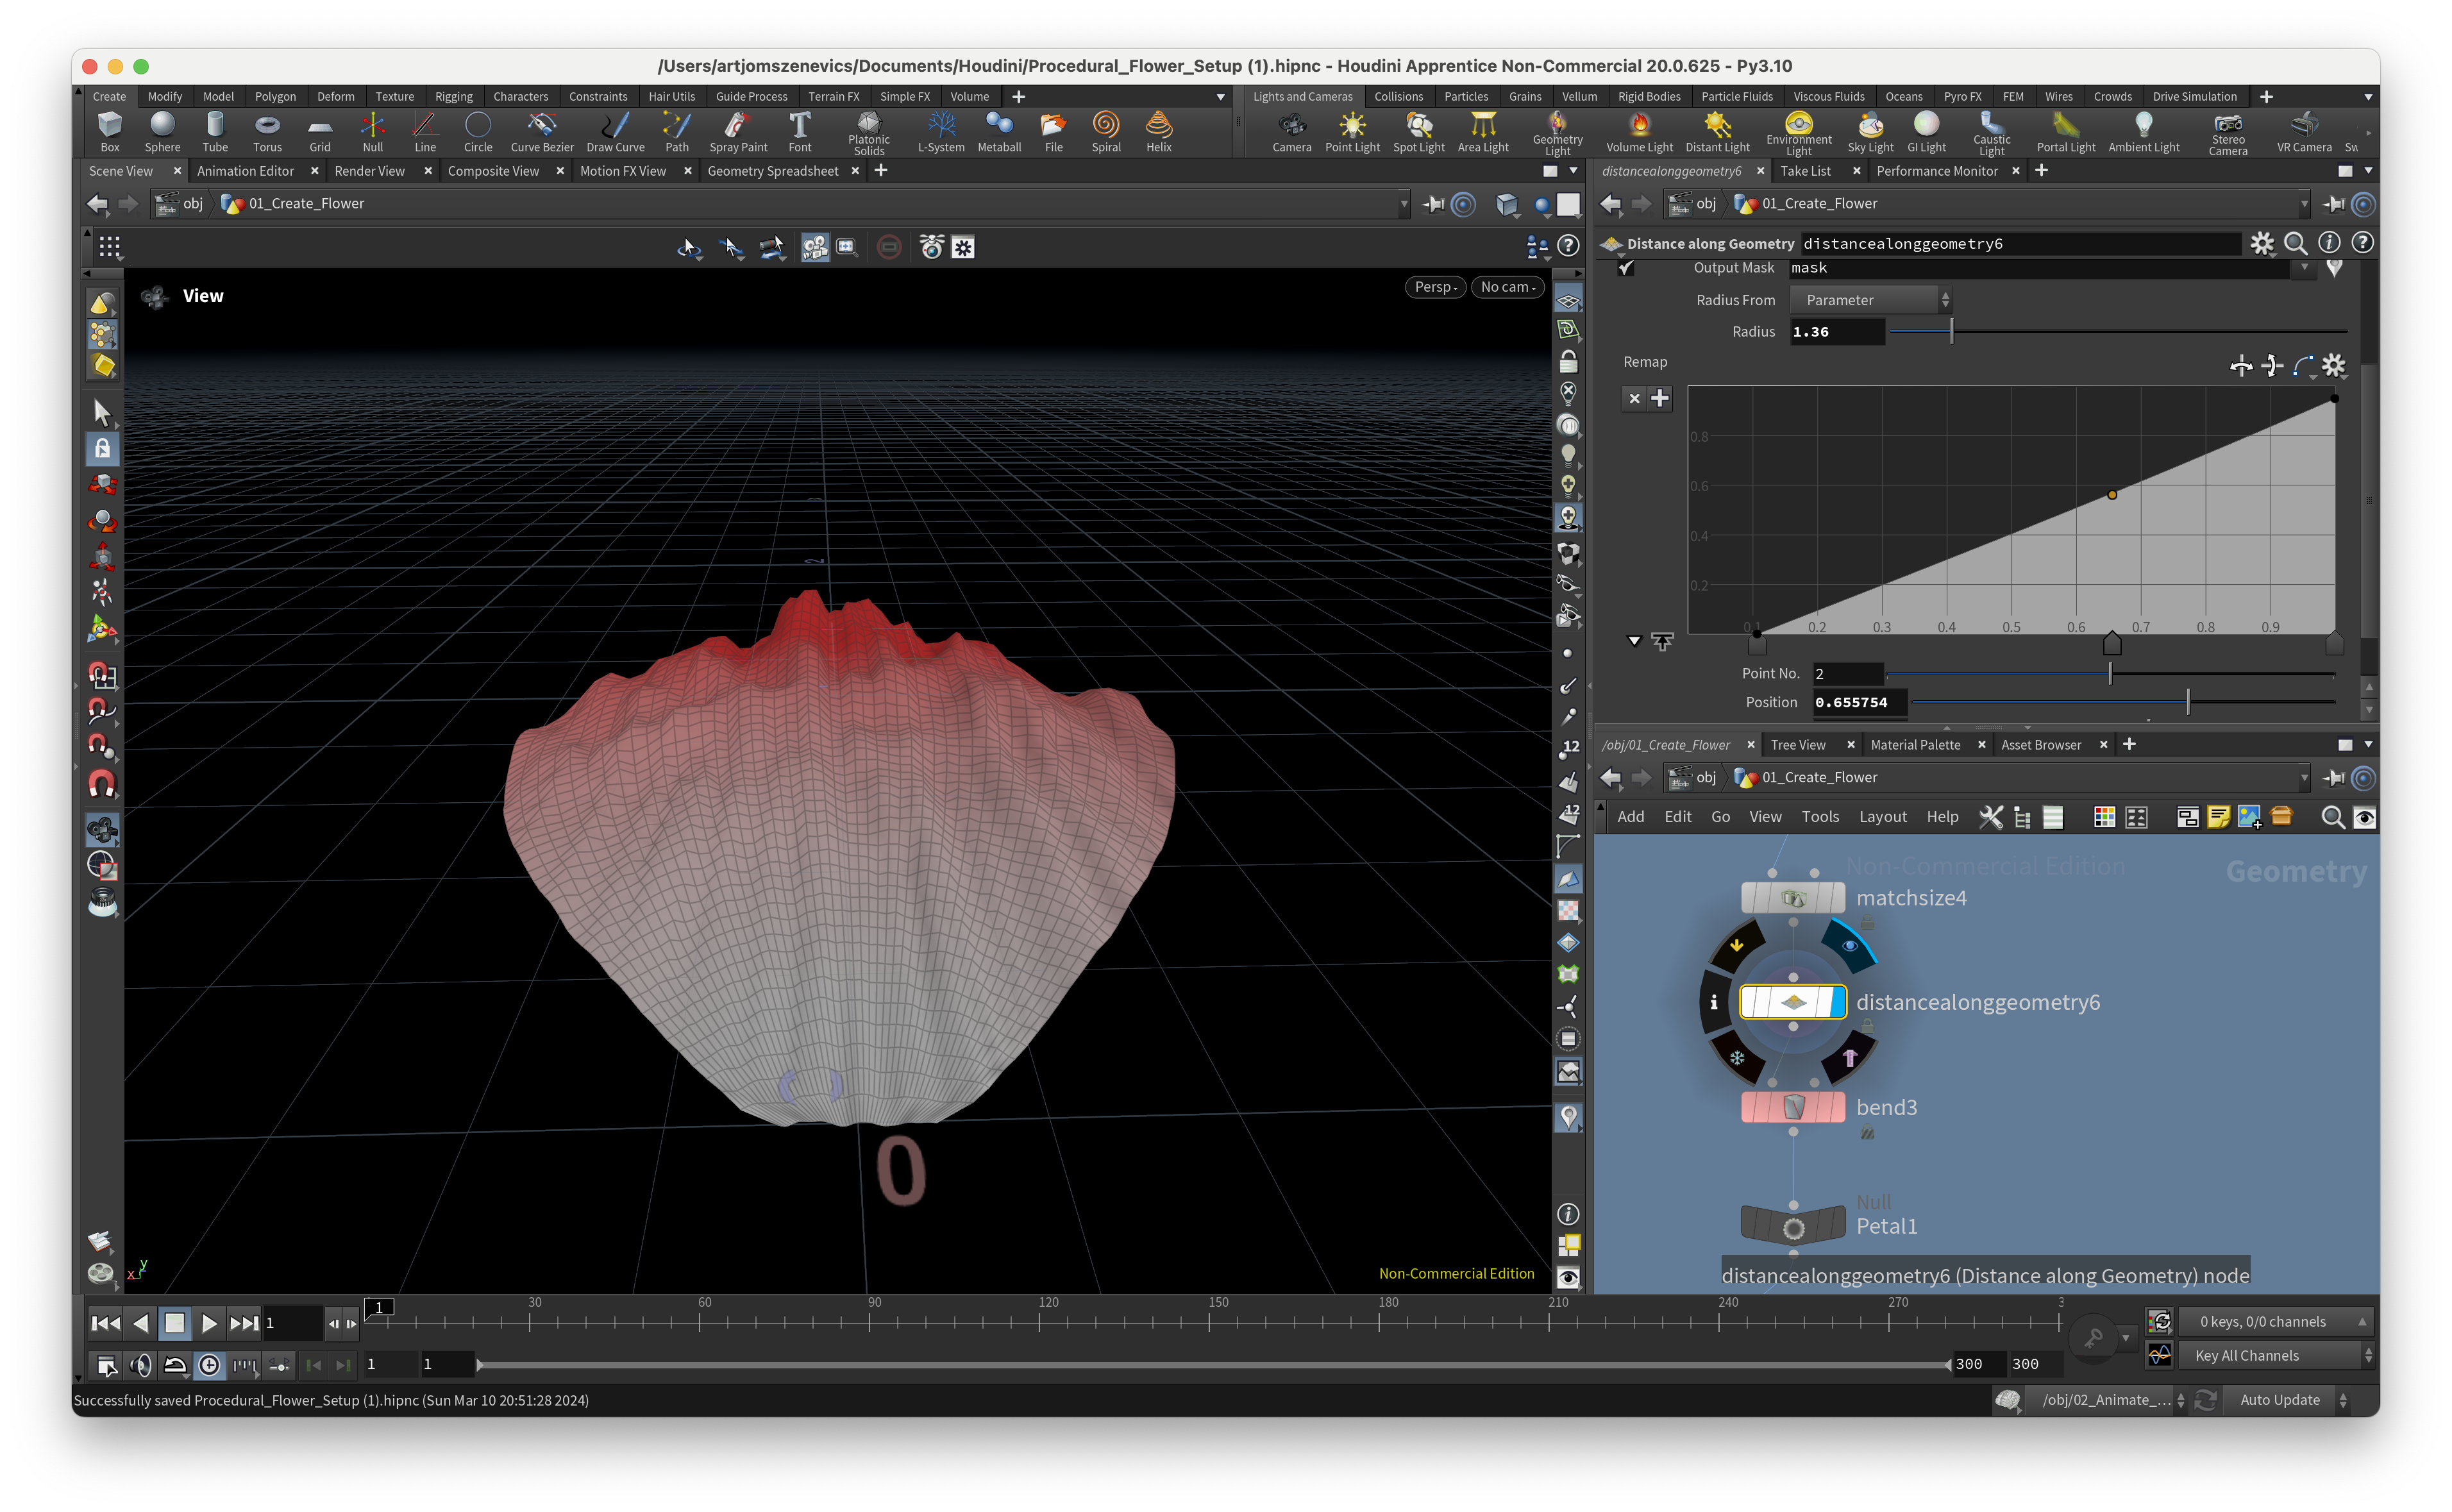
Step 12 - Previously I've already mentioned the Distance along the geometry but this time I'm not using edge points as my faloff start but rather a random point on top of geometry. In addition I can control radius as well as ramp.
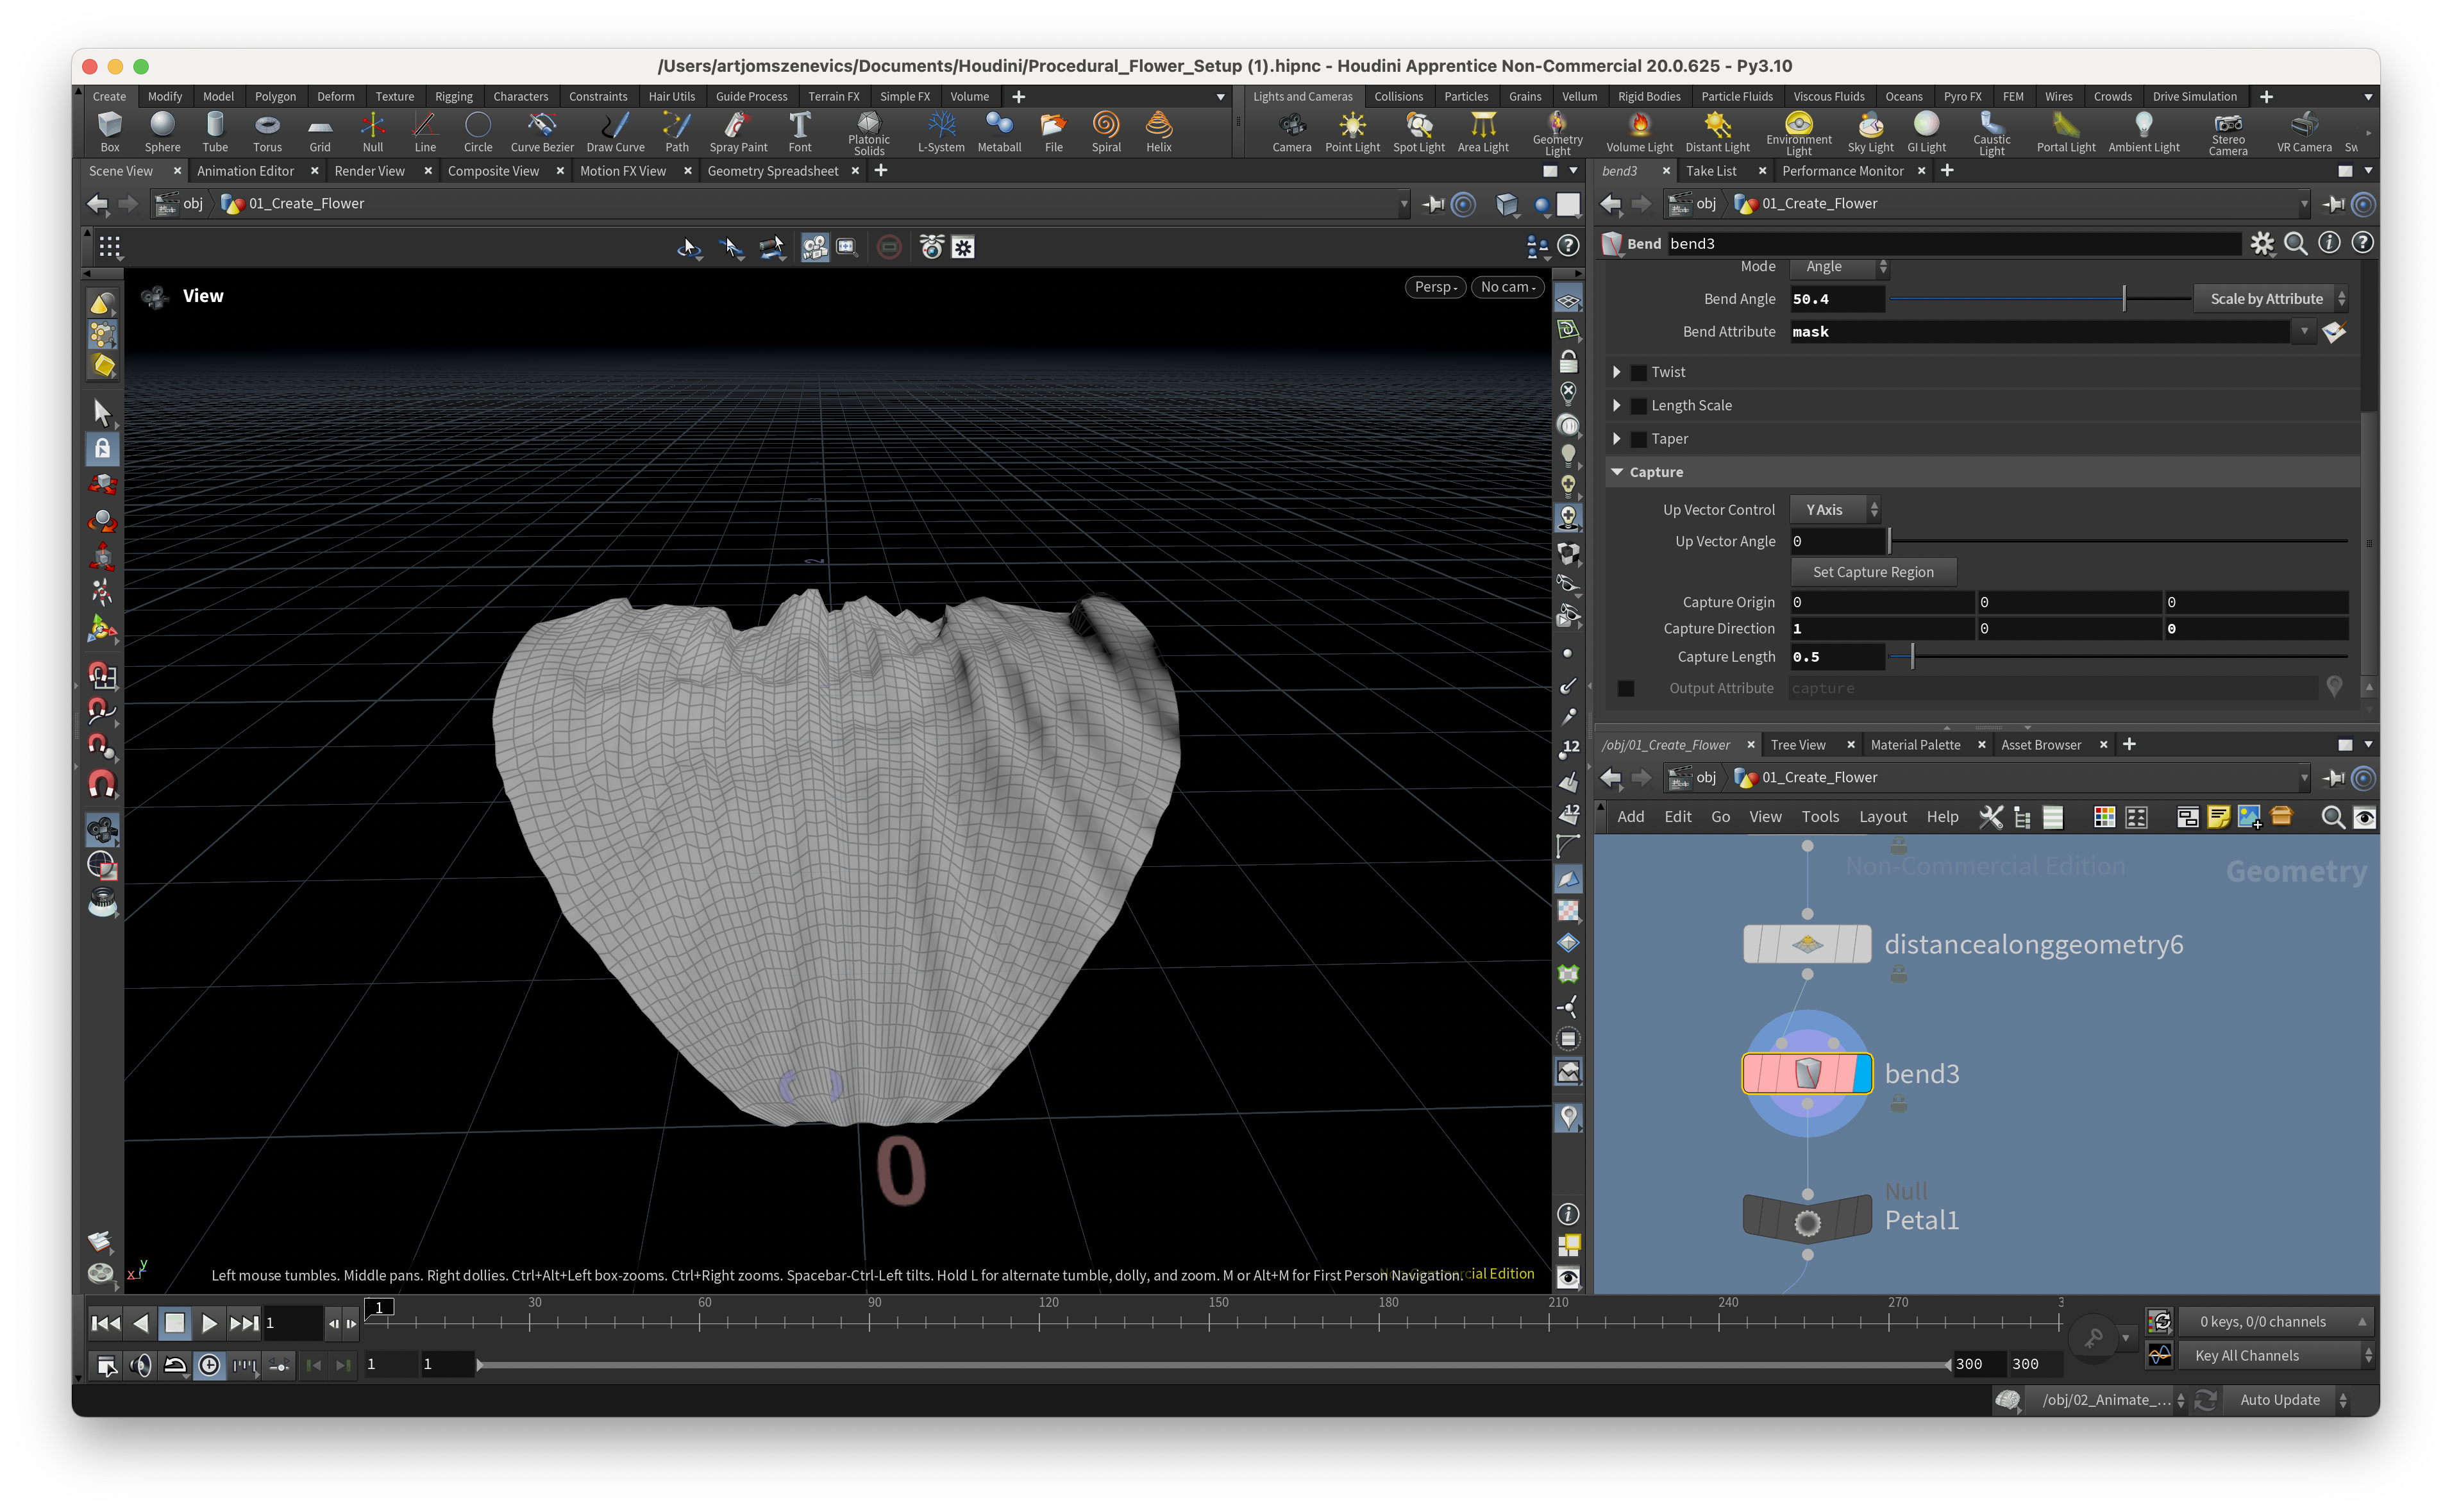
Step 13 - Previous step was done in order to have a more control over our bend deformer. As you can see we are inputting the mask in the "bend Attribute" this way the bend deformer only changes the falloff which we've made on the previous step.
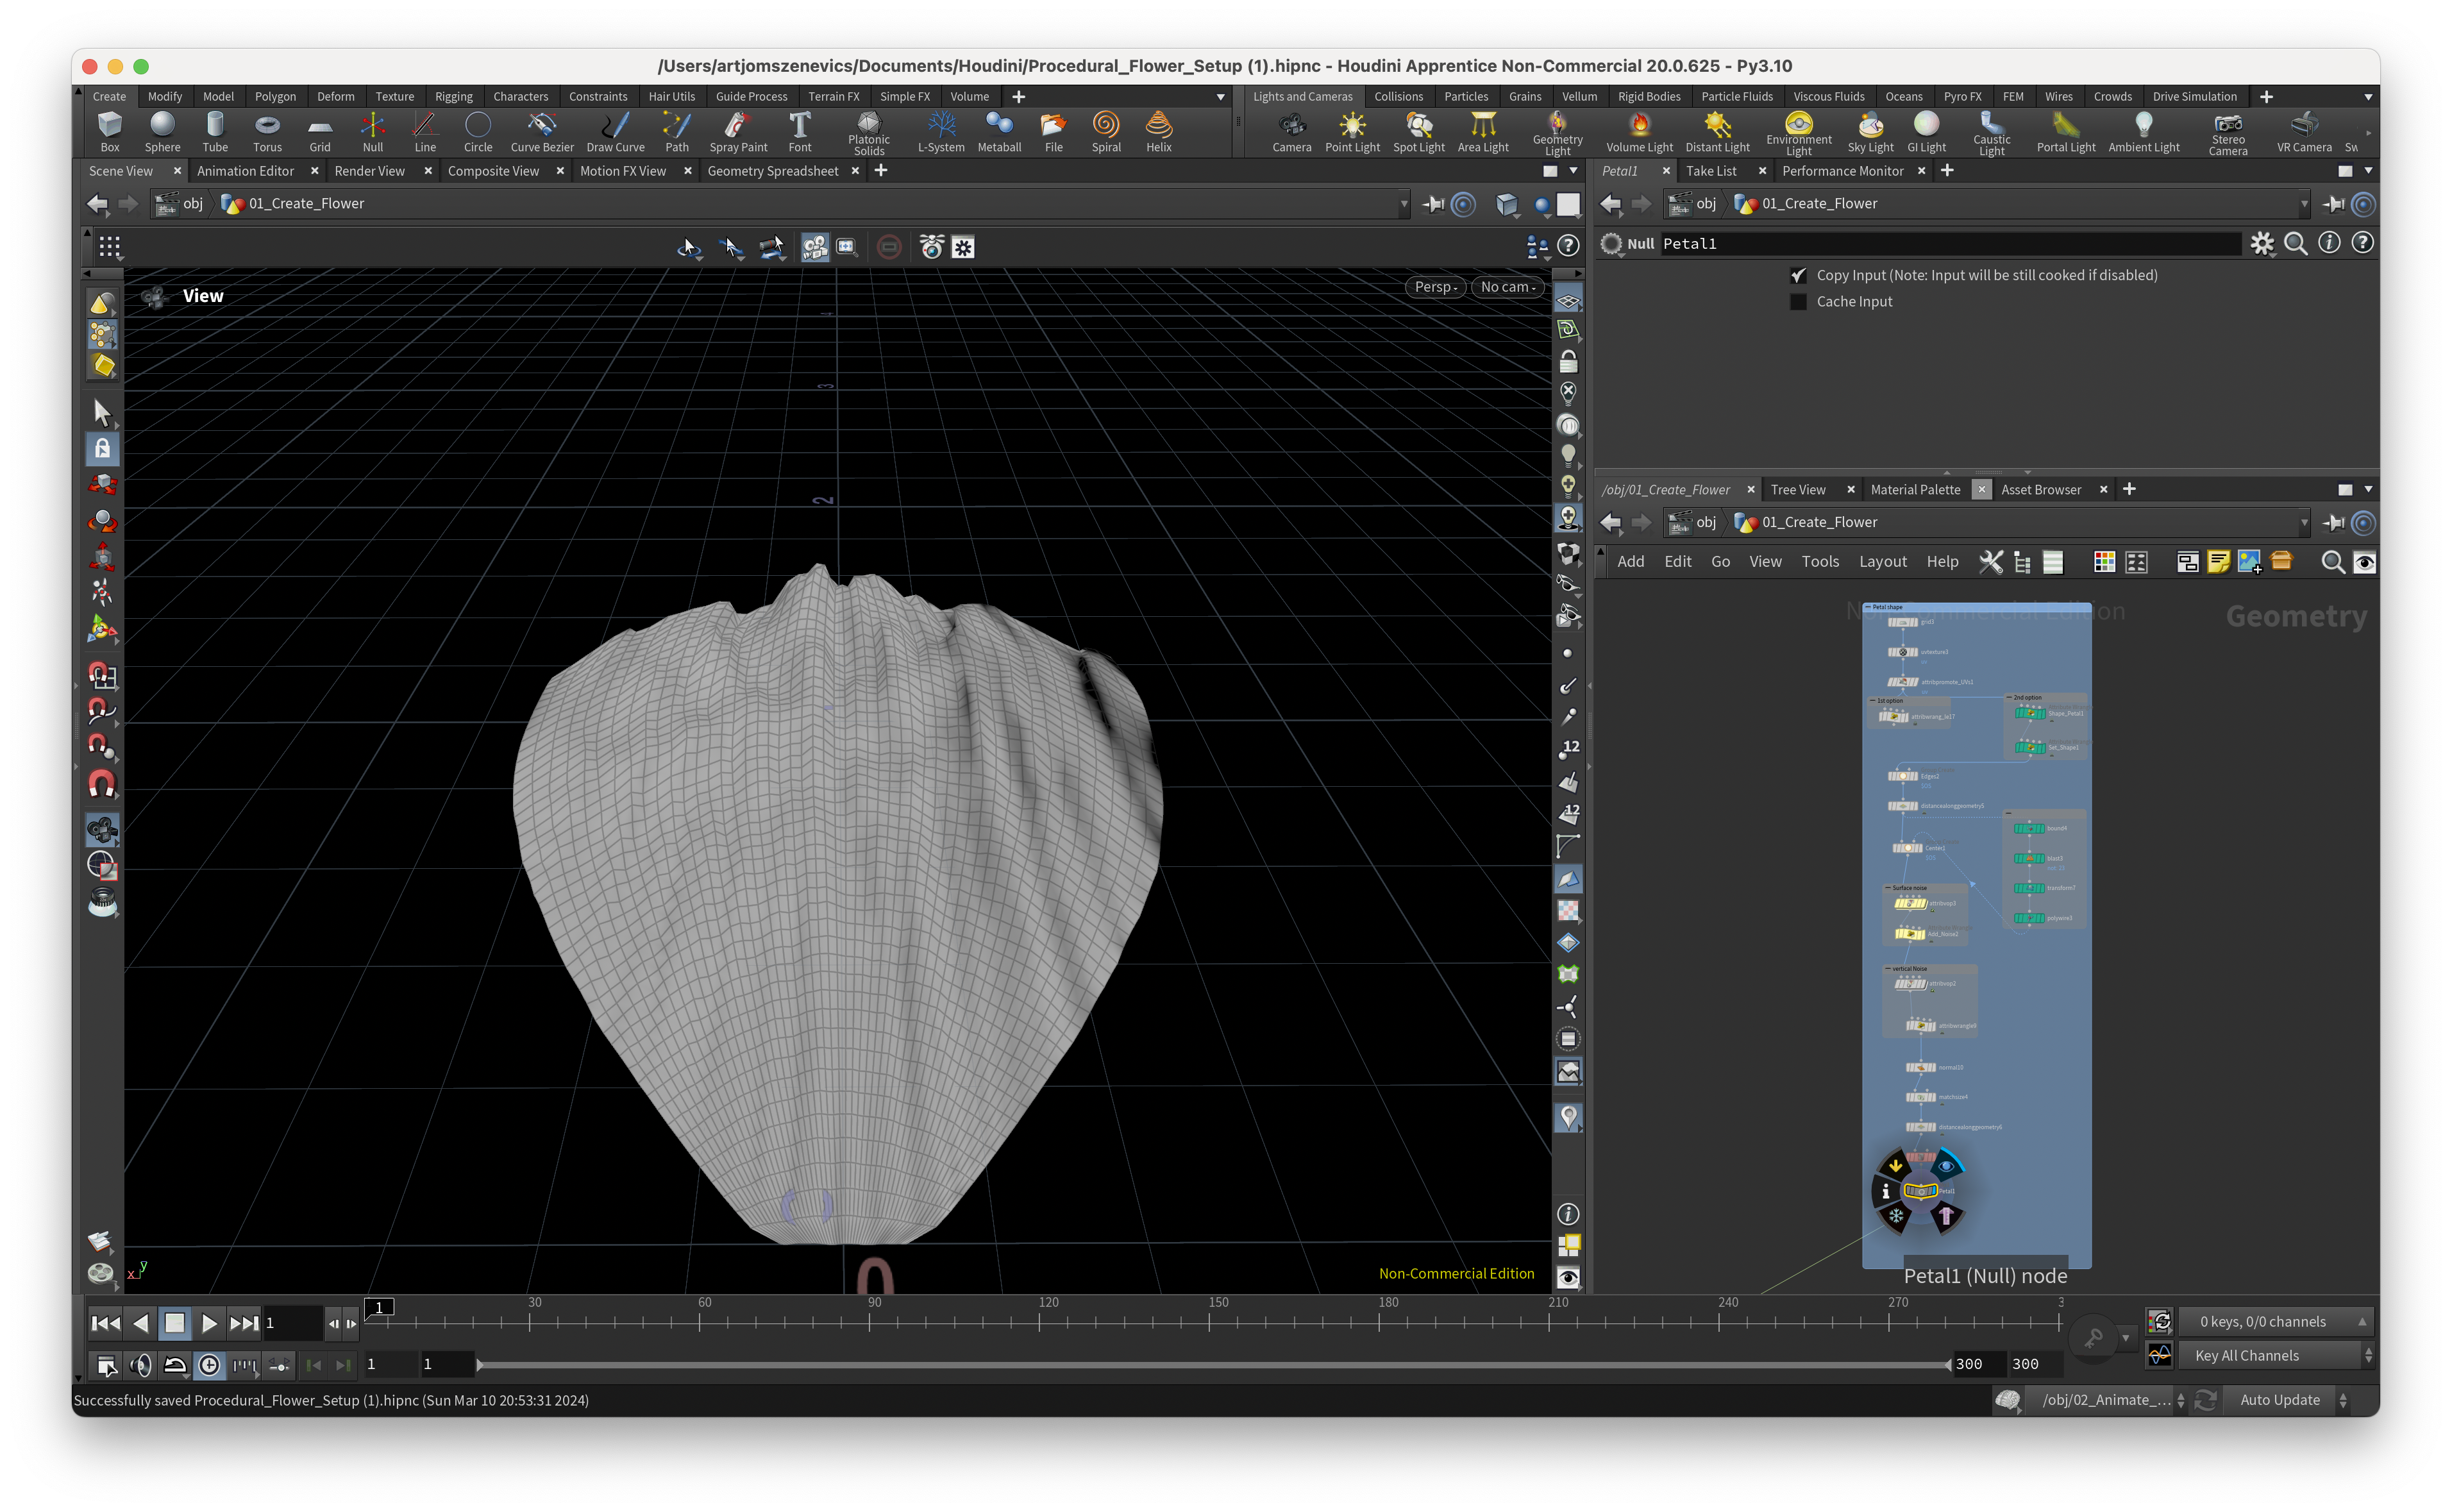
Step 14 - Here you can see the entire procedural setup for the Petal.
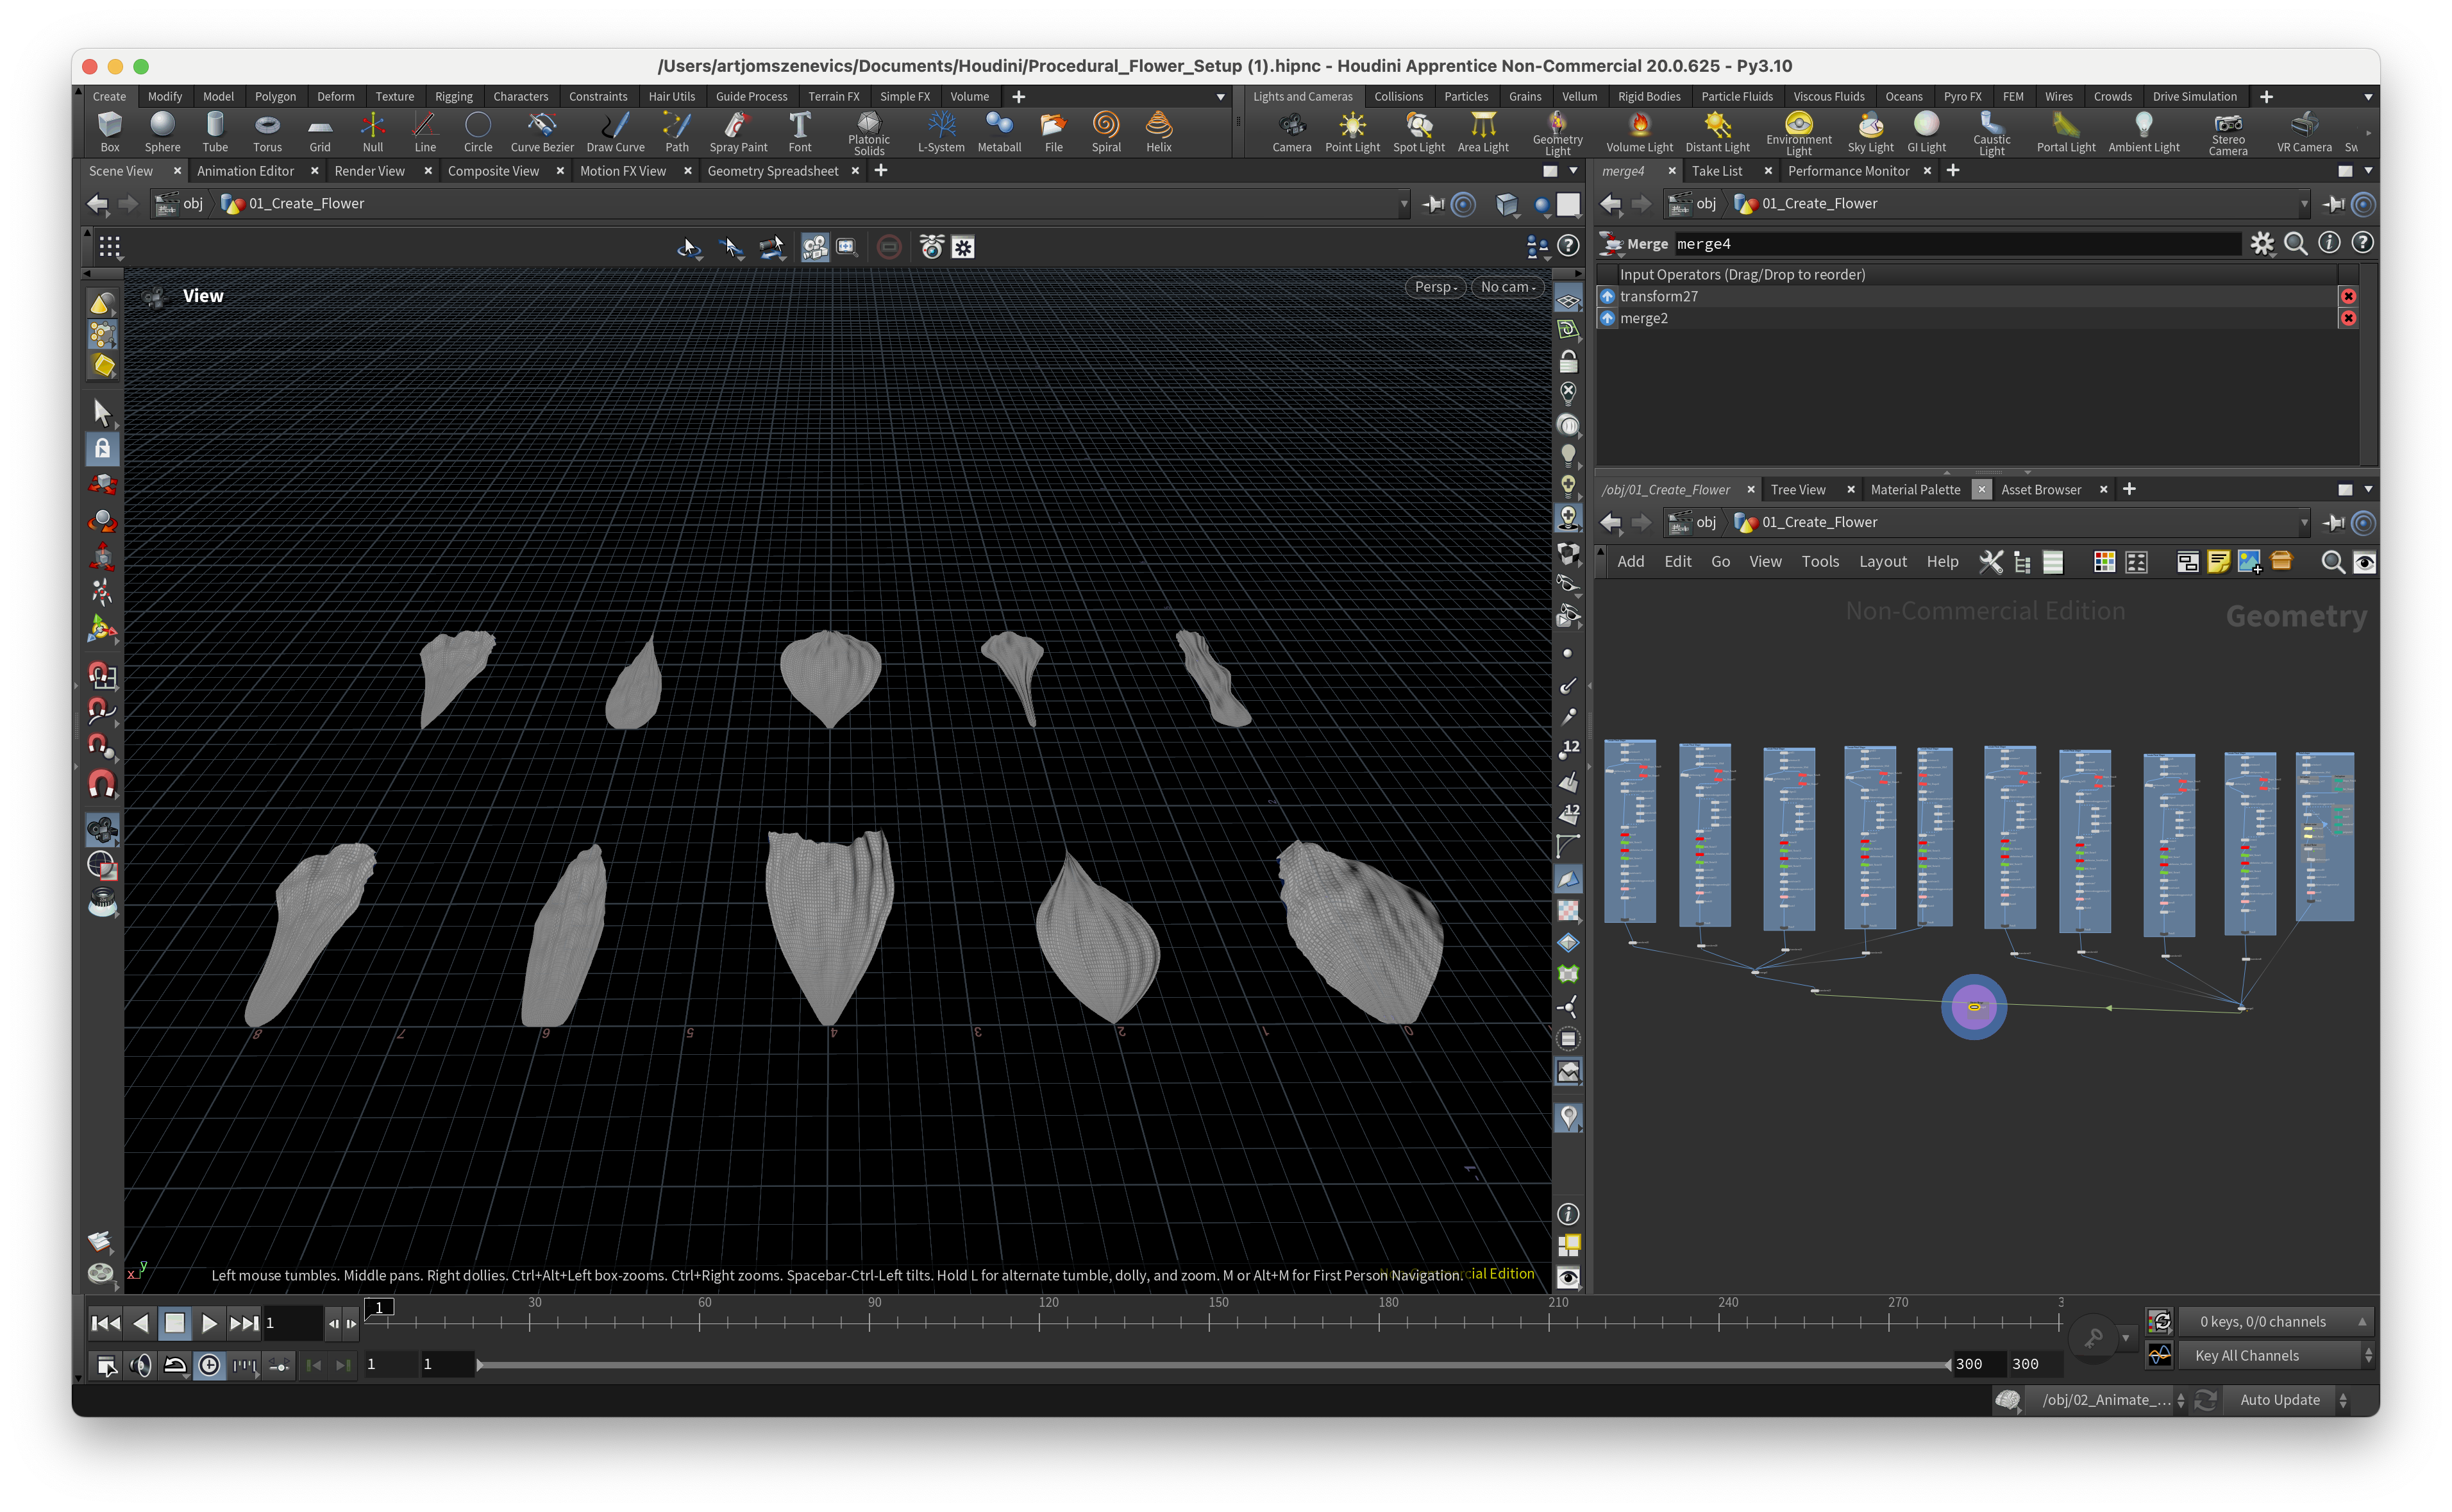
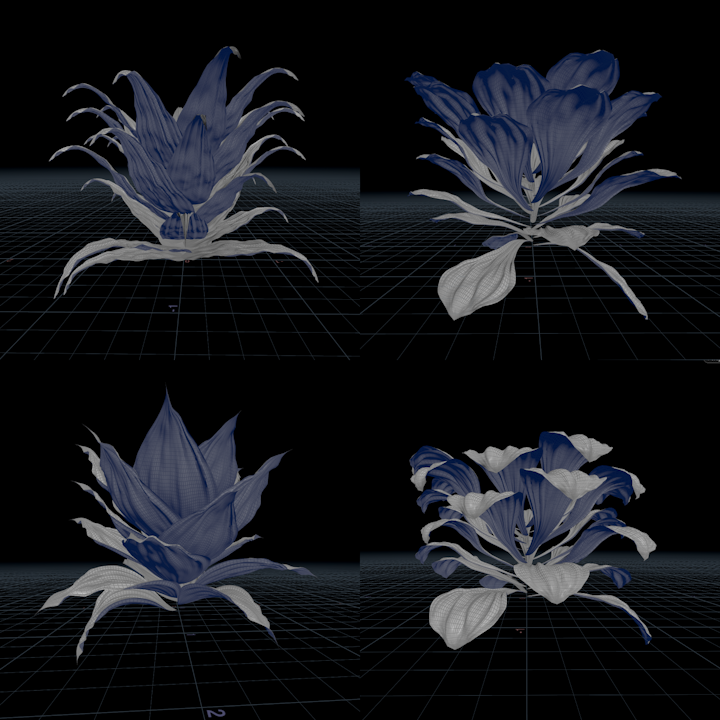
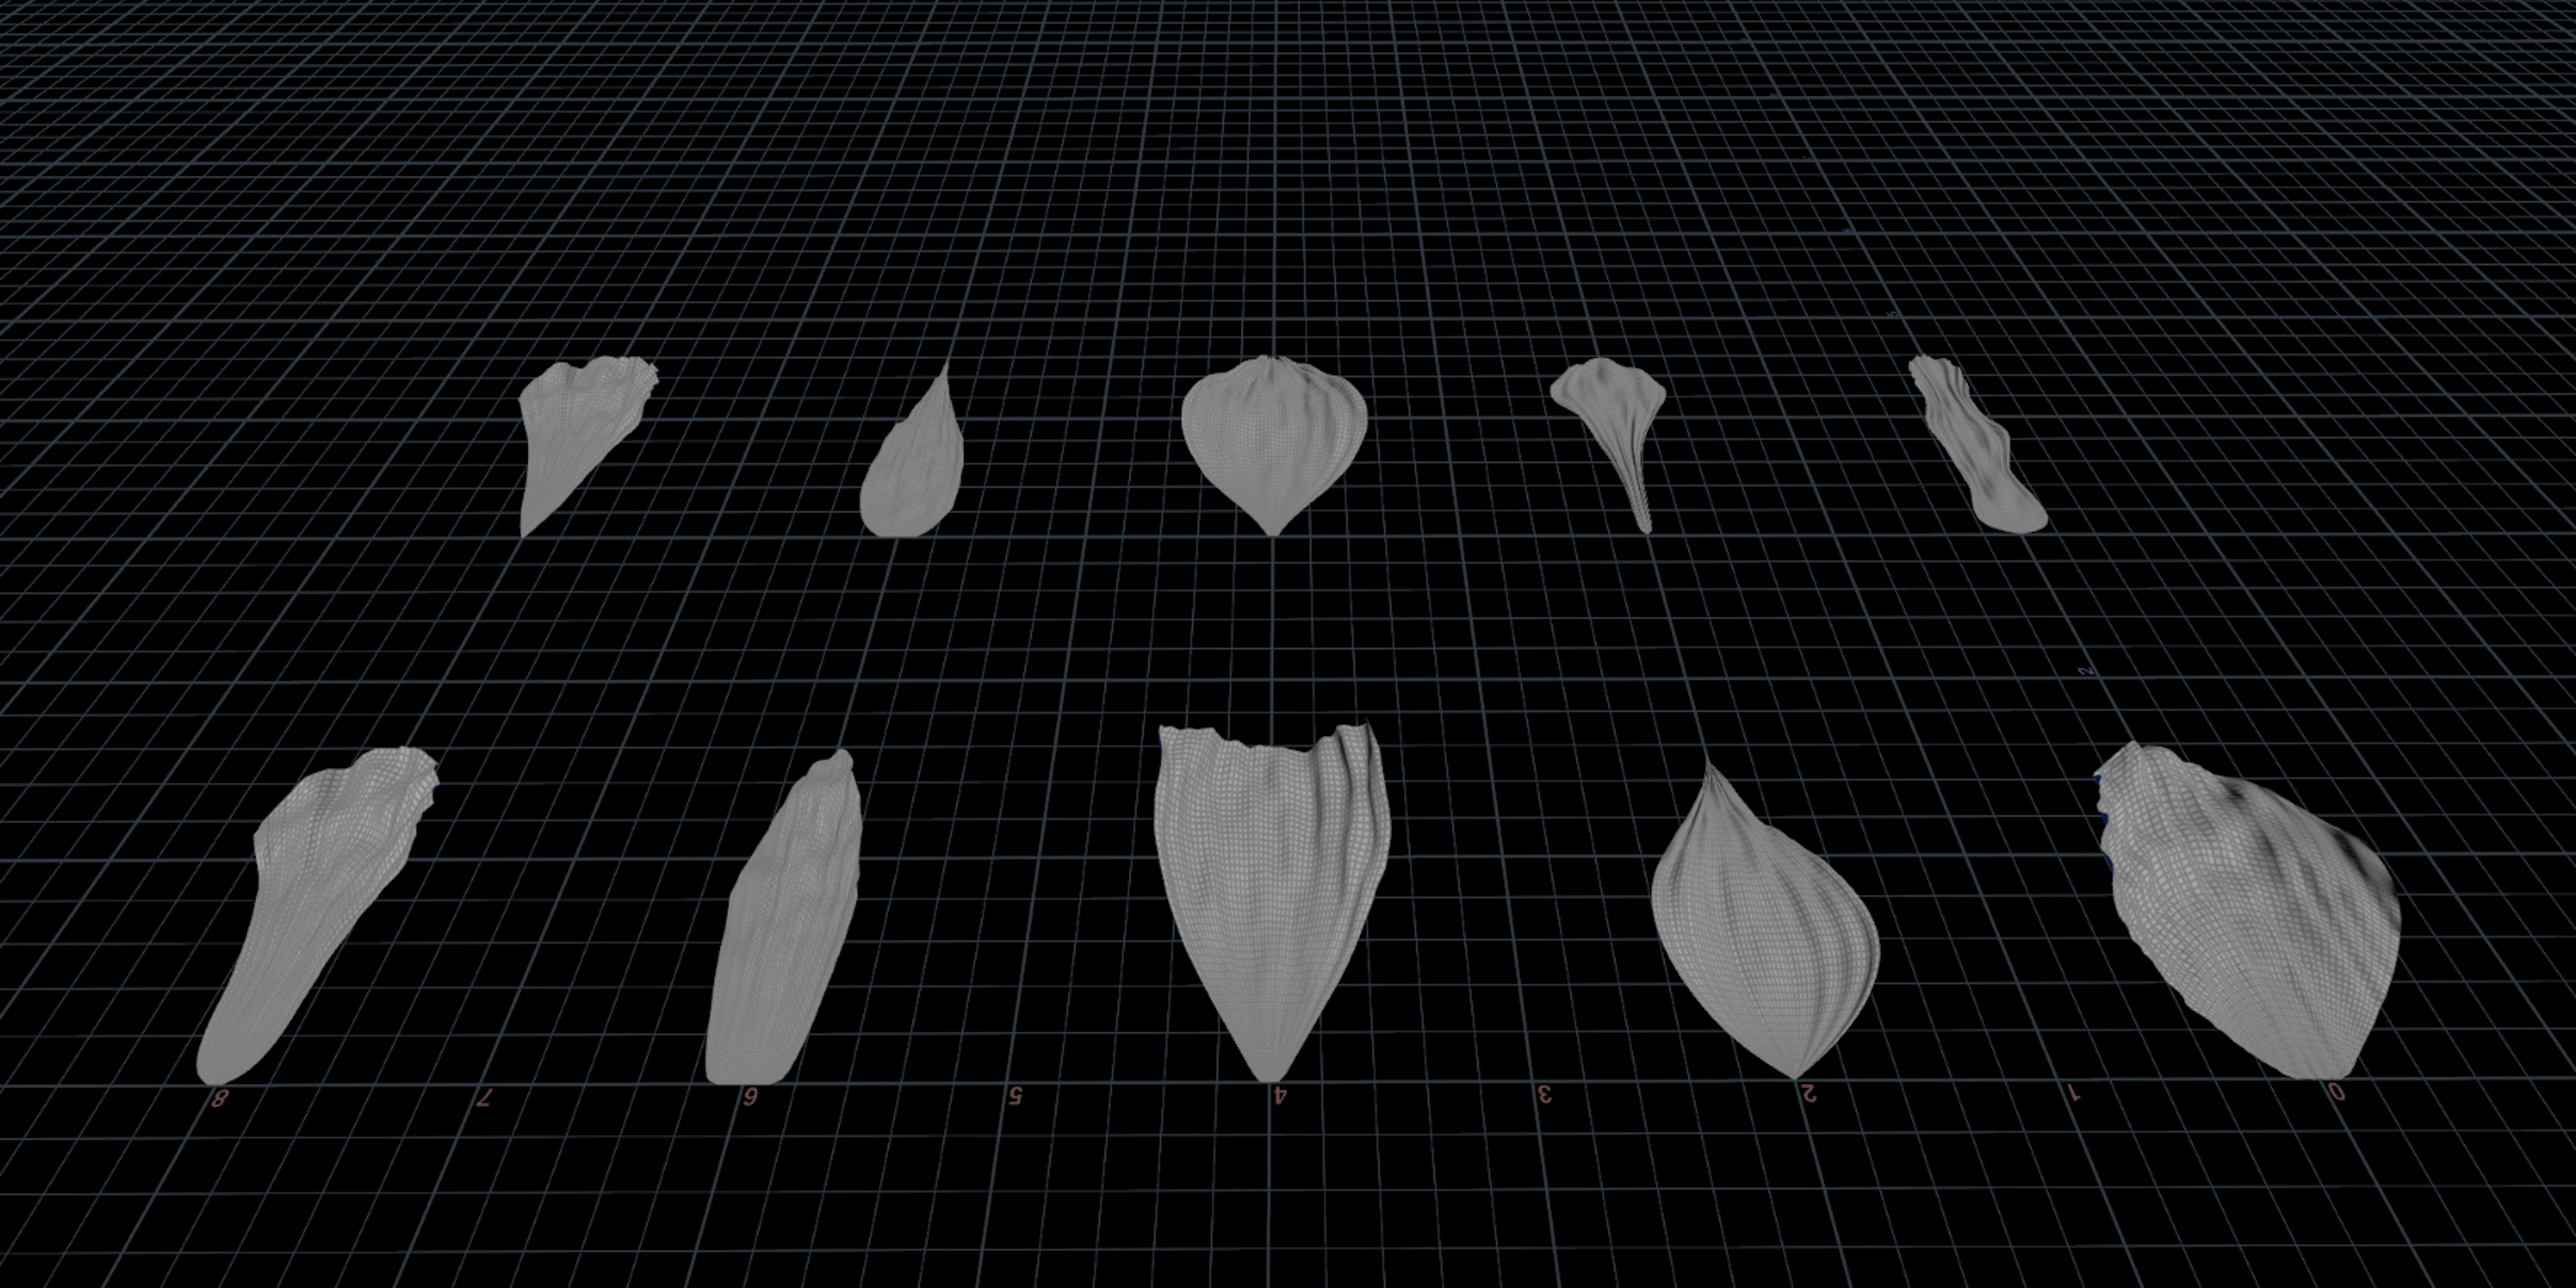
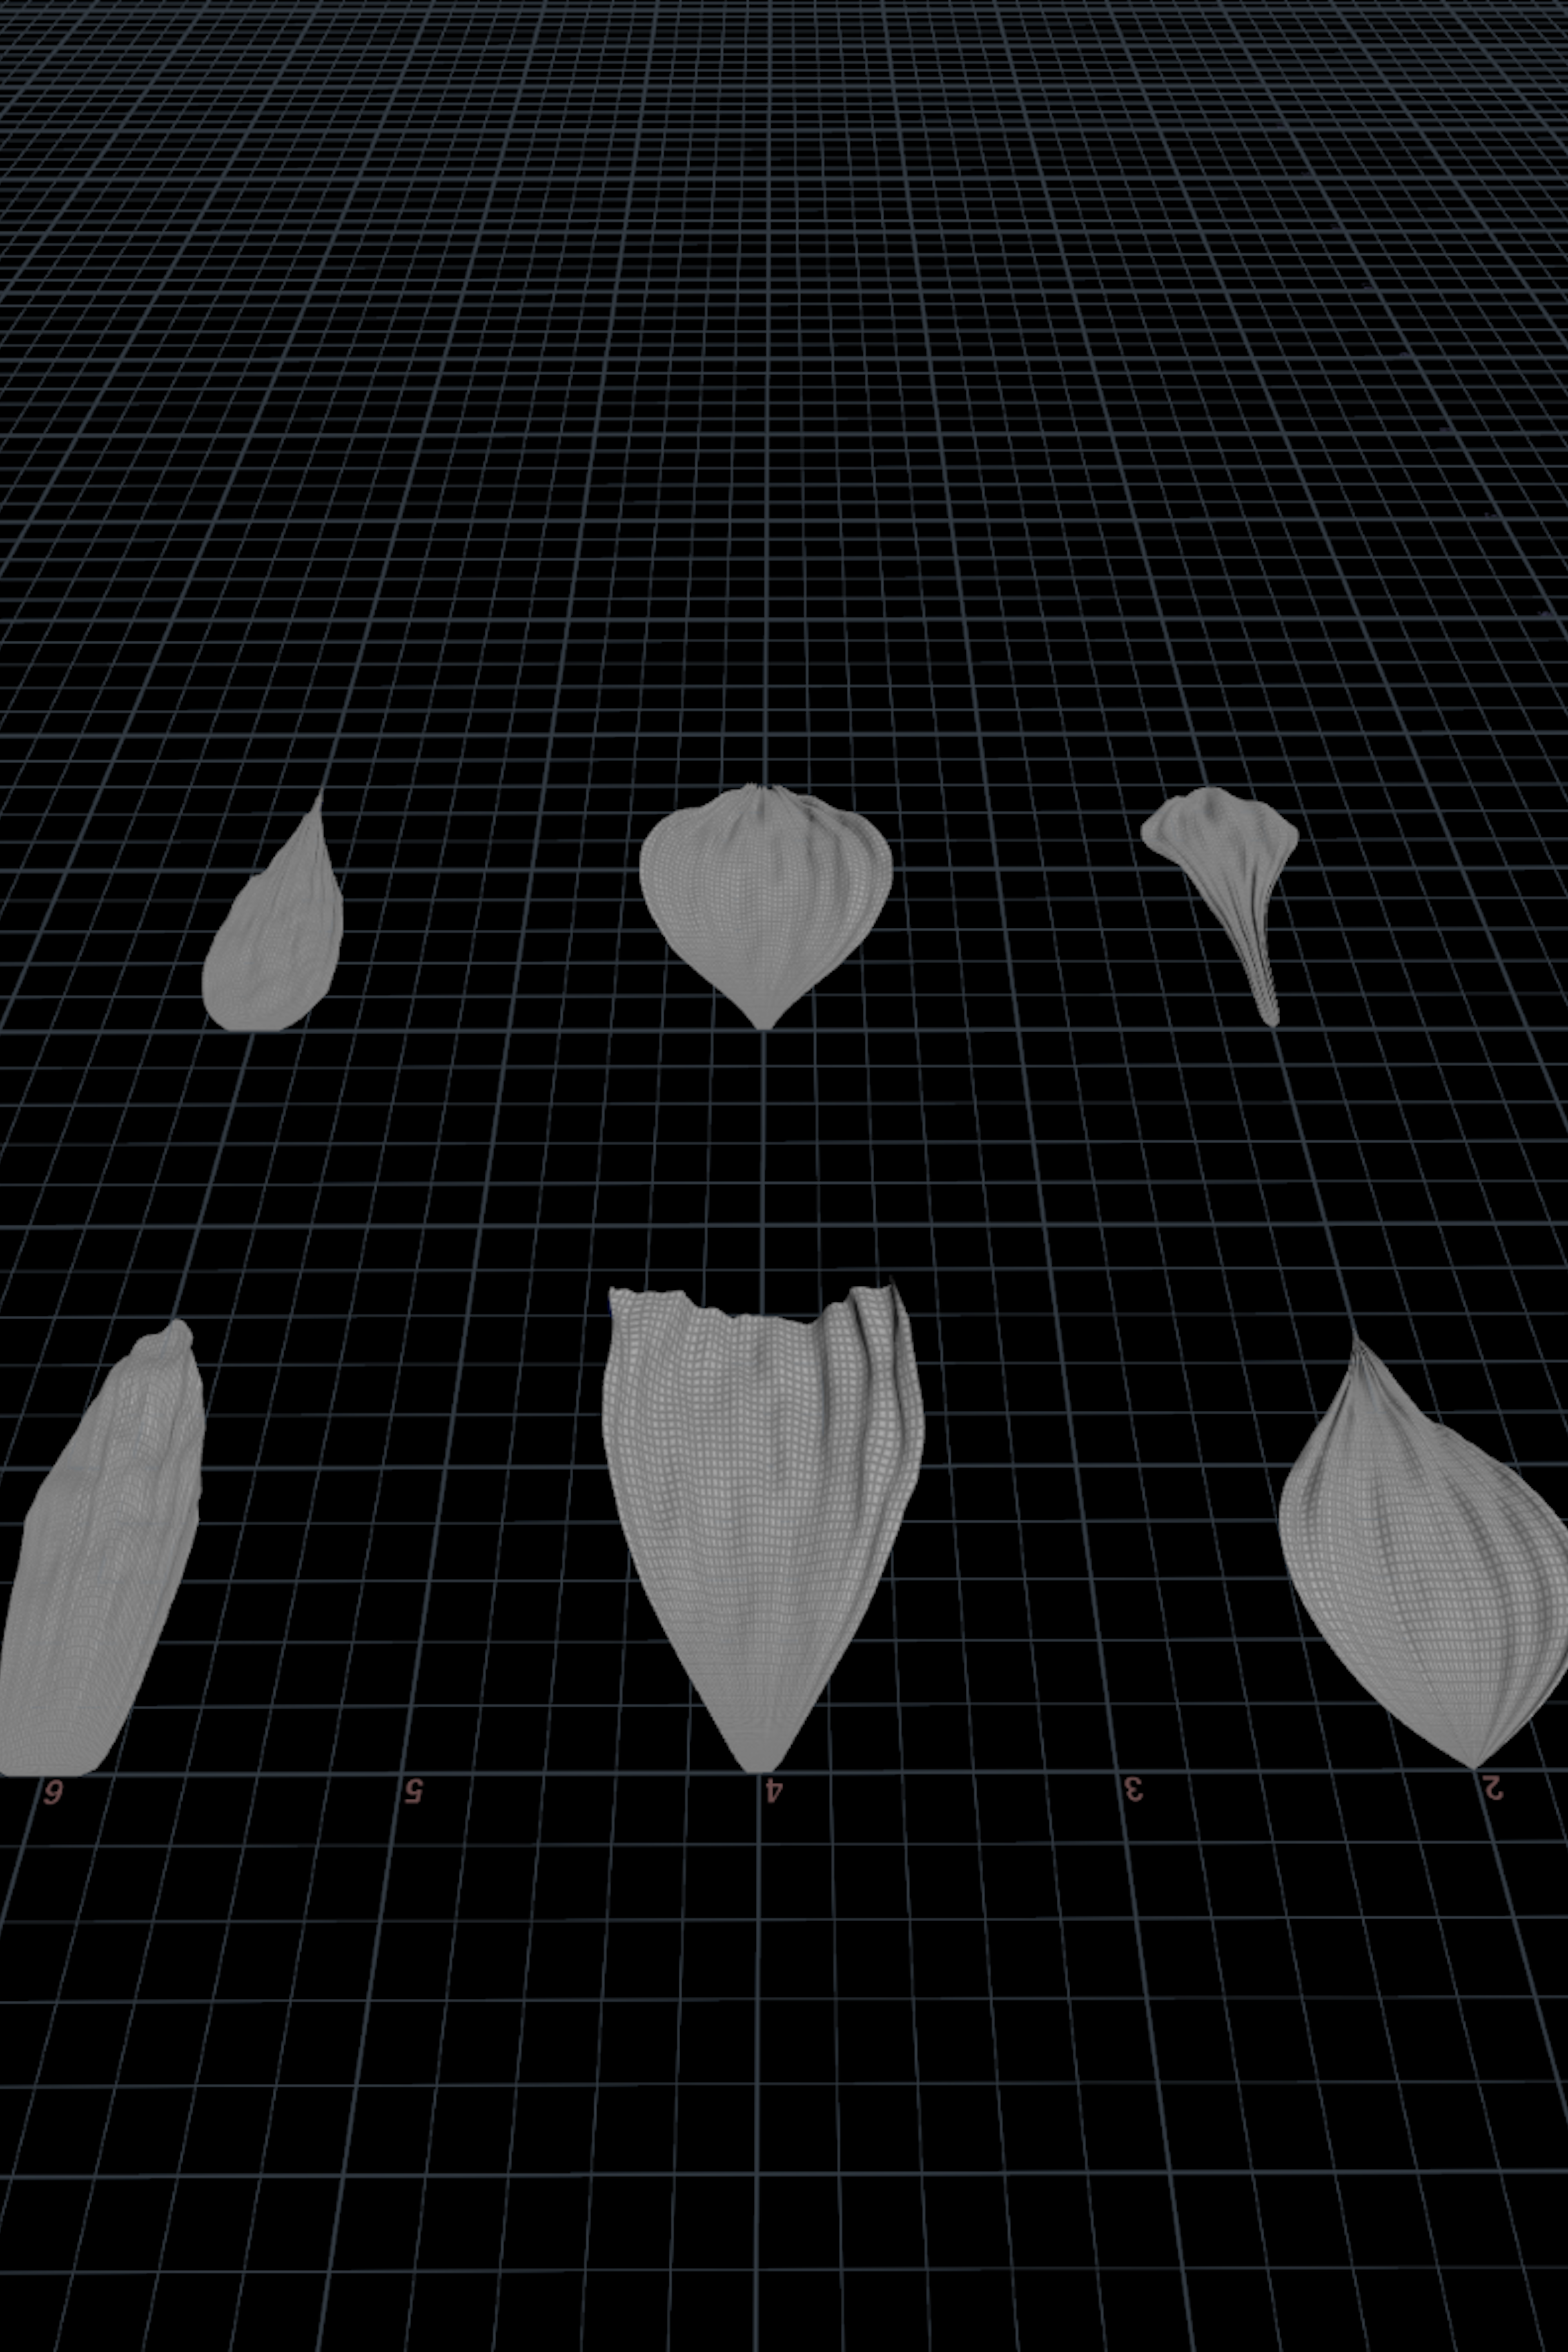
Step 15 - And last step was to model different variations of petals by using different parameters in the attributes which we've defined. As you can see with this kind of setup I was able to create different petals. Some are with a more sharp end but some are with more rounded.
Next article will be about following Paul Esteves next part of his lesson which is cloning the Petal to a flower like shape and running a Vellum solver simulation of flower opening.